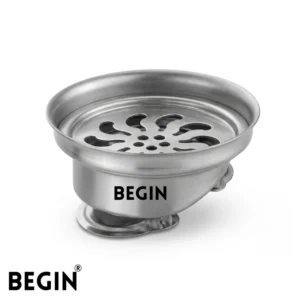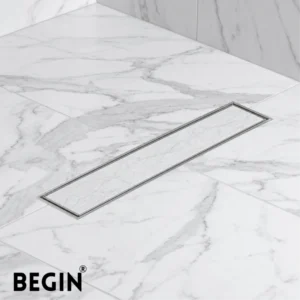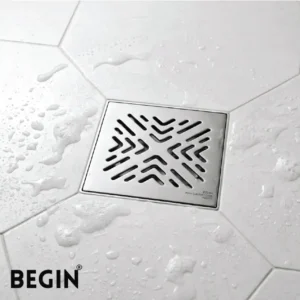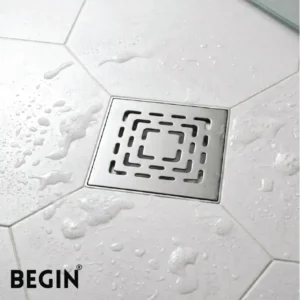
A channel drain cover, also called a linear drain cover or drain grate, is the removable top panel that sits over a long, narrow drainage channel in your bathroom or balcony floor.
Beneath it, you’ll often find a debris basket or hair trap that collects waste before it enters your pipes.
Homeowners remove the cover for three main reasons:
- Clearing hair buildup after it blocks water flow
- Breaking up stubborn blockages deep in the channel
- Doing routine maintenance
The removal method depends entirely on your drain design. Forcing the cover can crack tiles, scratch stainless steel finishes, or break locking mechanisms.
Identify Your Channel Drain Cover Type Before Removal
Using the wrong removal method causes real damage. It can scratch your stainless steel finish, crack floor tiles, or snap the locking mechanism clean off. So before you touch the cover, take sixty seconds to identify what type you have.
Here are the four main channel drain cover types found in Indian homes:
| Cover Type | Key Feature | How It’s Removed |
| Snap-In Cover | No visible screws | Hook or lifting slot |
| Screw-Fixed Cover | Screws on the top surface | Flathead or Phillips screwdriver |
| Tile Insert Drain | Blends with floor tiles | Drain lifting key |
| Heavy-Duty Outdoor Grate | Large, heavy frame | Two-handed lift |
Snap-in drain covers are the most budget-friendly option. Screw-fixed covers give you a secure fit. Tile insert drains look seamless and clean. Heavy-duty grates handle outdoor loads and water volume.
Note: In most Indian bathrooms, snap-in and screw-fixed channel drain grates dominate. This is because standard floor traps in Indian construction follow compact sizing, typically 110mm to 200mm wide, which suits lighter cover designs.
Once you know your drain type, you pick the right tool and avoid costly mistakes.
Tools You Will Require to Remove the Channel Drain Cover
Using the wrong tool on a drain cover leaves scratches, chips the finish, or cracks the surrounding tile. Keep these six tools handy before you start.
| Tool | Purpose |
| Drain lifting key | Hooks into tile insert drain covers for clean removal |
| Screwdriver (flathead or Phillips) | Turns out, screws on fixed-type covers |
| Needle-nose pliers | Gets a firm grip on tight or corroded edges |
| Plastic pry tool | Slides under the cover without marking the surface |
| Rubber gloves | Keeps your hands clean and stops the cover from slipping |
| Soft cloth | Lays under the stainless steel grate to prevent scratching |
Now let’s get into the actual removal steps.
How to Remove a Channel Drain Cover Step by Step
Follow these five steps carefully. Each one builds on the last, so don’t skip ahead.
Step 1: Dry the Area and Inspect the Cover
Wet floors hide the cover edges and cause slipping. Before you touch anything, take an old towel and wipe the area dry.
Once dry, look at the drain grate carefully. Check for screws, lifting slots, side clips, or small key holes. Run your finger along the edges, and you’ll often feel a gap that eyes miss.
If you spot a brand name like Jaquar or Hindware stamped on the grate, look up that model. Some brands use their own removal method.
Now you know exactly what you’re dealing with before you start.
Step 2: Remove Screws or Locking Clips
Screws corrode fast in Indian bathrooms because water sits on the floor daily. Match your screwdriver size to the screw head first. A loose-fitting screwdriver strips the head and turns a five-minute job into a repair job.
Turn slowly. If the screw resists, put a drop of WD-40 around the head, wait 5 to 10 minutes, then try again. Most Indian bathroom channel drain covers use Phillips head screws — a No.1 or 2 Phillips fits the majority.
Once out, drop the screws into a small bowl immediately. Losing one into an open channel means an unnecessary hardware run.
Screws removed, the cover now sits loose.
Step 3: Lift the Cover Using the Correct Technique
Tilting the cover sideways chips the tile edge. Always lift straight up.
| Cover Type | Removal Method |
| Snap-in | Hook into the slot and pull vertically |
| Screw-fixed | Remove screws first, then lift both ends evenly |
| Tile insert | Use the lifting key that came with the drain |
| Outdoor grate | Grip both ends and lift straight with both hands |
For covers longer than 600mm, use both hands and apply equal pressure. Thin stainless steel grates bend easily if you lift from one end only.
Set the cover on a soft cloth after removal to avoid scratching the finish.
Step 4: Take Out the Debris Basket or Hair Trap
The debris basket is located under the grate and catches hair and pieces of soap. Not all channel drains include one; it depends on your brand and model.
If yours has one, lift it out by the handle using rubber-gloved hands. No handle? Slide gloved fingers under the rim carefully.
Hair and soap residue are the most common finds in Indian bathroom drains. During monsoon season, fine sand and mud add to the build-up.
Don’t rinse the basket over the open drain — debris falls straight into the pipe. Take it to a dustbin first, tap out the waste, then rinse separately.
Step 5: Inspect the Channel for Blockages
Shine a phone torch down the channel and look for hair clumps, soap coating, white mineral crust, or sand. Hard water cities like Delhi and Jaipur see heavy mineral build-up.
Also, check for rust or cracks on the channel body. A cracked channel leaks water into the floor slab — expensive to fix later.
This inspection ensures no hidden blockage remains before the cover goes back on.
What to Do If the Channel Drain Cover is Stuck
A stuck cover usually means the drain hasn’t been cleaned in months. Before you apply any force, identify the cause. Forcing a stuck channel drain cover cracks tiles, damages the frame, and can snap locking clips permanently.
Here are the most common causes and how to fix each one:
| Cause | Solution |
| Mineral deposits or limescale | Pour warm water around the edges. Apply white vinegar and leave it for 10–15 minutes. |
| Soap scum build-up | Spray a mild bathroom cleaner around the rim. Work a plastic scraper gently along the edges. |
| Silicone or grout overflow | Score the sealed edges with a utility knife. Don’t press down on the cover while doing this. |
| Corroded or rusted screws | Dab WD-40 around each screw head. Give it 5–10 minutes before you try the screwdriver again. |
Note: Don’t slide a metal screwdriver under the tile edge. Don’t strike the cover with any tool. Don’t crank the cover sideways. Any of these can crack your floor tiles or snap the locking mechanism, and most drain warranties won’t cover that kind of damage.
Tip: In cities like Delhi, Jaipur, and Lucknow, hard water is the number one reason drain covers seize up. The calcium and magnesium content in the municipal water supply leaves a thick mineral crust around the drain edges within weeks. Homeowners in these cities should clean their channel drain covers at least once a month, not once a year.
Clean and Reinstall the Channel Drain Cover
Before anything goes back in, clean what came out.
Pull hair and solid debris out of the channel with hand gloves on. Rinse the debris basket under running water until it runs clear. Wipe the underside of the drain grate with a soft cloth. Then flush the open channel with hot water to shift any remaining soap residue or sediment sitting at the bottom.
One thing to avoid is strong chemical drain cleaners on stainless steel grates. They eat into the finish over time and leave the surface dull and pitted.
Bathrooms collect hair and hard water deposits faster than most. Clean your channel drain every one to three months to stay ahead of blockages.
Reinstalling the Cover
Check the cover orientation before lowering it. Most channel drain grates have a fixed direction — putting it in backwards means it won’t sit flush.
Lower it straight down. Never slide it in at an angle. For screw-fixed covers, tighten each screw evenly and stop before they’re fully tight — overtightening cracks the surrounding grout. For snap-in covers, press down on both ends until you feel or hear a firm click.
Run water through the drain and watch for any rocking or uneven sitting.
A properly reinstalled cover sits flat, drains freely, and needs no adjustment.
Common Mistakes to Avoid When Removing a Channel Drain Cover
- Forcing the cover upward: Bends the grate frame and chips the tile edge on either side.
- Dropping screws into the open channel: Retrieving them often needs a professional and costs more than the drain itself.
- Using metal tools on stainless steel or decorative finishes: It will leave permanent scratch marks that no polish can remove.
- Reinstalling the cover with debris still inside: It stops the flow of water immediately and ruins all of your cleaning.
- Overtightening screws on reinstall: Cracks the grout around the channel or strips the screw thread completely.
Final Thoughts
You now know how to remove a channel drain cover safely, without damaging your tiles or finish. The right technique takes 10 to 15 minutes and saves you an expensive repair bill.
Make it a habit to clean your drain every one to three months. That one step prevents most blockages before they start.
If your current drain cover is worn, rusted, or simply outdated, browse our range of channel drains and find a better fit for your home.
Frequently Asked Questions
How Often Should I Remove and Clean My Channel Drain Cover?
In Indian bathrooms, once a month works best. Hard water deposits, daily hair fall, and soap buildup clog channel drains faster here than in most other climates. If you notice water draining slowly, don’t wait; remove and clean the cover immediately.
Can I Replace Just the Channel Drain Cover Without Changing the Full Drain?
Yes, in most cases you can. However, the replacement cover must match your existing channel’s width and length exactly. Stick to the same brand where possible. Mixing brands often means the cover doesn’t sit flush or lock properly.
What is the Common Size of a Channel Drain Cover in Indian Bathrooms?
In India, channel drain covers are available in widths of 100mm, 150mm or 200mm. The length is usually between 300mm to 1000mm, depending upon the bathroom layout.
Is It Safe to Use Chemical Drain Cleaners Inside the Channel After Removing the Cover?
Avoid strong chemical cleaners inside the channel if your drain body or grate is stainless steel. Harsh chemicals corrode the metal surface and weaken grout joints around the channel over time. Instead, go for rinses of hot water or a mild, pH-neutral bathroom cleaner.
Related Products
Explore products related to this article
-
 27%
27%SS Flip Bowl for Drain 5×5 AD0495 | Stainless Steel Drain Part
Original price was: ₹375.00.₹275.00Current price is: ₹275.00. Add to cart -
23%
Tile Insert Drain 100×600 mm SS304 with Flip Bowl
Original price was: ₹3,200.00.₹2,450.00Current price is: ₹2,450.00. Add to cart -
25%
Bathroom Drain Cover 5×5 | Stainless Steel 304
Original price was: ₹417.00.₹313.00Current price is: ₹313.00. Add to cart -
25%
Bathroom Floor Drain Cover 5×5 | Stainless Steel Wonder
Original price was: ₹417.00.₹313.00Current price is: ₹313.00. Add to cart