Water pooling at your feet. A smell you can’t ignore. Hair and soap scum are turning your drain into a slow-moving mess. These are signs your shower drain cover needs to come off and soon.
The good news is you can handle this yourself in under 15 minutes.
To remove a shower drain cover, first identify if it is a screw-in, snap-in, or pop-up style. Screw-in covers need a screwdriver to loosen the center screw. Snap-in covers lift straight out with a flathead screwdriver or your fingers. Pop-up drains twist counterclockwise to release.
The removal steps depend entirely on which type of drain cover you have. Using the wrong approach can scratch your drain grate or crack the finish around it.
Types of Shower Drain Covers
Before you grab a screwdriver, you need to know what kind of drain cover you have, because the removal method is completely different for each type.
1. Screw-In Drain Covers: These are the most common type. You’ll spot one or two visible screws sitting on top of the drain grate or along its edge. A standard flat-head or Phillips screwdriver is all you need to get this type off.
2. Snap-In Drain Covers: Snap-in covers have no screws at all. They press into the drain opening and hold themselves in place with small plastic or metal tabs. A flat-head screwdriver slipped under the edge will pop them right out.
3. Pop-Up Drain Covers: Pop-up style stoppers come in three common subtypes, each of which is removed differently.
- Lift-and-turn: To remove, lift the cap and turn it counterclockwise until it unscrews freely.
- Toe-touch: Press down to pop open, then turn the cap counter-clockwise to unscrew from the base.
- Push-pull: Pull the stopper out. Hold the base and, with a cloth around the top knob, twist it counterclockwise with pliers and remove.
If you don’t know what subtype you have, try twisting counterclockwise first; most variants do share that direction.
4. Linear Shower Drains: These are rectangular drains that run parallel to one edge of the shower floor. They’re often found in walk-in and modern tile showers. The grate usually lifts straight up or has small screws on either end.
5. Tile Insert Drains: These drains sit completely flush with your tile floor, so they can be tricky to notice. The cover holds a piece of tile on top to blend in. You’ll need a flathead screwdriver to find the seam and carefully pry it up.
Tools You’ll Need to Remove a Shower Drain Cover
- Flat-head screwdriver
- Phillips-head screwdriver
- Needle-nose pliers (wrapped in cloth)
- Rubber gloves
- Flashlight
- Penetrating lubricant
- Old toothbrush or stiff cleaning brush
- Utility knife or plastic putty knife
- Small towel or rag
How to Remove Each Type of Shower Drain Cover
Now that you know your drain type, here’s exactly how to remove it, without damaging it.
Screw-In Drain Covers
- Look at the drain grate and locate the screws. Most covers have one in the center or two on opposite sides.
- Choose the correct screwdriver. Use a flat-head for single-slot screws and a Phillips-head for cross-head screws.
- Turn each screw counterclockwise until it comes fully out.
- Lift the cover straight up and set it aside.
Tip: Place a small towel around the drain opening before you start. It stops screws from slipping into the drain.
Snap-In Drain Covers
- Look for a small gap between the cover edge and the shower floor.
- Slide a flat-head screwdriver into that gap at any point along the edge.
- Gently pry upward with light, steady pressure. Do not force it.
- Once one side lifts, work your fingers under the cover and pull it straight out.
Tip: Try two or three different spots around the edge if the cover does not pop up right away. Snap-in covers sometimes grip more tightly on one side.
Pop-Up Drain Covers
- Check the center of the cover for a knob, cap, or small post.
- Try twisting the entire cover counterclockwise first. Many pop-up styles unscrew this way.
- If it does not twist, pull it straight up with firm pressure.
- Some pop-up covers have a center screw underneath the cap. Remove the cap, unscrew it, then lift the cover free.
Tip: If the cover feels stuck, grip the edges with needle-nose pliers and twist gently. Avoid yanking it hard.
Linear Drain Covers
- Look at both short ends of the rectangular grate for screws or retention clips.
- Unscrew any fasteners using the correct screwdriver. If you see no screws, look for a small metal lifting hook — many linear drains ship with one clipped to the side of the channel. Insert it into a grate slot and pull straight up.
- Some modern linear grates slide a short distance before lifting horizontally, so if straight-up doesn’t work, try nudging it sideways first.
- Set the grate on a dry towel to avoid scratching it.
Tip: Linear grates can be long and awkward to handle. Ask someone to help you hold one end while you lift the other.
Tile Insert Drain Covers
- Look closely along the edge of the cover where it meets the tile. You will see a very thin seam.
- Press a flat-head screwdriver gently into that seam.
- Apply slow, even upward pressure. Work around the full edge before forcing any single spot.
- Once the cover loosens, lift it straight up and handle it carefully to protect the tile insert on top.
Tip: Wrap the tip of your screwdriver with a small piece of tape. It prevents scratches on the tile surface around the drain.
If your cover still will not budge after following these steps, the next section will help you deal with a shower drain cover stuck from buildup or corrosion.
What to Do When the Shower Drain Cover is Stuck
If the cover will not budge, forcing it is the worst thing you can do. You risk cracking the tile, bending the grate, or snapping a corroded screw right off. Most stuck covers have a simple cause, and once you identify it, the fix is straightforward.
| Cause | Solution |
| Mineral deposits / hard water buildup | Soak with white vinegar for 15 to 20 minutes |
| Rusted screws | Apply penetrating lubricant, wait 10 minutes |
| Soap scum is sealing the edge | Pour warm water around the edge, then pry gently |
| Silicone residue | Score the seam carefully with a plastic tool |
| Corrosion | Grip with needle-nose pliers wrapped in a cloth |
One important caution before you apply force: When using pliers or a screwdriver to grip the cover, make sure only the cover is rotating, not the drain body below it. If you feel the entire drain assembly turning, stop immediately.
That means the drain body’s seal to the shower pan has loosened, and continuing to use it can cause water to leak into the subfloor, a repair that costs far more than a plumber visit. If this happens, call a plumber before using the shower again.
If corrosion is severe and nothing works, contact a plumber before the situation gets worse. But in most cases, a little patience and the right product will get that cover off cleanly.
How to Clean a Shower Drain After Removing the Cover
With the cover off, do not put it back just yet. A few minutes of cleaning now can fix a slow-draining shower and stop bad smells from coming back.
- Pull out any hair and debris by hand. Rubber gloves make this much easier and less unpleasant.
- Pour warm water into the drain opening to flush out loose gunk sitting near the top.
- Scrub the drain cover with dish soap and a stiff brush. Work the bristles into the grate slots where soap scum tends to hide.
- Grab a flashlight and look down the pipe. A blockage sitting deeper in the drain will need a drain snake to clear it out.
- Rinse the cover well under running water, dry it off, and set it aside until you are ready to reinstall.
Common Mistakes to Avoid
Some small mistakes can make an easy job into an expensive repair. Watch out for these:
- Using a knife or sharp metal tool to pry: Scratches the tile and gouges the drain finish permanently.
- Prying against the tile instead of the drain edge: Pressure on the tile causes chips and cracks.
- Using the wrong screwdriver size: A poor fit strips the screw head and makes removal much harder next time.
Take your time with each step. Rushing is usually what causes damage.
When to Call a Plumber
Most homeowners can remove a shower drain cover without any professional help. However, some situations do need an expert.
Call a plumber if a screw has snapped off inside the drain body and cannot be extracted, if you notice visible cracks in the drain body itself, or if water continues to back up after you have cleaned the drain thoroughly.
You should also get a professional opinion if you suspect the waterproofing membrane beneath your shower floor may have been disturbed. These are not DIY fixes, and catching them early saves money in the long run.
Summing It Up
Removing a shower drain cover is a straightforward job when you follow the right order. Identify your drain type, pick the correct tools, work gently, clean what you find, and reinstall the cover securely.
To keep things flowing smoothly, pull the cover off every four to six weeks and clear out any hair or soap scum before it builds up into a bigger problem.
If you find your cover is cracked, corroded beyond cleaning, or simply due for an upgrade, the Begin Faucets drain cover collection is worth a look.
Frequently Asked Questions
When Should I Replace My Shower Drain Cover?
Press down on the cover and see if it shakes or is not level on the floor. Cracks, snapped grate slots, and metal that crumbles when you scrub it are signs that you need a new cover soon.
Can I Reuse an Old Corroded Drain Cover?
A little surface rust after cleaning is nothing to worry about. But if the metal has started flaking off or the cover has bent out of shape, put in a new one. Broken pieces can clog the pipe further down.
Are Chemical Drain Cleaners Safe to Pour in After Removing the Cover?
They work fast but can slowly eat away at older pipes with repeated use. Hot water and a hand-operated drain snake will clear most blockages without that risk.
What Size Drain Cover Fits Most showers?
Shower drain covers most commonly come in 2-inch, 3-inch, and 4-inch sizes. The 4-inch round cover is the most common in newer homes, but older bathrooms often use 2-inch or 3-inch openings. Always measure your drain opening — length and width before ordering a replacement.
Can Hot Water Help Free a Cover That Will Not Lift?
Yes, and it is worth trying before reaching for any tools. Hot water softens the soap scum and grime that often seals the cover to the floor. Give it two to three minutes to work, then try again.
Related Products
Explore products related to this article
-
 27%
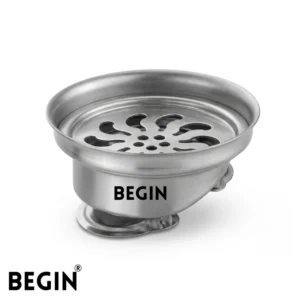
27%SS Flip Bowl for Drain 5×5 AD0495 | Stainless Steel Drain Part
Original price was: ₹375.00.₹275.00Current price is: ₹275.00. Add to cart -
23%
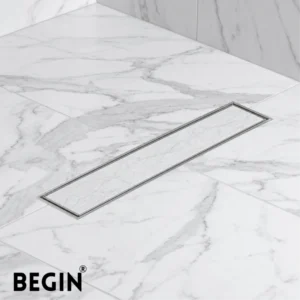
Tile Insert Drain 100×600 mm SS304 with Flip Bowl
Original price was: ₹3,200.00.₹2,450.00Current price is: ₹2,450.00. Add to cart -
25%
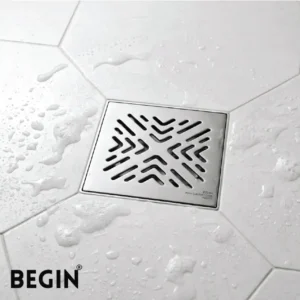
Bathroom Drain Cover 5×5 | Stainless Steel 304
Original price was: ₹417.00.₹313.00Current price is: ₹313.00. Add to cart -
25%
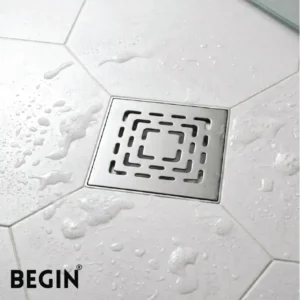
Bathroom Floor Drain Cover 5×5 | Stainless Steel Wonder
Original price was: ₹417.00.₹313.00Current price is: ₹313.00. Add to cart