

Cleaning a rainfall shower head takes less than an hour and requires no special tools. White vinegar and a toothbrush handle most jobs.
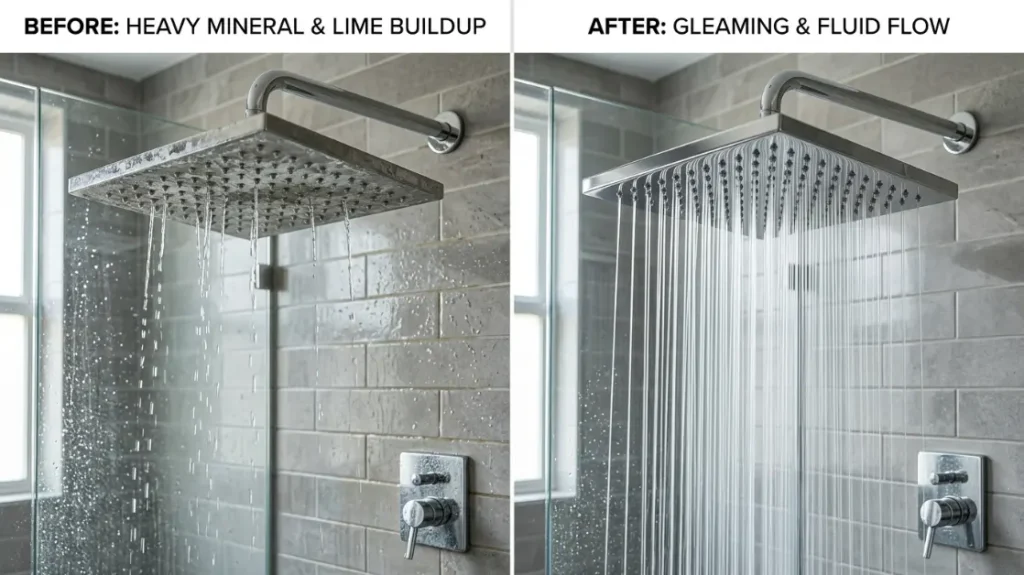
Over time, mineral buildup clogs the nozzles, blocks water flow, and drops your water pressure to a trickle. Hard water speeds this process up fast.
The good news is that you do not need to call a plumber or buy expensive products to fix it.
This guide walks you through two proven cleaning methods, shows you how to protect different finishes, and helps you keep your shower head working like new.
How to Clean a Rainfall Shower Head Without Removing It
No tools required for this one. If your shower is losing pressure or spraying unevenly, this is the first method to try. It tackles mineral buildup without any dismantling.
What You Will Need
- White distilled vinegar (500ml for light buildup, up to 1 litre for heavy deposits)
- One large zip-lock bag (gallon size works best)
- A rubber band or a zip tie
- Old toothbrush
- Clean microfiber cloth
Step-by-Step Cleaning Process
1. Pour 500ml to 1 litre of white distilled vinegar straight into the zip-lock bag.
2. Lift the bag around the shower head so the entire face sits submerged in the vinegar.
3. Loop a thick rubber band around the neck at least twice or a zip tie to stop the bag from drooping under the weight of the vinegar.
4. When done soaking, remove the bag and scrub each of the nozzle holes with your toothbrush in tight circular motions.
5. Then switch the shower on and run hot water for two to three minutes to push any loosened deposits out.
How Long Should You Soak It?
Thirty minutes is plenty for a rainfall shower head with a light scale. Heavier deposits need longer — anywhere from one to two hours does the job.
Just do not push past two hours on nickel or brass finishes. Vinegar is acidic, and extended contact can wear the surface down over time.
For stubborn limescale that will not budge, check out our guide on how to clean limescale from a shower head.
How to Clean a Removable Rainfall Shower Head
This method works best for heavy clogs or when the bag soak did not fully restore water pressure. Taking the head off gives you direct access to every nozzle.
Remove the Shower Head Safely
Wrap a cloth around the connector nut before touching it with a wrench. This one step protects the finish from scratches. Turn the head counterclockwise until it comes free, and support the weight with your other hand — larger rainfall heads can be surprisingly heavy.
Soak and Scrub the Nozzles
1. Place the shower head face-down in a bowl and pour in enough white distilled vinegar to fully cover the nozzle surface — roughly 500ml to 1 litre.
2. Soak 1-2 hours, depending on the amount of clogging of the nozzles.
3. Use a soft toothbrush to clean each silicone nozzle separately. The silicone nozzles are flexible, too, so you can break up deposits with your thumb.
4. Rinse the entire head thoroughly under warm running water.
Retighten and Test Water Flow
Tighten the head on by hand, and snug it with your wrench. Turn the shower on and check around the connector for any drips. Run the water for 30 seconds to flush out loosened deposits and confirm you have restored water pressure in your rainfall shower head.
Own a Moen fixture? Our guide on how to clean a Moen shower head walks through brand-specific steps in detail.
How to Clean Rainfall Shower Heads With Premium Finishes
Premium finishes such as matte black, brushed gold, and rose gold are more sensitive than standard chrome. Using the wrong cleaner even once can strip the coating permanently and void your warranty.
Matte Black Finish
Matte black is one of the most popular finishes right now, but it scratches and dulls easily. Skip abrasive pads and bleach completely.
Instead, mix a small drop of mild dish soap with warm water and wipe the surface down gently. Dry it straight away with a soft cloth — water left sitting on matte black leaves spots that are hard to shift.
Never apply vinegar directly to this finish. Fixture manufacturer care guides widely flag this, as repeated acid contact dulls the coating over time.
Gold, Rose Gold, and Brushed Brass Finishes
These finishes are beautiful but thin. Always use a pH-neutral cleaner rather than anything acidic. Keep soaking time short, and never scrub.
A soft microfiber cloth dampened with warm water is all you need for routine shower fixture maintenance on gold and rose gold surfaces.
Brushed Nickel and Chrome Finishes
Both finishes handle moisture better than most. White vinegar works fine here as long as you dilute it with equal parts water. Rinse the surface well after cleaning and buff it dry to bring back the shine.
Quick Tip: Always check manufacturer guidelines. Every brand uses different coating technology on its fixtures. A cleaner that is safe for one matte black shower head may not suit another. Always check your care manual before trying any new cleaning product.
| Finish | Safe Cleaner | Avoid |
| Matte Black | Mild dish soap + warm water | Vinegar, bleach, and abrasive pads |
| Gold / Rose Gold / Brushed Brass | pH-neutral cleaner, damp microfiber | Acids, long soaks, and scrubbing |
| Brushed Nickel | Diluted white vinegar | Undiluted acids, abrasive tools |
| Chrome | Diluted white vinegar | Bleach, steel wool |
Common Mistakes and How to Avoid Them
Most cleaning damage is avoidable. These five mistakes trip people up more than anything else.
- Reaching for bleach on colored finishes: Bleach is too harsh for matte black, gold, and brass. It strips the coating straight off, and there is no fixing that afterward.
- Scrubbing with steel wool or stiff brushes: Hard materials scratch the surface and create tiny grooves for mineral deposits and grime to collect even faster.
- Soaking for too long: Vinegar is acidic. Leave a shower head sitting in it for too many hours, and it starts breaking down the rubber washers and internal seals.
- Skipping the rinse after cleaning: This one gets missed often. Vinegar left on the surface keeps reacting with the finish after you walk away. Always rinse thoroughly.
- Waiting too long to act on reduced pressure: A drop in water flow is your earliest warning sign. That is limescale starting to build up inside the nozzles. Catching it early saves you a much harder clean later.
How to Keep Your Rainfall Shower Head Clean for Longer
Preventing hard water buildup is far easier than scrubbing it off later. These simple habits make a real difference.
1. A quick once-over with a dry cloth stops mineral deposits from forming in the first place.
2. Run hot water for 30 seconds before turning the shower off. This flushes fresh deposits through before they settle.
3. Do a light vinegar soak once a month. Maintenance soaks help prevent limescale build-up.
4. Use a water softener if your home has hard water. Soft water dramatically reduces the mineral load hitting your fixtures every day.
5. Fit an inline shower filter on the shower arm. These affordable attachments reduce mineral deposits in the water before they ever reach your shower head.
Small, consistent habits protect your fixture far better than occasional deep cleans. With the right routine in place, your rainfall shower head stays clear, powerful, and looking sharp all year round.
Final Thoughts
A simple vinegar soak handles most buildup without removing anything. For heavier clogs, taking the head off and soaking it directly gets the job done. And matching your cleaning approach to your specific finish protects the surface from long-term damage.
Clean your shower head once a month, and you will rarely need a deep clean. A little regular care keeps the water flowing strong.
Ready to start? Grab your vinegar and get it done today.
Frequently Asked Questions
Can I Use Baking Soda Instead of Vinegar to Clean My Rainfall Shower Head?
Baking soda works, but it is gentler than vinegar. Mix it with water into a paste and scrub the nozzles with an old toothbrush. It suits delicate finishes well, but struggles against thick limescale. For heavy buildup, vinegar is still the stronger option.
Will Vinegar Damage the Rubber Nozzles Inside My Shower Head?
Short soaks are fine. Rubber and silicone nozzles only run into trouble when left sitting in vinegar for three hours or more. Stick to the recommended soak times, and your nozzles will come out undamaged.
What If My Rainfall Shower Head Still Has Low Water Pressure After Cleaning?
Pull out the small flow restrictor disc sitting just inside the inlet and rinse it separately — blockage there is a common missed step. If pressure is weak across your whole home and not just the shower, that points to a broader plumbing issue rather than the fixture itself.
How Do I Know When to Replace a Rainfall Shower Rather Than Clean?
If two full deep cleans leave multiple nozzles still blocked, cleaning is no longer solving the problem. Visible cracks in the casing or a worn-out internal seal are also clear signs. At that point, a replacement will serve you far better than another soak.