

You’re standing in your yard, staring at that black poly pipe sticking out of the ground. You’ve got a faucet in your hand. And one big question in your head—can I actually connect these two things?
Good news: yes, you can.
But here’s the thing — there’s a right way to do it and a wrong way. If you do it wrong, you’ll end up with leaks, loose fittings, or a faucet that doesn’t hold. If you do it right, you will have a solid, reliable outdoor water source.
In this guide, you’ll learn exactly what fittings you need, how to connect them step by step, and the common mistakes you’ll want to avoid.
What is Poly Pipe?
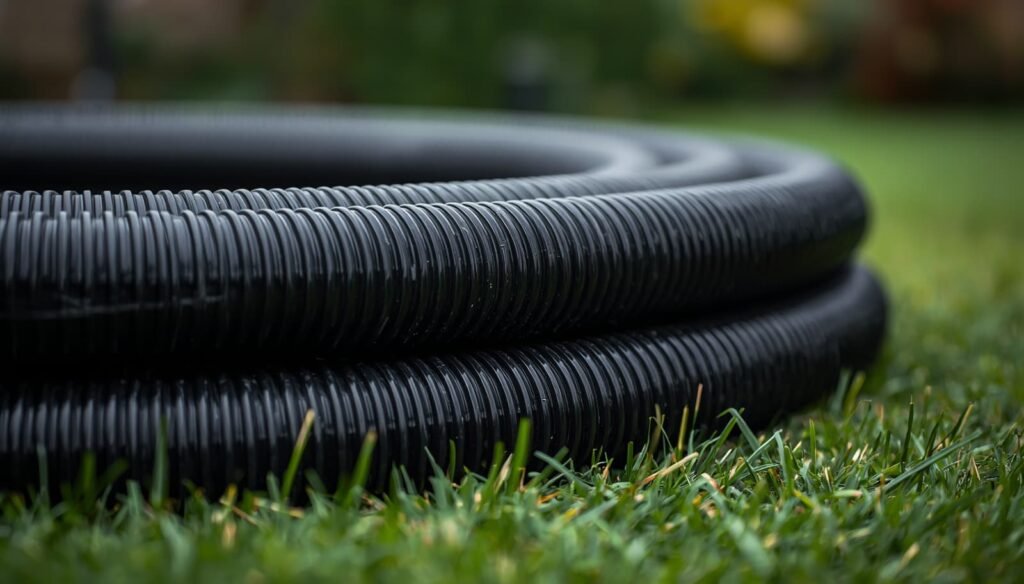
Poly pipe is a flexible plastic pipe made from polythene. It’s lightweight, inexpensive, and built to take on outdoor waterlines like a boss.
You’ve probably seen that black, flexible pipe that goes underground to a well, garden, or irrigation system. That’s a poly drop.
There are a Few Common Types:
- Black Poly Pipe (LDPE): It’s flexible, easy to work with, and does the job well for irrigation lines and general outdoor plumbing. If you’re laying something in the garden or setting up a sprinkler system, this type is probably what you’ll end up using.
- HDPE Pipe: This one’s built to take a beating. It’s denser and tougher than standard poly pipe, which is why you’ll find it running municipal water lines and well lines. If conditions are rough or pressure is high, HDPE holds up where other pipes won’t.
- PEX Pipe: Think of it as the indoor workhorse. It handles hot and cold water with no fuss, making it a go-to for household plumbing. It’s flexible like PVC but performs better in tight spaces and temperature extremes inside your home.
Can You Connect an Outdoor Faucet Directly to Poly Pipe?
The short answer is yes, you can. But not directly.
Here’s the deal. The poly pipe doesn’t have threads on it. It’s just a smooth, flexible plastic tube. Most outdoor faucets, also called hose bibs or spigots, have threaded metal connections. So you can’t just push the two together and call it a day.
You need a fitting in the middle to make it work.
Think of it like an adapter. It bridges the gap between the smooth poly pipe and the threaded faucet. Without it, you’ll get leaks, loose connections, or nothing will fit at all.
The fitting you need is called a poly insert fitting. It has two ends:
- One end slides into the poly pipe and is held in place with a clamp.
- The other end has male or female threads that connect to your faucet.
Once you have the right fitting, the whole job becomes pretty straightforward. It’s not complicated; you just need to know what to grab at the hardware store.
Tools and Materials You’ll Need
Before you start, gather everything you need. It saves you from making three trips to the hardware store. Here’s a simple list to work from:
| Item | What It’s For |
| Outdoor faucet / hose bib | The actual spigot you’re installing |
| Poly insert adapter (match your pipe size) | Connects poly pipe to the threaded faucet |
| 2 stainless steel hose clamps | Keeps the fitting locked tight on the pipe |
| Screwdriver or nut driver | Tightens the hose clamps |
| Teflon tape | Seals the threaded connection |
| Pipe cutter or sharp utility knife | Cuts the poly pipe clean and straight |
| Pressure-treated wood / mounting board | Gives the faucet a solid surface to mount on |
| Mounting screws | Secures the faucet to the board or wall |
| Heat gun or warm water (optional) | Softens the pipe end for easier fitting insertion |
Getting the right pipe size matters most. Poly pipe usually comes in ½ inch or ¾ inch, and make sure your insert adapter matches exactly.
Quick Tip: Grab one extra insert fitting while you’re at the store. They’re cheap, and if one cracks during install, you’ll be glad you have a backup.
Step-by-Step: How to Install an Outdoor Faucet to Poly Pipe
Let’s get to work. Follow the directions below and you’ll have a working outdoor faucet in no time at all.
Step 1: Turn Off the Water
Start at your main water shutoff and turn it off completely. Then open a faucet inside your home to release any pressure left in the lines. Don’t skip this step. Working on a live waterline is a mess waiting to happen.
Step 2: Pick Your Spot and Mount a Backer Board
Choose where you want the faucet to sit. If you plan on mounting it on a post or fence, or in an area where there is no flat surface, you can first screw some pressure-treated wood to that location. This will provide your faucet something to grip onto.
Step 3: Cutting the Poly Pipe
Either a pipe cutter or a sharp utility knife may be used when cutting the poly pipe. The sharper your cut, the easier you will find it sealing the cut pipe.
Tip: Score the pipe slowly with a utility knife and rotate it as you cut. You’ll get a much cleaner edge.
Step 4: Warm the End of the Pipe
Dip the cut end of the poly pipe into hot water for about 30 seconds. This softens the plastic just enough to make sliding in the fitting much easier. No hot water? A heat gun on low works too, just make sure you don’t overdo it.
Step 5: Slide the Hose Clamps On First
Before you insert the fitting, slide two stainless steel hose clamps onto the pipe. This step is easy to forget and annoying to fix later once the fitting is already in.
Step 6: Push the Insert Adapter Into the Pipe
Now push the barbed end of the poly insert adapter firmly into the pipe. It should be tight and secure. Screw it in all the way until the pipe sits against the shoulder of the fitting.
Step 7: Tighten the Two Hose Clamps
Put both hose clamps over the barbed end of the fitting and tighten with a screwdriver.
Tip: Don’t skip the second clamp. A poly pipe needs two clamps for a truly tight seal. One just isn’t enough to hold underwater pressure.
Step 8: Wrap the Faucet Threads With Teflon Tape
Take your Teflon tape and wrap it around the threaded end of the adapter two or three times. Always wrap in the direction of the threads. This makes a watertight seal when you screw the faucet on.
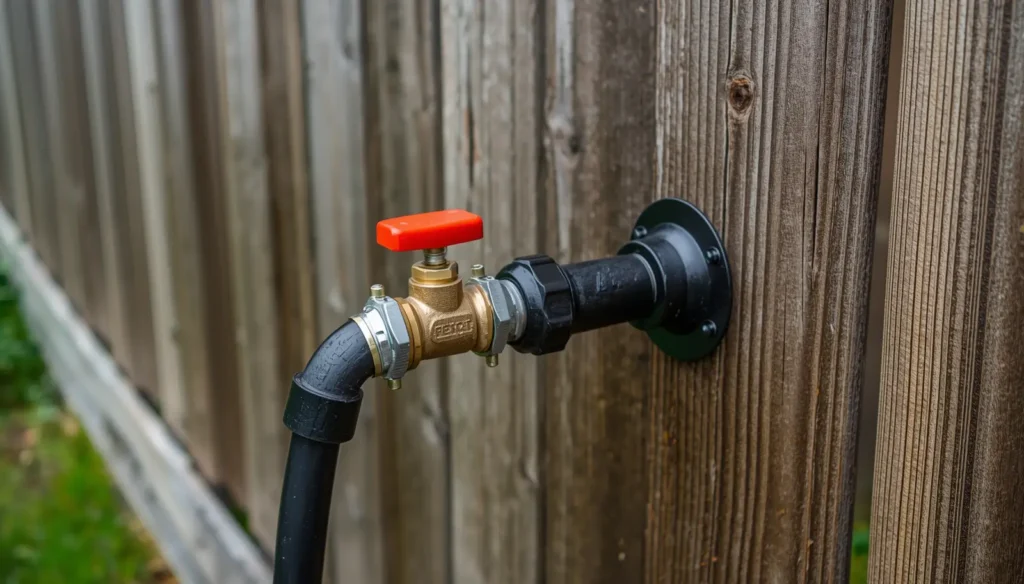
Step 9: Screw the Faucet On
Begin by hand-threading your outdoor faucet or hose bib onto the adapter. Once it’s hand-tight, take a wrench and snug it up well. Don’t overdo it; it should be firm and secure, not a death grip.
Step 10: Turn the Water Back On and Check for Leaks
With the connections in place, slowly turn the main water shutoff back on. Don’t rush it. Watch every connection closely for drips or seeping water. Run your hand around the clamps, the adapter, and the faucet threads.
If you spot a leak at the threads, then turn the water off, add more Teflon tape, and try again. If a clamp is dripping, it’s better to tighten it a little more.
No leaks? You’re done.
Best Type of Faucet to Use With Poly Pipe
Not all outdoor faucets are the same. Picking the right one saves you from headaches down the road. Here’s a quick breakdown of your options:
- Frost-Free Hose Bibbs — Best for Cold Climates
- The stem reaches 6–12 inches inside the wall, so water drains away from the cold air automatically.
- If you live somewhere that freezes in winter, this model is the one to get.
- Standard Sillcocks — Fine for Warm Climates
- Simple, affordable, and easy to install
- Not a great choice if your area drops below freezing; the water inside can freeze and crack the pipe
- Anti-Siphon Vacuum Breaker Faucets — Worth Considering
- These have a built-in valve that stops dirty water from flowing back into your clean water supply.
- Many local codes actually require them; check your area before buying.
- Brass vs. Plastic Faucets — Which is Better
| Parameters | Brass | Plastic |
| Durability | Lasts for decades | Can crack over time |
| Cost | Costs a bit more | Budget-friendly |
| Best For | Long-term outdoor use | Light, temporary setups |
Quick Advice: Go with a frost-free brass hose bibb if you can. It costs a little more upfront, but it holds up in all weather and lasts for years.
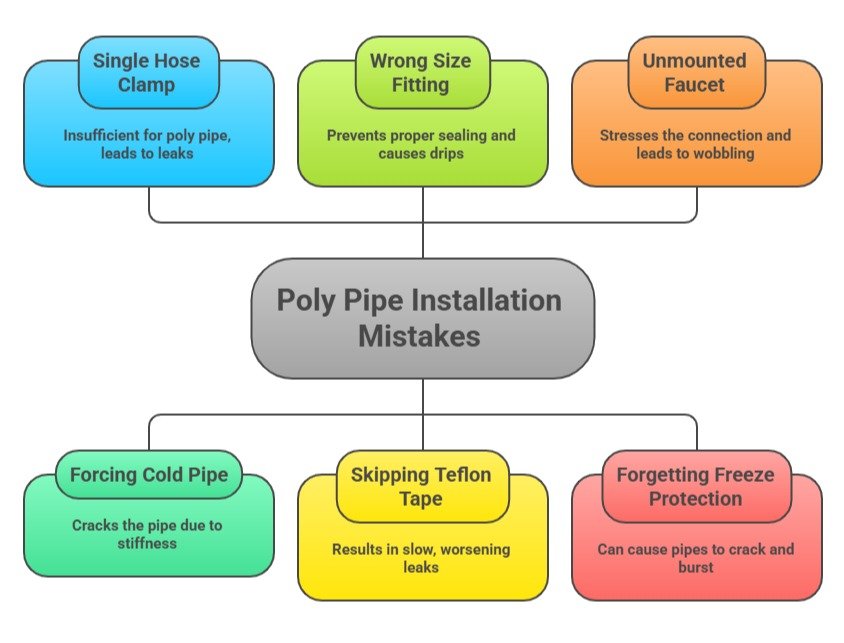
Common Mistakes to Avoid
Code, Safety, and Freeze Protection Considerations
Before you grab your tools, take a few minutes to think about safety and local rules. This stuff matters more than most people realize.
- Check Your Local Plumbing Code: Every area has its own rules about outdoor plumbing. Some require permits even for a simple faucet install. A quick call to your local building department saves you from fines or having to redo the work.
- Backflow Prevention Required: Most areas require an anti-siphon device on outdoor faucets. This stops dirty outdoor water from flowing back into your clean drinking water. Don’t skip it — it protects your family, and it’s often the law.
- Bury Poly Pipe Below the Frost Line: If your pipe runs underground, it needs to be deep enough that it won’t freeze. The frost line varies by location. Check what’s required in your area before you dig.
- Insulate Any Exposed Sections: Any pipe that runs above ground and is exposed to cold air needs foam pipe insulation wrapped around it. It’s cheap and takes five minutes to install.
- Know When to Call a Plumber: If you’re tapping into a main water line, dealing with high water pressure, or your local code requires licensed work, call a pro.
Final Thoughts
Yes, you can absolutely install outdoor faucet to poly pipe, and now you know exactly how to do it right.
It’s not a complicated job. With the right fittings, two hose clamps, a little Teflon tape, and some patience, most homeowners can get this done in an afternoon. Take your time on each step, don’t rush the connections, and check for leaks before you call it done.
The biggest wins come from the small details — warming the pipe, using two clamps, and mounting the faucet solidly. If you ensure those are correct, you’ll achieve great results.
If this guide helped you out, share it with a friend who’s tackling the same project.
Frequently Asked Questions
What Size Poly Pipe is Best for an Outdoor Faucet?
For most homes, 1/2″ works fine, but I’d go with 3/4″ if you can — you’ll notice the difference the moment you’re trying to run a sprinkler and a hose at the same time.
Can a Poly Pipe Handle the Pressure of an Outdoor Faucet?
Generally, yes. Just check that your pipe’s PSI rating clears your home’s water pressure. Most houses run between 40–80 PSI, and standard 100 PSI poly pipe handles that without breaking a sweat.
Is it Okay to Leave a Poly Pipe Exposed Above Ground?
Short-term, sure. Long-term, not a great idea. Sunlight breaks the material down, and it gets brittle faster than you’d expect. Wrap exposed sections with UV-resistant insulation or slap on a UV-protective coating if it’s going to stay out there.
How Long Does a Poly Pipe Outdoor Faucet Connection Last?
A solid install underground can genuinely go 20+ years without issue. The faucet itself is usually the first thing to go — figure 10 to 20 years depending on your climate and how rough the winters get.
Can I Connect a Poly Pipe to a Copper or PEX Outdoor Faucet Line?
Absolutely. Just grab a transition fitting — poly-to-copper or poly-to-PEX — from any hardware store. Straightforward swap, no special tools needed.
What’s the Difference Between Poly Pipe and PEX?
The poly pipe stays outside and underground: cold water only. PEX goes inside your walls, handles both hot and cold, and uses a completely different set of fittings. Don’t mix them up or assume the fittings are interchangeable; they’re not.