

Best Jet Spray for Toilet: Compare Materials & Brands
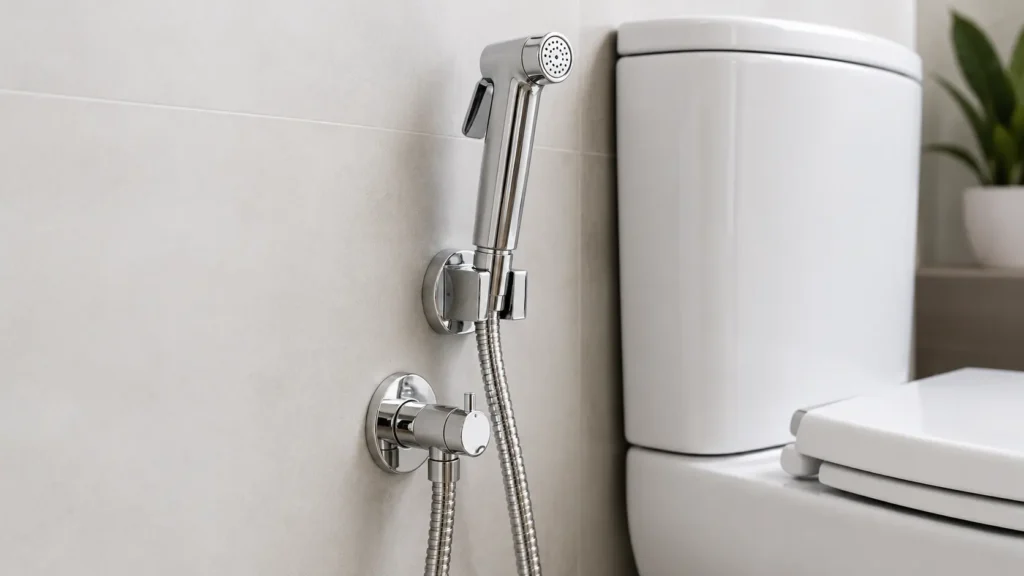
Finding the best jet spray for toilet use is not as simple as picking the cheapest option on the shelf. Many buyers make that mistake and regret it within months. A poor-quality jet spray often leaks at the joint. It may rust after a few uses in hard water. Some models offer no real pressure control, so you get either a weak trickle or a hard blast. Cheap hoses crack and split too soon. This guide will help you compare materials, understand how a jet spray differs from a health faucet, look at trusted brands, and know what price range fits your budget. Which is the Best Jet Spray for a Toilet? For most Indian households, the best jet spray for toilets is made of brass or SS304 stainless steel. Look for a braided steel hose, a smooth pressure-control trigger, and leak-proof fittings that fit the standard ½-inch plumbing size used across India. This combination gives you strength, hygiene, and long-term value without heavy maintenance. Use Case Recommended Choice Everyday home use Brass or SS304 Budget bathrooms PTMT or ABS Hard-water areas Brass or SS304 Elderly users Soft-pressure trigger Premium bathrooms Premium brass health faucet Your final pick still depends on your water quality, budget, and who uses the bathroom most. Jet Spray vs Health Faucet: Are They the Same? Most people in India use “jet spray” and “health faucet” as if they’re the exact same thing, and in casual conversation, that’s fine. But technically speaking, there’s a subtle difference worth understanding. A health faucet typically refers to the handheld nozzle attached to a flexible hose; the kind you hold in your hand and direct yourself. Jet spray, on the other hand, is a bit more flexible in meaning. Sometimes it’s used for that same handheld unit, but in certain setups, it refers to a fixed spray mounted directly onto the toilet itself. Both serve the exact same purpose — personal hygiene after using the toilet, but how they’re designed and installed sets them apart. A handheld health faucet allows you to adjust the angle, distance, and pressure as you desire, giving you more flexibility. A fixed jet spray is incorporated in the toilet setup and is in a fixed location and does not provide the same flexibility. So here’s the simplest way to think about it: the function is identical, but the design and installation aren’t always the same. If you’re planning to buy one, don’t just go by the name; check what type of product you’re actually getting. Internationally, this same fitting also goes by names like handheld bidet sprayer or shattaf. Types of Jet Sprays: ABS vs PTMT vs Stainless Steel vs Brass Not all jet sprays are made from the same stuff, and that’s exactly why some last five years while others crack in five months. The material you pick decides how well it handles daily use, water quality, and wear. Material Best For Advantages Limitations ABS Budget use Lightweight, affordable Less durable PTMT Everyday bathrooms Rust-free, economical Basic appearance Stainless Steel Daily family use Strong, corrosion-resistant Check steel grade Brass Long-term use Premium durability Higher price A few things worth knowing before you shop: If your budget is tight but you still want something rust-free, a PTMT jet spray is worth a look. A brass jet spray costs more upfront but tends to outlast the rest. How to Choose the Best Jet Spray for Toilet Picking the right jet spray isn’t just about looks. Check these seven things before you spend your money. Look for a leak-proof hose too, since it directly affects how long your fitting stays trouble-free. Water Pressure Varies More Than You’d Think Not every home delivers water the same way, and that affects which spray makes sense. Note: Match your fitting to your building’s plumbing setup. Common Mistakes to Avoid When Buying a Jet Spray These small checks save more than they appear because a toilet spray that lasts saves you money in the long run. Best Jet Spray Brands in India and Price Range The cheaper ones use thinner plastic and basic plating, while the pricier ones use better metal and finer finishing. Category Approx. Price Brands Budget ₹250–₹700 PTMT and ABS brands Mid-range ₹700–₹1,500 Begin Faucets, Hindware, Cera, Parryware, RN, Plantex Premium ₹1,500–₹3,000+ Jaquar, Kohler, Grohe A quick sense of where each brand sits: If you’re wondering about the toilet jet spray price in India, it really comes down to material, brand, and finish, so the range above gives you a rough starting point. Take Begin Faucets, for example. It makes health faucets across different finishes and materials, which gives buyers some room to balance how long it lasts against how it looks and what it costs. Whichever brand catches your eye, take a minute to check the material grade, hose quality, warranty terms, and whether it matches your water pressure. Installation, Water Pressure & Maintenance Tips Set it up right the first time, and your jet spray won’t give you trouble for years. Wrapping It Up Choosing the best jet spray for toilet use really comes down to a handful of things: solid material, a fit for your water pressure, a sturdy hose, tight leak-proof fittings, and a warranty you can count on. Sticking to trusted brands makes this whole decision easier too. If you’re weighing your options, it’s worth looking at Begin Faucets alongside other established names and picking whatever suits your bathroom, your water pressure, and your long-term needs best. Frequently Asked Questions How Long Does a Jet Spray Usually Last? A good-quality jet spray, especially brass or SS304 steel, can last several years with basic care. Cheaper plastic models tend to wear out much sooner, often within a year or two of daily use. Can I Install a Jet Spray Myself, or Do I Need a Plumber? Many people install it themselves using PTFE tape and a wrench, since the fitting is simple. However, if you are unsure about the valve connection, or notice
How to Install a Health Faucet: Step-by-Step Guide
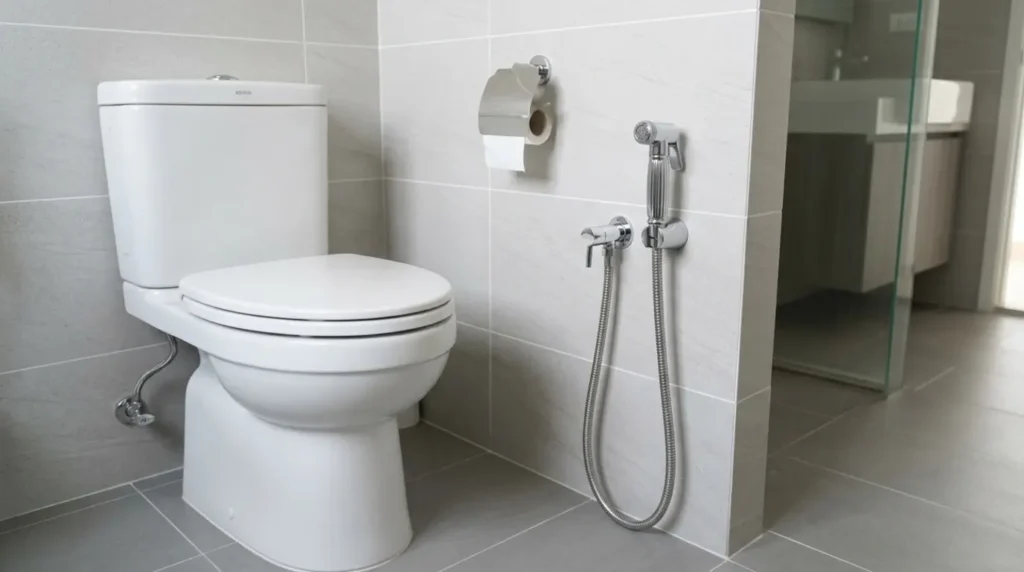
Health faucets are now a standard fixture in most Indian bathrooms — in homes, offices, and even budget hotels. The good news is that they work with both Indian-style floor-mounted pans and Western-style wall-mounted commodes, so you do not need to worry about compatibility. Most Indian bathrooms already have a 15mm water inlet near the toilet, which is exactly what a health faucet needs. So no major plumbing work is required. A standard health faucet fits any toilet type. You only need basic tools, and no professional plumber is needed for a normal installation. Most faucets come in a 1.2-metre hose length, which works for most setups. The whole job takes around 30 minutes. This guide walks you through every step of the installation from gathering tools to testing the final connection. Check Your Bathroom Setup Before Installation Before you buy anything, spend two minutes looking at your bathroom. This saves you an extra trip to the hardware store. Western-Style (Wall-Mounted Commode) Indian-Style (Floor-Mounted Pan) Quick Compatibility Checklist Standard Indian plumbing uses 1/2-inch BSP (15mm) threads, and almost every health faucet sold in India is built to match this size, but confirm before buying. Health Faucet Sizes and Prices in India All standard health faucets in India use a 1/2-inch BSP (15mm) connection, so they fit directly onto Indian plumbing without any adapters. Picking the right hose length matters more than most people think. Common Hose Lengths Price Guide by Material Material Price Range (INR) Best For ABS Plastic ₹150 – ₹400 Tight budgets, rental homes PTMT ₹400 – ₹900 Mid-range, rust-free daily use Stainless Steel ₹700 – ₹1,500 Durability, hard water areas Brass ₹1,200 – ₹3,000 Long-term use, premium finish Buying Tip: PTMT works well for most homes; it does not rust, handles daily use easily, and costs far less than brass or steel. Tools and Materials You Need Gather everything before you start. This keeps the job clean and fast. Tools Materials / Kit Components Most Indian health faucet kits already include all the materials listed above, so check your kit box before buying anything separately. How to Install a Health Faucet Step-by-Step These steps work for most Indian bathrooms. Take it one step at a time, and you will finish in about 30 minutes. Step 1: Turn Off the Water Supply Look for the angle valve sitting behind or just beside your toilet — it is a small tap-like knob. Turn it clockwise until it stops. No angle valve? Go shut the main bathroom water line instead. After closing it, flush the toilet once. That push clears out the water still sitting in the pipe, so it does not spray on you when you open the joint. Step 2: Remove the Existing Water Connection The inlet pipe runs from the angle valve up into the bottom of your flush tank. Loosen the nut where it meets the tank, but hold the tank fitting steady with your other hand. Do not let it spin; it can crack the tank inlet. Pull the pipe away and set it aside. Tuck a dry cloth under the joint right away because some water will still drip out. Tip: Before you remove anything, take a quick photo with your phone. When you are putting it all back together, that photo saves a lot of guessing. Step 3: Apply PTFE Tape on Threads Pick up the PTFE tape and wrap it around the male thread going clockwise — the same direction you will screw the fitting in. Pull the tape tight as you wrap. Go around three to four times. One loose round of tape does nothing. Do this on every single threaded joint in this job, not just one or two. That tape is what keeps slow drips from showing up three days later. Step 4: Install the T-Valve The T-valve goes where your old inlet pipe used to connect at the outlet of the angle valve. It has three openings. One sits on the angle valve, one feeds the flush tank, and the last one takes the health faucet hose. Start screwing it on by hand until it feels snug. Then use the wrench for one firm quarter-turn. Tip: Stop at one-quarter turn with the wrench. Tightening beyond that can split a plastic T-valve or damage the thread on the angle valve. Step 5: Connect the Hose Before you thread the hose connector onto anything, peek inside the connector and check that the small rubber washer is sitting flat inside it. If that washer is missing or tilted, water will drip no matter how tight you go. Screw one end onto the T-valve and the other onto the spray gun. Hand-tighten both ends first, then add a quarter-turn with the wrench. That is all it needs. Step 6: Attach the Spray Gun Hold the spray gun with one hand, then slowly bring the hose connector up to it. Before you begin turning, make sure the threads line up neatly. If the connector feels stiff right from the first turn, stop — it is cross-threading. Back it off and start again. Once it turns smoothly, hand-tighten it fully. Add one quarter-turn with the wrench at the end, then give the gun a light tug to check that it holds firm. Step 7: Install the Holder Bracket The bracket goes on the wall at around 90 to 100 cm from the floor. That height feels natural for most adults standing at the toilet. Put it on the wall closest to your stronger hand, about 15 to 20 cm away from the toilet edge. Use a pencil to mark your drill points before you start. When drilling into tiles, go slow with a tile bit and steady pressure — rushing cracks the tile. Tip: Not comfortable drilling into tiles? A strong adhesive hook rated for 2 kg or more works as a solid temporary fix until you are ready. Step 8: Turn On the Water Supply and Test Open the angle valve slowly;
How to Increase Water Pressure in a Health Faucet
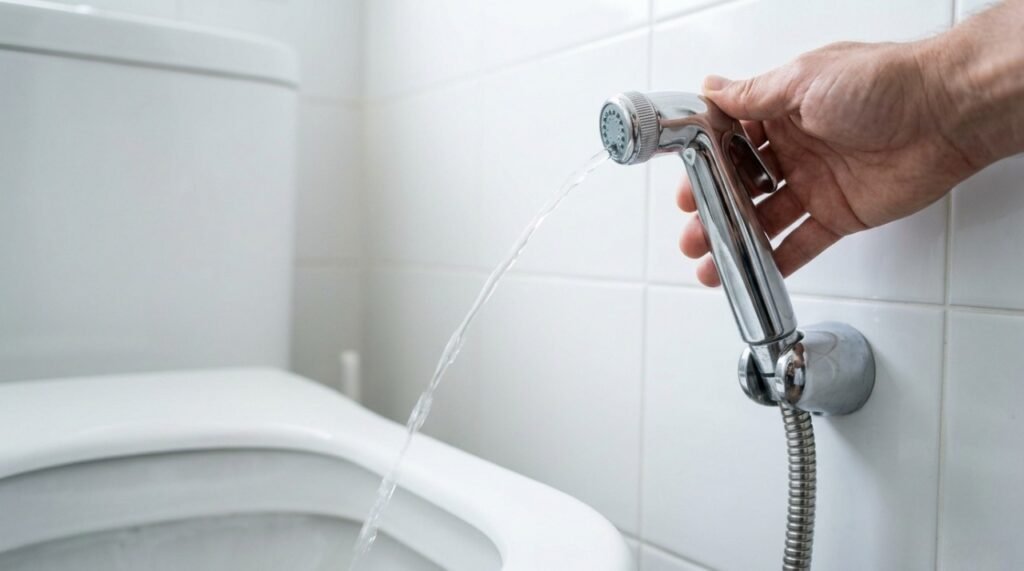
You turn the handle, and nothing happens. Just a weak trickle where a strong spray should be. If this sounds familiar, you are not alone. Many homes deal with this problem at some point. Here are signs your health faucet has low pressure: If you want to know how to increase water pressure in health faucet fittings, the good news is this: most fixes are simple. You don’t need to call a plumber or buy a new unit. In fact, the problem often comes down to small, fixable issues. Let’s find out what causes each one and how to fix them. How a Health Faucet Gets Its Water Pressure Water pressure follows a simple path. It moves through three points before it reaches you. 1. Water Supply: Your bathroom water pressure depends on which overhead tank or pump your building uses. If that supply is weak, every tap and fixture in your home feels it, including your health faucet. 2. Inlet Valve and Pipe: Water is supplied through a small valve near the wall. It opens up, and the water comes in full blast. Half open it, and the pressure drops off immediately. 3. Hose and Spray Head: Water is pumped through the flexible hose to the nozzle. It is the nozzle that shapes the spray you feel in your hand. One step builds on the one before it. If the pressure is strong at the supply but weak at the nozzle, something is blocking it in between. This chain explains why pressure problems can start almost anywhere. Next, let’s look at the most common reasons pressure drops. What Causes Low Water Pressure in a Health Faucet? There are many reasons for a weak flow. Here’s a quick run-through of the usual suspects. Cause Why It Happens Minerals clogging or blocking the nozzle Hard water minerals slowly build deposits of calcium and salt in the nozzle holes. Over months, these tiny holes get narrower and narrower. Eventually, cause low water pressure. Kinked or bent hose The flexible hose often gets squeezed behind the toilet tank, especially in tight bathrooms. Even a small bend is enough to choke the water flow. Inlet valve partially closed The inlet valve should be fully opened. Otherwise, the water entering the health faucet will be limited, causing a weak flow. Worn-out o-ring or washer It has washers and O-rings that help form a good seal inside the faucet. When they fail, they can obstruct the flow of water or cause leaks that reduce pressure. Low building water supply Sometimes the problem is not the tap itself. If you have low water pressure coming into your home or building, the health faucet will also have a weak flow. Old internal components Health faucets naturally wear over time. Internal parts can wear out and affect the water flow efficiency and water pressure. Most of these causes have an easy fix. Let’s go through each one, step by step. Ways to Increase Water Pressure in a Health Faucet Try these fixes in order. Most people solve the problem within the first three steps. 1. Soak and clean the nozzle Twist the spray head off the hose and look closely at the small holes. Hard water minerals are the white or grey crusty bits. Drop the nozzle in a bowl with equal parts vinegar and water, leave it for 30 minutes, then scrub gently with an old toothbrush before rinsing. 2. Straighten or swap the hose Pull the hose out gently and run your hand along its full length. A bend or twist anywhere along it can choke the flow. If you find cracks or a soft, worn patch, it’s time for a new hose. 3. Fully open the valve There is a small valve on the wall behind the tap. Turn it counter-clockwise as far as it goes, even if you think it’s already open. People often leave this valve only half-turned without realizing it. 4. Swap out old washers and O-rings Open up the hose connections and look at the small rubber rings inside. Flat, cracked, or stiff rings let water sneak past instead of pushing forward. Pick up replacements from any hardware shop near you. 5. Check other taps in your home Turn on a different tap and see how it flows. If every tap in the house feels weak, your faucet isn’t the problem; your building’s supply is. A quick chat with a neighbor will tell you if they’re facing the same thing. 6. Clear out the inlet filter Tucked behind the inlet valve is a tiny mesh screen that traps sand and grit. Unscrew the fitting carefully, pull this screen out, and rinse it clean under a tap before putting it back. Pro Tip: Steps 1, 2, and 6 take about 15 minutes combined and solve most low-pressure issues in one go. If pressure still feels low after all six steps, a few more things are worth checking. Is the Problem Your Faucet or Your Water Supply? Before you replace any parts, run this quick test to find where the real problem sits. 1. Turn on another tap in the bathroom. If it’s weak too, your faucet probably isn’t the issue. 2. Check the small valve behind your toilet. If someone turned it down during a repair and forgot to open it back up, your health faucet will always feel weak. 3. Try testing at a different time of day. Pressure naturally tends to fall during peak hours, typically 7-9 AM and 6-8 PM, and to rise later. If the faucet still feels weak after this test, then the problem may be within the installation itself. Common Mistakes Include: Once you’ve ruled out these issues, it might be time to look at the faucet’s internal parts. When to Replace Parts and How to Keep Pressure Strong Long-Term Cleaning solves most problems, but not all of them. Here’s when a part needs to go: 1. Spray head or nozzle: Holes still clogged after a
How to Clean a Health Faucet Head: Easy Step-by-Step Guide
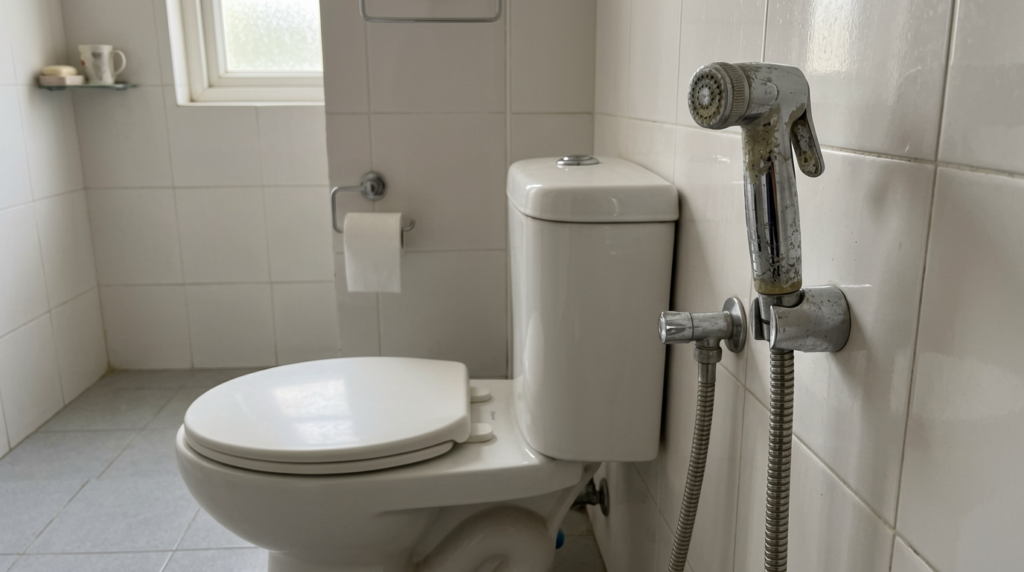
Is your health faucet giving a weak spray? Learning how to clean a health faucet head can fix that fast. A dirty nozzle is very common — especially in Indian homes where hard water leaves white mineral crust that slowly chokes the spray holes. The good news is you do not need a plumber or any special tools. In this blog, you will learn the right way to clean your health faucet head at home, when to replace it, and how to keep it clean for longer. Most people finish in under 30 minutes. Let’s get started. Why Does a Health Faucet Head Get Dirty or Clogged? Your health faucet head deals with a lot every single day. It collects dirt and clogs over the years. Here are the main culprits: The biggest culprit in the majority of Indian homes is hard water deposits on the surface of taps. Cities like Delhi, Lucknow, and Ahmedabad have water that carries heavy minerals. Once this water dries up on the nozzle, it leaves a white or yellowish crust behind, and that crust slowly chokes the small spray holes. Soap scum blocks holes from the outside, while mineral deposits clog them from inside. This is exactly why your faucet starts throwing water in odd directions or loses pressure. Signs Your Health Faucet Head Needs Cleaning Check your faucet regularly. These signs tell you it’s time for a clean: If you see any of these signs, clean your faucet head right away. Black spots and a bad smell mean mould — do not delay on those. Things You’ll Need Before You Start Before you even start, grab these easy-to-find items: You probably have most of these already at home. The Basic Cleaning Method for How to Clean Health Faucet Head Whether your spray head is removable or not, the core cleaning method is the same — a vinegar soak followed by a gentle scrub. Here is how to do it. Step 1: Prepare your vinegar solution Mix equal parts white vinegar and warm water. This simple solution works surprisingly well on the white crusty deposits that block your faucet nozzle. For heavy white crust, soak for the full 2 hours. If vinegar alone does not work after two attempts, use a store-bought descaler such as diluted citric acid powder, which is easily available online. White vinegar contains 5 to 8% acetic acid, which dissolves calcium carbonate — the main mineral in limescale. Never use bleach or strong acid on chrome fittings, these strip the finish and cause permanent damage. Step 2: Soak the spray head Submerge the spray head fully in the vinegar solution. For light buildup, 30 to 60 minutes is enough. Not sure if your buildup is light or heavy? Try scraping it with a fingernail — if it comes off easily, it is light. If it is rock-hard, soak for 2 hours. Step 3: Scrub gently Slip on your rubber gloves. Take your soft toothbrush and work it gently across the nozzle. To properly clean the health faucet nozzle holes, use a toothpick to poke through any holes that still look blocked. Never use a metal pin or needle — it bends and tears the tiny holes, ruining the spray pattern completely. Step 4: Rinse and test Turn the faucet on and let the water run hard for 30 seconds. This flushes out everything the vinegar loosened inside. Dry the head with your microfiber cloth once done. Quick Tip: Stand back and watch the spray after rinsing. Even flow and stronger pressure mean your faucet is clean and clear again. If the flow is still uneven after cleaning, the rubber washer inside may need replacing. If Your Head Does NOT Remove Follow the basic cleaning method above with one difference for Step 2: instead of a bowl, use a zip-lock bag. 1. Fill a medium-sized zip-lock bag with the solution of vinegar and warm water. 2. Place the spray head into the bag and dip it into the solution. 3. Secure the bag with a rubber band and squeeze out the air so the solution wraps around every nozzle hole. 4. Leave it to soak, then scrub, rinse, and test as described above. If Your Head Removes Not sure if your head is removable? Try turning it anticlockwise. If it moves, it is removable. A removable head lets you clean every corner properly. 5. Support the faucet pipe with one hand. With the other, turn the spray head anticlockwise. If it is stiff, wrap a dry cloth around the head for a better grip. 6. Drop the spray head into a bowl of the vinegar and warm water solution and soak as per the basic method above. 7. Scrub, rinse, and test as described in the basic method. 8. Turn the head back onto the pipe in a clockwise direction. Hand-tighten well, but do not over-tighten. CAUTION: Look at the rubber washer inside before you screw the head back on. If it looks flat, cracked, or worn out, replace it with a new one. Otherwise, you will end up with a leak. If you want to skip the DIY mix and get straight to a spotless faucet, our Begin Faucet Cleaner is formulated to dissolve limescale fast — no soaking, no guesswork. How to Maintain Your Health Faucet Head Good health faucet maintenance means cleaning on a regular schedule. How often depends on your water type: Water Type Cleaning Frequency Soft Water Every 2–3 months Hard Water Every month Commercial Bathrooms Every 2–4 weeks Not sure if you have hard water? Look for white residue on your taps or kettle, which is the clearest sign. India has many hard water zones across most cities and towns, so for most Indian homes, a monthly clean is the smartest habit to build. A few small habits each week will save you a big cleaning job later: Common Mistakes to Avoid When Cleaning a Health Faucet Head These are the most common mistakes
How to Use Health Faucet Properly for Better Hygiene
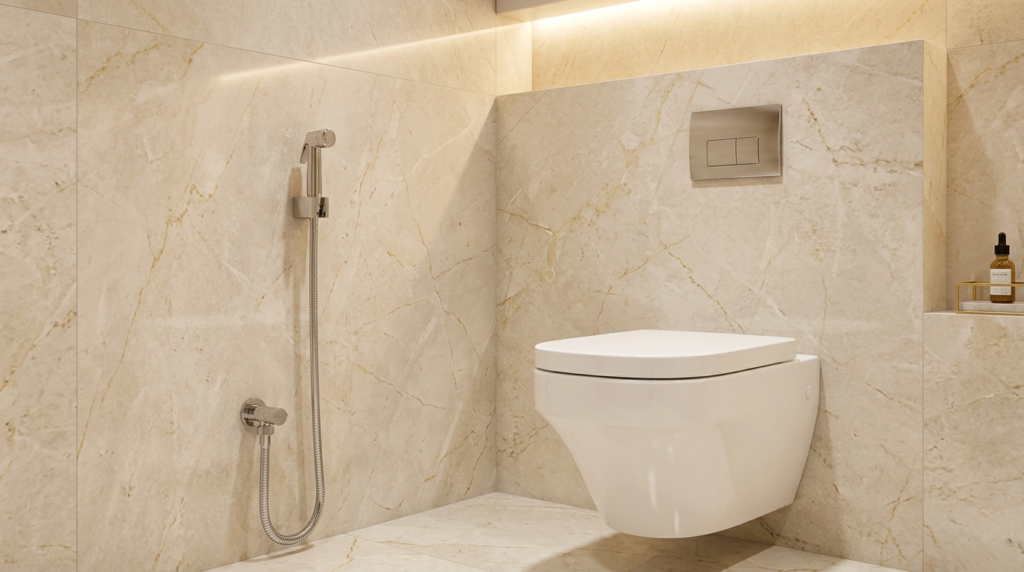
Ever finished using the toilet and still felt not quite clean enough? That’s exactly where a health faucet steps in and changes things. A health faucet is a handheld spray device attached near your toilet. It gives you a quick, targeted rinse — far more effective than dry toilet paper alone. Most people have one installed but never really learn how to use it properly. And that small gap in knowledge can affect your hygiene more than you’d think. This guide walks you through the right way to use a health faucet, the real benefits it offers, common mistakes people make, and how to keep it clean. Let’s start with the basics. How to Use a Health Faucet Properly Honestly, no one really teaches you how to use a health faucet. You put it up, you look at it, and you work it out yourself. But when you get it right, it makes a bigger difference than you might think. Here’s What You Should Do: Step 1: Stay seated after you finish: Don’t rush off just yet—sitting helps everything stay where it should, so the rinse actually works. Step 2: Point the nozzle before you spray: Don’t rush it. Take a moment to aim, then pull the trigger. A small adjustment up front prevents you from spraying in the wrong place altogether. Step 3: Squeeze the trigger gently, just a little at first: No need to go hard right away. A gentle push gives a light, steady stream. That’s really all you need for a good clean. Step 4: Move slowly: Don’t hold it in one place. As you rinse, move the nozzle a little bit. That way you’re not missing spots or over-spraying one area.” Step 5: Pat dry before getting up: Release the trigger and then pat the area dry with toilet paper or a clean cloth. Not good for your skin to walk away from it while it’s still wet. Quick Tip for Women: Always rinse front to back. This direction prevents bacteria from traveling toward the urinary tract and helps prevent infections. Water pressure is more important than most people think. If you go too high, you can get irritation. Too low and it won’t wash right. The best flow for day-to-day use is steady flow in the middle to low range. Benefits of Using a Health Faucet A health faucet does more than just keep you clean. Here’s what you actually get from using one regularly: Reduces toilet paper use, really adds up to savings over months and years, and saves money in the long run. Note: Studies have shown that toilet paper alone only removes some fecal matter. The water purification is much more thorough and hygienic. Health Faucet vs Bidet Hand-Free Toilet Spray vs Toilet Paper Not sure which option is right for you? This quick comparison breaks it down simply. Feature Health Faucet Bidet (Hands-free) Toilet Paper Cost Low High Ongoing expense Hygiene Level High Very High Moderate Water Usage Low–Moderate Moderate None Ease of Use Easy Very Easy Easy Installation Simple Requires plumber None Eco-Friendliness Good Good Poor A health faucet is the best choice for most households – affordable, easy to install, and very effective for daily hygiene. If you want a completely hands-free experience and don’t mind the higher upfront cost, then a bidet hand-free is for you. Toilet paper will do in a pinch, but as a long-term hygiene solution, it just doesn’t compare. Common Mistakes to Avoid While Using a Health Faucet Even with a simple tool like a health faucet, some bad habits can make it less effective or cause discomfort. 1. High pressure of the spray: If you adjust it too high, it may hurt, as well as cause skin irritation. Start low and work your way up. 2. Nozzle direction is wrong: Rinsing from back to front pushes bacteria toward the urinary tract. The risk of infection is higher, especially for women. 3. Not drying the area after rinsing: Any residual dampness provides moisture that can contribute to skin irritation and fungal problems over time. 4. Allowing young children to use it unsupervised: Little kids can squeeze the trigger too hard and spray everywhere but where they’re supposed to. Make sure you’re supervising until they’ve got the hang of it. 5. Skipping nozzle cleaning: When the nozzle’s dirty, bacteria collect fast. That pretty much ruins the whole point of rinsing for hygiene. 6. No cleaning between shares: If you have more than one person using the same faucet, be sure to clean the nozzle between uses to avoid cross-contamination. How to Clean and Maintain a Health Faucet A clean health faucet performs better and lasts longer. Some simple steps to keep yours in good shape. Quick Tip: Don’t spray bleach directly onto the nozzle. This can damage the internal rubber seal and significantly reduce the life of your health faucet. Who Can Benefit Most From a Health Faucet A health faucet is more than a bathroom upgrade — some people need it more than others. 1. Pregnant Women: Rinsing is safer and more comfortable than wiping in pregnancy. 2. Senior Citizens: Personal Hygiene made easy without the hassle of stretching or turning. 3. Hemorrhoids: Water rinsing is soothing rather than irritating the area further. 4. IBS or Digestive Issues: If you find yourself going to the bathroom a lot, a quick rinse makes dealing with it much simpler. 5. Women on their Periods: You will feel fresh and clean all day. 6. Limited Mobility Persons: Reduces dependency on others in personal hygiene tasks. Final Thoughts Good hygiene doesn’t have to be complicated. A health faucet is one of the simplest changes you can make in your bathroom — and the difference it makes is very real. You’ve seen how to use it correctly, step by step. You’ve also looked at the benefits, the common mistakes to sidestep, and how easy it is to keep clean with just a few minutes of care each