

How to Clean a Health Faucet Head: Easy Step-by-Step Guide
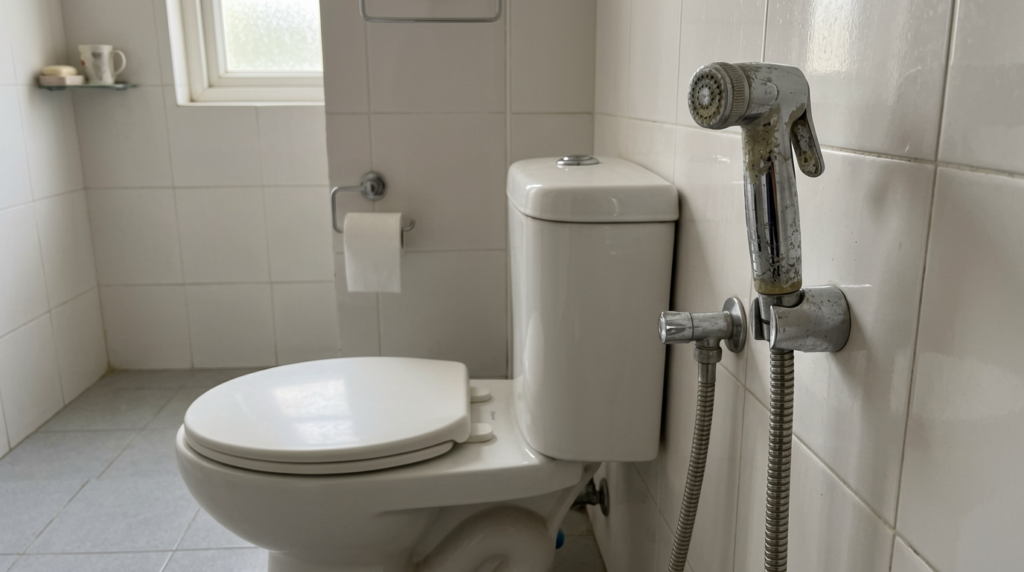
Is your health faucet giving a weak spray? Learning how to clean a health faucet head can fix that fast. A dirty nozzle is very common — especially in Indian homes where hard water leaves white mineral crust that slowly chokes the spray holes. The good news is you do not need a plumber or any special tools. In this blog, you will learn the right way to clean your health faucet head at home, when to replace it, and how to keep it clean for longer. Most people finish in under 30 minutes. Let’s get started. Why Does a Health Faucet Head Get Dirty or Clogged? Your health faucet head deals with a lot every single day. It collects dirt and clogs over the years. Here are the main culprits: The biggest culprit in the majority of Indian homes is hard water deposits on the surface of taps. Cities like Delhi, Lucknow, and Ahmedabad have water that carries heavy minerals. Once this water dries up on the nozzle, it leaves a white or yellowish crust behind, and that crust slowly chokes the small spray holes. Soap scum blocks holes from the outside, while mineral deposits clog them from inside. This is exactly why your faucet starts throwing water in odd directions or loses pressure. Signs Your Health Faucet Head Needs Cleaning Check your faucet regularly. These signs tell you it’s time for a clean: If you see any of these signs, clean your faucet head right away. Black spots and a bad smell mean mould — do not delay on those. Things You’ll Need Before You Start Before you even start, grab these easy-to-find items: You probably have most of these already at home. The Basic Cleaning Method for How to Clean Health Faucet Head Whether your spray head is removable or not, the core cleaning method is the same — a vinegar soak followed by a gentle scrub. Here is how to do it. Step 1: Prepare your vinegar solution Mix equal parts white vinegar and warm water. This simple solution works surprisingly well on the white crusty deposits that block your faucet nozzle. For heavy white crust, soak for the full 2 hours. If vinegar alone does not work after two attempts, use a store-bought descaler such as diluted citric acid powder, which is easily available online. White vinegar contains 5 to 8% acetic acid, which dissolves calcium carbonate — the main mineral in limescale. Never use bleach or strong acid on chrome fittings, these strip the finish and cause permanent damage. Step 2: Soak the spray head Submerge the spray head fully in the vinegar solution. For light buildup, 30 to 60 minutes is enough. Not sure if your buildup is light or heavy? Try scraping it with a fingernail — if it comes off easily, it is light. If it is rock-hard, soak for 2 hours. Step 3: Scrub gently Slip on your rubber gloves. Take your soft toothbrush and work it gently across the nozzle. To properly clean the health faucet nozzle holes, use a toothpick to poke through any holes that still look blocked. Never use a metal pin or needle — it bends and tears the tiny holes, ruining the spray pattern completely. Step 4: Rinse and test Turn the faucet on and let the water run hard for 30 seconds. This flushes out everything the vinegar loosened inside. Dry the head with your microfiber cloth once done. Quick Tip: Stand back and watch the spray after rinsing. Even flow and stronger pressure mean your faucet is clean and clear again. If the flow is still uneven after cleaning, the rubber washer inside may need replacing. If Your Head Does NOT Remove Follow the basic cleaning method above with one difference for Step 2: instead of a bowl, use a zip-lock bag. 1. Fill a medium-sized zip-lock bag with the solution of vinegar and warm water. 2. Place the spray head into the bag and dip it into the solution. 3. Secure the bag with a rubber band and squeeze out the air so the solution wraps around every nozzle hole. 4. Leave it to soak, then scrub, rinse, and test as described above. If Your Head Removes Not sure if your head is removable? Try turning it anticlockwise. If it moves, it is removable. A removable head lets you clean every corner properly. 5. Support the faucet pipe with one hand. With the other, turn the spray head anticlockwise. If it is stiff, wrap a dry cloth around the head for a better grip. 6. Drop the spray head into a bowl of the vinegar and warm water solution and soak as per the basic method above. 7. Scrub, rinse, and test as described in the basic method. 8. Turn the head back onto the pipe in a clockwise direction. Hand-tighten well, but do not over-tighten. CAUTION: Look at the rubber washer inside before you screw the head back on. If it looks flat, cracked, or worn out, replace it with a new one. Otherwise, you will end up with a leak. If you want to skip the DIY mix and get straight to a spotless faucet, our Begin Faucet Cleaner is formulated to dissolve limescale fast — no soaking, no guesswork. How to Maintain Your Health Faucet Head Good health faucet maintenance means cleaning on a regular schedule. How often depends on your water type: Water Type Cleaning Frequency Soft Water Every 2–3 months Hard Water Every month Commercial Bathrooms Every 2–4 weeks Not sure if you have hard water? Look for white residue on your taps or kettle, which is the clearest sign. India has many hard water zones across most cities and towns, so for most Indian homes, a monthly clean is the smartest habit to build. A few small habits each week will save you a big cleaning job later: Common Mistakes to Avoid When Cleaning a Health Faucet Head These are the most common mistakes
202 vs 304 Stainless Steel Sinks: Which is Better?
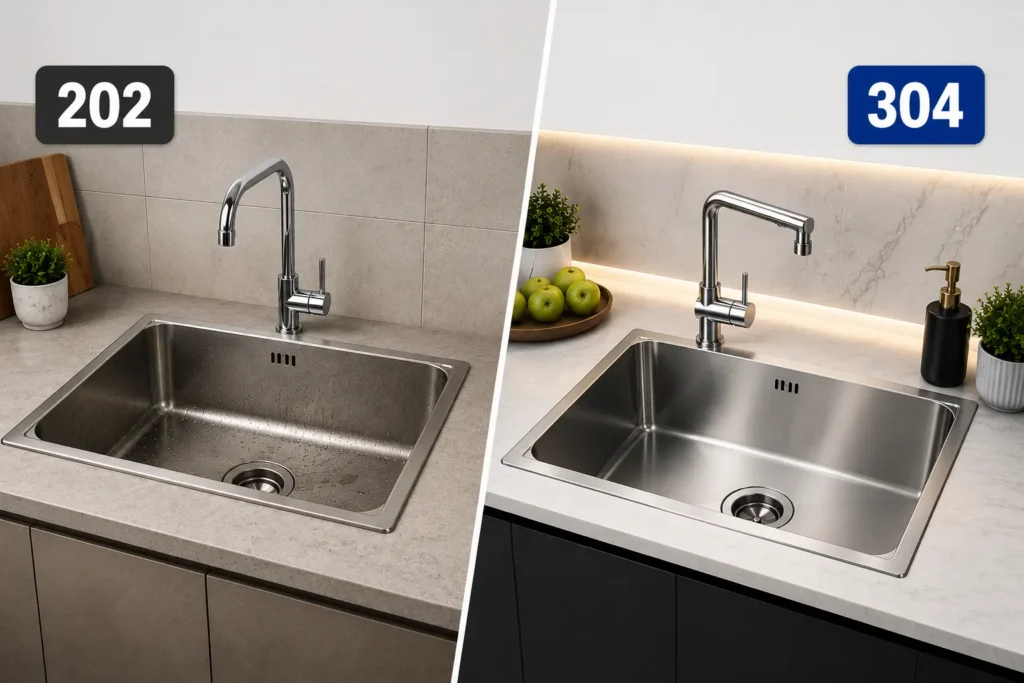
Most people pick a kitchen sink based on looks alone and regret the decision within the first few years of use. When choosing between 202 vs 304 stainless steel sinks, the grade of steel decides how long your sink lasts, how well it resists rust, and how easy it is to clean every day. The confusion between these two grades is real, especially in India. And many sellers will not explain the difference and will call both stainless steel. As a result, buyers often end up with the wrong sink for their kitchen and water conditions. This post breaks down exactly what sets these two grades apart, so you can choose with confidence. Understanding Stainless Steel Sink Grades Think of a stainless steel grade as a formula. It tells you which metals were mixed together and in what ratio. Manufacturers produce different grades because different products serve different purposes. A sink in a commercial kitchen takes far more punishment than one in a home. On the other hand, a home kitchen sink still needs to handle daily exposure to water, soap, and food acids without breaking down. Chromium and nickel are the two metals that matter most in this formula. Chromium coats the steel surface with a thin layer that keeps rust out. Nickel makes the steel tougher and keeps stains and corrosion from settling in over the years of use. More nickel in the formula means a more durable sink, and a higher price tag to match. What is a 202-Grade Stainless Steel Sink? 202-grade stainless steel is the more affordable option you will find in most budget kitchen sinks across India. Manufacturers make it by using manganese in place of a higher nickel content. The result is a more affordable steel that still offers a reasonable degree of protection against corrosion. Composition and Key Features: 202-grade steel carries roughly 16–18% chromium, around 3–4% nickel, and uses higher manganese content to compensate for the lower nickel compared to 304-grade. Chromium does provide a protective surface layer. But at lower nickel levels, the alloy cannot match 304-grade for long-term corrosion resistance. Pros: Cons: What is a 304-Grade Stainless Steel Sink? 304-grade stainless steel sits at the top end of what you will find in residential kitchen sinks. It costs more than 202-grade, and there is a clear reason for that. The metal composition is simply stronger and more capable of handling real kitchen conditions. Composition and Key Features: Grade 304 steel has 18% chromium and 8% nickel. This is why you will often see it labelled as 18/8 stainless steel — the two numbers refer directly to those percentages. This blend is food-grade, which means it is safe to be in contact with food, water, and cookware every day. Pros: Cons: 202 vs 304 Stainless Steel Sinks: Key Differences Knowing each grade separately is useful. However, seeing them side by side is what actually helps you decide. These differences directly affect how your sink performs five or ten years from now. Feature 202 Grade 304 Grade Chromium Content ~16–18% ~17–19.5% Nickel Content ~3–4% (higher manganese compensates) ~8% Rust Resistance Moderate Excellent Durability Good Excellent Lifespan 8–12 years (average use) 15–20+ years Coastal/Humid Areas Not recommended Recommended Price Range Budget-friendly Premium The single biggest factor separating these two grades is nickel content. Nickel is what gives 304-grade steel its ability to fight corrosion year after year. Because 202-grade uses manganese instead, it simply cannot match that level of protection — especially when water, soap, and food acids hit the surface every single day. As a result, the gap between these grades becomes even more significant when you factor in India’s diverse climate and water conditions. Which Stainless Steel Sink Grade is Better for Indian Kitchens? Indian kitchens are tough on sinks. Between hard water, acidic cooking, and humid climates, a sink here faces far more stress than one in a dry, temperate country. The grade you choose needs to match those real conditions — not just look good on a spec sheet. And here’s how each condition relates to the correct grade: For most Indian households, 304-grade is the practical choice, not because it costs more, but because it actually lasts. However, knowing the grade on paper is one thing. Verifying it before you buy is another matter entirely. How to Identify a Genuine 304 Stainless Steel Sink Many sinks on the market carry vague labels. Knowing what to check before paying protects you from ending up with a 202-grade sink at a 304-grade price. Knowing how to verify a grade is half the job. The other half is figuring out which grade actually fits your kitchen, your location, and your budget. When Should You Choose 202 Grade and When Should You Choose 304 Grade? Neither grade is universally wrong. The right choice depends on how you live, where you live, and how long you plan to stay. 202 Grade is a Good Fit When 304 Grade is Worth the Investment When Common Myths About Stainless Steel Sinks “304 stainless steel is 100% rust proof, correct?” It is rust-resistant, not rust-proof. Prolonged exposure to harsh chemicals or bleach-based cleaners can still damage the surface over time. “202 stainless steel is just poor quality.” That is not accurate. 202 is a legitimate steel grade that works perfectly well in the right conditions. The problem starts when buyers use it in situations it was never designed for. “A thicker gauge means a better steel grade.”These are two separate properties. Gauge measures the physical thickness of the steel sheet and affects dent resistance and noise dampening. Grade measures the alloy composition and determines corrosion resistance. A thick 202-grade sink is still more prone to rusting than a thinner 304-grade one. You need both working in your favour. “A shiny mirror finish means it is 304-grade.” The finish — matte, brushed, or mirror is a surface treatment applied after manufacturing. It has no connection to the steel grade underneath. Both 202 and 304-grade sinks
Toilet Cistern Basics: Types, Features, and Maintenance
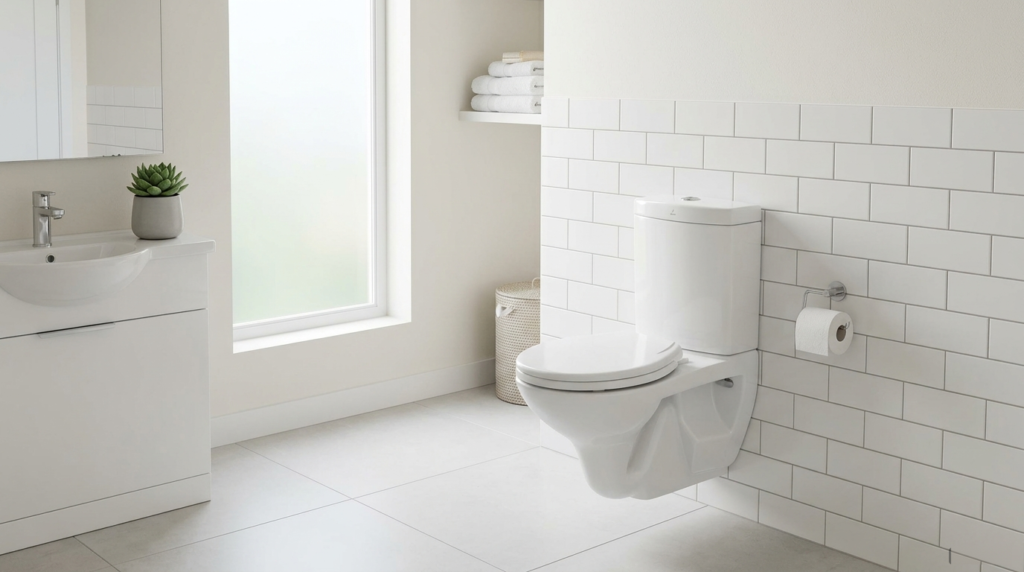
A toilet cistern is the tank that sits behind or above your toilet bowl. It stores water and releases it every time you flush. Simple as that. What most people don’t realise is how much this one part affects your home. Toilets use around 30% of all household water. So if your cistern isn’t working right, you’re likely wasting water and money. A good cistern gives you control. It refills quickly, flushes cleanly, and handles dozens of uses every day. Cisterns come in two main styles. Some are exposed and sit on top of the bowl. Others are recessed into the wall for a cleaner appearance. This guide walks you through types, key features, and easy maintenance tips. How Does a Toilet Cistern Work? The whole thing runs on a simple chain reaction. Each part triggers the next. When this cycle runs smoothly, you never notice it. But a cracked rubber seal or a stuck float valve changes that fast. You get weak flushes, running water, or both. Small fixes done early keep things working properly. Main Parts of a Toilet Cistern and Their Functions Everything inside your cistern has a job to do. All of them together make every flush work. Part Function Flush valve Opens to release water into the bowl when you flush. Fill valve Lets fresh water back into the cistern after each flush. Float valve Rises with the water level and shuts off the fill valve when full. Overflow pipe This removes any excess water if the cistern overflows. Flush button Triggers the flush valve when pressed. Rubber seal Sits at the base of the flush valve and stops water from leaking through. Knowing these parts makes a real difference. When something goes wrong, you’ll have a better idea of what to look for. Most cistern problems come down to just one or two of these components failing. Types of Toilet Cisterns Picking the right cistern isn’t complicated. You just need to know what’s out there. Concealed Toilet Cistern The tank goes inside the wall. Nothing is visible except the flush button. Benefits: Best for: Wall-hung pans in modern, minimal bathrooms. Cost range: ₹4,000 – ₹15,000+ Close-Coupled Toilet Cistern The tank and pan come as one unit. This is what you’ll find in most Indian homes. Benefits: Best for: Standard home bathrooms on any budget. Cost range: ₹2,000 – ₹8,000 Wall-Hung Toilet Cistern The tank goes behind the wall. Pan floats off the floor with no base touching the ground. Benefits: Best for: Premium renovations where design matters as much as function. Cost range: ₹6,000 – ₹20,000+ Low-Level Toilet Cistern The tank sits just above the pan on the wall. A short pipe connects the two. Benefits: Best for: Smaller bathrooms or older properties that need a refresh. Cost range: ₹1,800 – ₹6,000 High-Level Toilet Cistern The tank is mounted high up on the wall. Water falls from a height and hits the pan hard. Benefits: Best for: Traditional homes or anyone after a vintage bathroom look. Cost range: ₹1,500 – ₹5,000 Concealed vs Exposed Toilet Cisterns: Which is Better? Both do the same job. But they suit very different bathrooms. Factor Concealed Exposed Appearance Hidden behind the wall — very clean look The tank sits out in the open Maintenance access You need to open a wall panel Right there — no panel needed Cost Costs more to buy and fit Much easier on the budget Water efficiency Usually comes with a dual flush built in Depends on the model you buy Installation complexity Takes longer and needs more skill Any plumber can do it quickly Durability Lasts well if fitted properly Parts wear out but can be replaced easily Got a bigger budget and a modern bathroom? Go concealed. Working with less money or an older style bathroom? Exposed makes more sense. One looks better. The other is just easier to live with. How to Choose the Right Toilet Cistern for Your Bathroom No single cistern suits every bathroom. Run through these six things before you buy: 1. Bathroom Size: Small bathrooms work better with a concealed or wall-hung cistern. Both save floor space and reduce visual clutter. 2. Wall Construction: Concealed cisterns need a solid, load-bearing wall behind them. Hollow or partition walls won’t hold the frame safely. 3. Water Pressure: Low water pressure areas need a fill valve rated for it. Wrong valve fit means slow refills, weak flushes. 4. Dual Flush: A dual flush cistern cuts water use significantly. Most new bathroom builds now include one as standard. 5. Budget: Expect to pay around ₹1,500 for a basic exposed cistern. A premium concealed system can go beyond Rs 15,000, including installation. 6. Design Style: Modern bathrooms suit concealed or wall-hung options. Traditional or period bathrooms look better with exposed cisterns. Always check that your chosen cistern works with your existing pan and plumbing before purchasing anything. Common Toilet Cistern Problems and How to Fix Them Most cistern problems show up early. Catching them fast saves water and money. Cistern Not Filling The tank empties after a flush, but barely refills or takes too long. A blocked or faulty fill valve is usually the cause, though low water pressure in your area can do the same thing. Clean or replace the fill valve — if pressure is the issue, call a plumber. Continuous Running Water Water keeps trickling into the bowl long after flushing. A worn rubber seal or a float valve sitting too high keeps the flush valve from closing properly. Replace the rubber seal first — it’s cheap and fixes the problem most of the time. Weak Flush The flush clears the bowl poorly or needs two goes. A low water level or a partially blocked flush valve can cause weak flushing performance. Raise the level of water in the cistern or check the valve for obstruction. Leaking Cistern Water pools around the base of the toilet or drips down the outside of the tank. A cracked cistern
Rimless vs. Rimmed Western Toilets: Which is Better
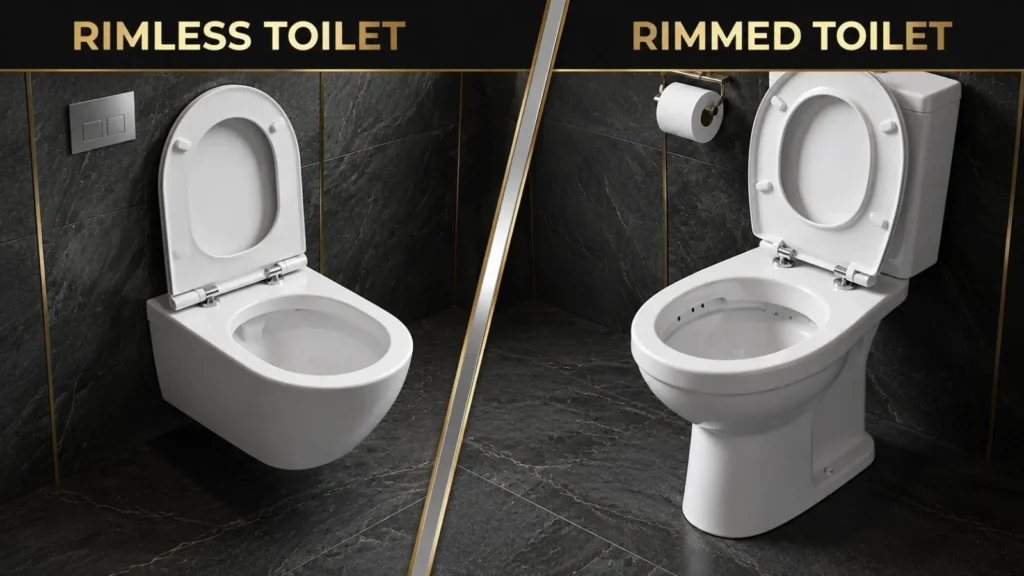
Buying a new toilet feels simple until you actually start shopping. Suddenly, you are staring at two very different designs and wondering which one is worth your money. Rimless and rimmed western toilets may look similar from a distance, but they work quite differently. A rimmed toilet has a hidden channel under the bowl’s edge. A rimless toilet has an open rim with no hidden channel at all. The right choice will depend on hygiene, ease of cleaning, flushing power, and your budget. By the end of this guide, you will know exactly which toilet suits your home. What is a Rimmed Western Toilet? A rimmed western toilet follows a traditional toilet design that has been the standard for decades. It has a concealed ledge called the under-rim channel that runs along the inside edge of the bowl. Water enters through small holes in the rim and spreads around the bowl when flushing. Rimmed toilets are familiar and inexpensive. But this classic design comes with some trade-offs worth knowing about. What is a Rimless Western Toilet? A rimless western toilet uses a completely open rim design with no hidden ledge inside the bowl. It skips the rim holes entirely and pushes water directly into the bowl. Water shoots out in a controlled arc from the back or sides of the bowl. This design was developed specifically to improve hygiene and make cleaning easier. Urban homeowners in Europe and India are choosing this design more and more. Rimless vs. Rimmed Toilets Comparison Choosing between rimless vs. rimmed western toilets gets easier when you see the differences laid out clearly. Here is a quick comparison across the most important features. Feature Rimless Toilet Rimmed Toilet Hygiene No hidden dirty spots Bacteria hide under rim Cleaning Effort Fast, easy wipe-down Needs a brush and effort Water Efficiency Cleaner flush, less waste Uses slightly more water Flush Coverage Covers the entire bowl Misses some spots Limescale Risk Rarely builds up Collects under the rim Price Range Costs more upfront Lower upfront cost Appearance Clean, modern look Classic bathroom style Best For Hygiene-first households Tight budget buyers Next, let us get into the flushing system because how water moves inside the bowl makes a bigger difference than most people expect. How Do Their Flushing Systems Differ? The two designs differ primarily in how they flush water through the bowl. Here is what actually happens when you press the flush button. Water Distribution In a rimmed toilet, water flows in through small holes hidden under the rim ledge. These holes rarely cover the entire bowl evenly. In contrast, a rimless toilet sends water in one controlled arc or swirl, giving you full toilet bowl coverage every single flush. Flush Power Rimless toilets use direct water flow, so less water does more work. As a result, you rarely need a second flush. Rimmed toilets, however, sometimes leave residue behind because the water distribution is weaker in certain spots. Splash Control Many people worry that rimless toilets splash more. Modern rimless designs actually control splash through smart bowl geometry — the shape guides water downward, not outward. On the other hand, rimmed toilets are not splash-free either. The hidden jets under the rim can direct water outward toward the seat during flushing. Which Toilet is Easier to Clean? Cleaning a toilet sounds straightforward. However, the design you choose decides how much time and effort you actually spend on it. Hidden Areas A rimmed toilet has an under-rim channel that you simply cannot see or reach properly. Dirt and moisture accumulate inside it undetected. A rimless toilet has no hidden spaces at all — every surface is open, visible, and reachable. Daily Cleaning Requirements Limescale and Dirt Build-Up Hard water causes limescale to accumulate inside the rim channel. Many Indian cities, including Delhi, Mumbai, and Jaipur, have notoriously hard water supply. Because of this, mineral deposits in rimmed toilets build up fast and are nearly impossible to remove completely. A rimless toilet lets you spot and scrub limescale before it becomes a real problem. Which Option Offers Better Hygiene? A clean-looking toilet is not always a hygienic one. The design of your bowl directly determines how easily germs accumulate and persist inside it. Bacteria Accumulation Bacteria thrive in dark, moist, hidden spaces. The under-rim channel in a rimmed toilet stays consistently wet and rarely gets disinfected properly. The Journal of Applied Microbiology published research in 2000 that raised serious questions about under-rim hygiene. Barker and Bloomfield found that Salmonella enteritidis bacteria formed stable colonies inside the rim channel of toilet bowls — surviving daily cleaning routines because standard products simply cannot penetrate that hidden space effectively. Germ-Prone Areas Odor Control Trapped waste particles inside the rim channel break down slowly and cause a persistent toilet odour. Because no residue remains hidden in a rimless bowl, bad smells have nowhere to develop. For a genuinely germ-free toilet, the open design wins clearly. Rimless vs. Rimmed Toilets in Hard Water Areas Hard water carries high levels of calcium and magnesium. Over time, these minerals leave stubborn deposits inside your toilet bowl and channels. For Indian homeowners in cities like Delhi, Jaipur, and Ahmedabad, this is a daily reality. Hard water in a rimmed toilet: With a rimless toilet, however, all surfaces are visible. Mineral deposits form only on visible surfaces, so you can spot and address them early. Regular toilet descaling becomes straightforward — apply a descaling product, scrub, and done. Hard water limescale in India builds up faster than most people expect. Because of this, a rimless toilet saves you significant long-term maintenance headaches. For homes with a hard water supply, the rimless design is clearly the more practical long-term choice. Cost Comparison Beyond the Purchase Price The buying price is just one part of the equation. Here is what you actually spend over time. 1. Initial Cost: Rimmed toilets starting from Rs. 5000 and going up to Rs. 15000. Rimless toilets begin from a price point of Rs.
P Trap vs S Trap: Key Differences, Uses & Which is Better
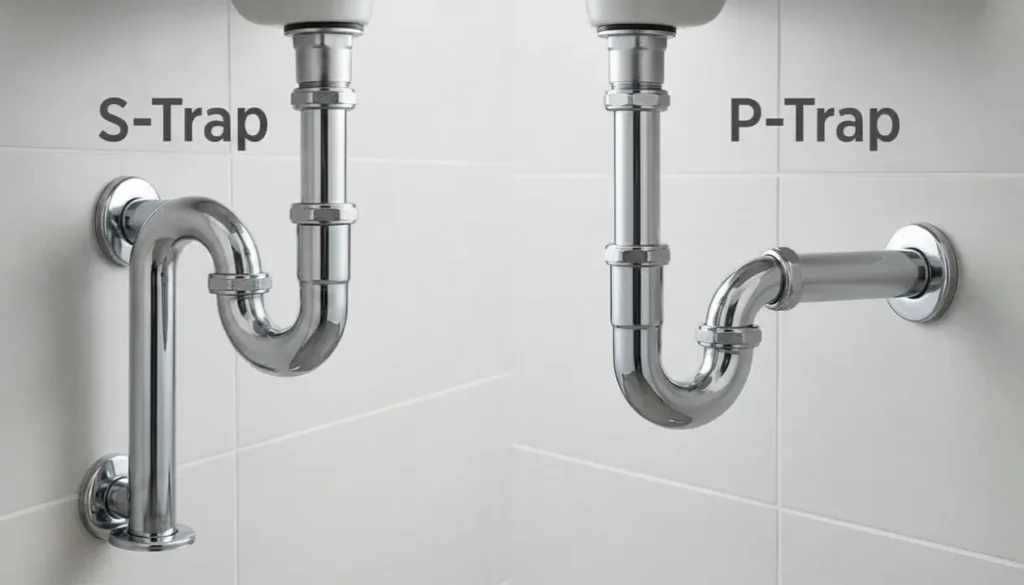
You’re renovating your bathroom. The plumber holds up two pipe fittings and asks, “P trap or S trap?” Suddenly, the p trap vs s trap debate feels very real. Most homeowners in India have no idea which one to pick. A wrong choice can cause bad smells, leaks, or even failed inspections. So before you nod and let the plumber decide, let’s make sure you understand what’s going on. In this blog, you will learn about the main differences, where each trap works best and which one is better for Indian bathrooms. Let’s start with the basics. What is a Plumbing Trap and Why Does It Matter? A plumbing trap is just a bent pipe. It is located under your bathroom drain, toilet or sink. That bend holds a small amount of water at all times. Simple as that. That trapped water does something really important. It blocks sewer gases from creeping up through your pipes and into your bathroom. Gases like methane smell terrible and can actually be harmful. The water acts like a plug, stopping those gases at the bend. Plumbers call this a “water seal.” Now, not all traps look the same. Across Indian homes, the two most common plumbing trap types are the P trap and the S trap. Both hold water. Both block gases. But their shapes are different, and that difference matters more than most people think. Use the wrong trap in the wrong spot, and you’ll deal with slow drains, gurgling sounds, and a bathroom that never stops smelling. That brings us to the real question — what makes a P trap different from an S trap? P Trap vs S Trap: Know the Basic Difference A P-trap is named after its shape. Look at it from the side, and it resembles the letter “P.” The pipe curves down, loops back up, and then exits horizontally through the wall. The p trap’s meaning is straightforward — it’s a wall-outlet trap that holds a reliable water seal without depending on the floor below. An S trap also gets its name from its shape. Viewed from the side, it looks like the letter “S.” The pipe curves down, loops back up, and then exits downward through the floor. The s trap meaning is simple too — it’s a floor-outlet trap, and it’s been a go-to choice in older Indian bathroom designs for decades. The real difference between a P-trap and an S-trap comes down to one thing: where the pipe goes after the bend. That single detail changes how each trap performs, how long the water seal lasts, and where you can actually install it. Feature P Trap S Trap Shape/Design Looks like the letter “P” Looks like the letter “S” Pipe exit direction Exits through the wall Exits through the floor Common use in India Modern flats, modular bathrooms Older homes, floor-drain setups Siphonage risk Low Higher Ease of installation Needs wall outlet access Easier in floor-drain layouts Water seal reliability More consistent Can dry out faster Both traps have their place, but how they perform in real Indian bathrooms tells a much bigger story. Where are P Traps and S Traps Used in Indian Bathrooms? Indian bathrooms do not follow one standard layout. Older homes, newer apartments, and independent houses all have different plumbing setups. So the trap you need depends a lot on where your drain outlet actually sits. P-traps work best in: S traps work best in: Many older Indian homes still rely on S-traps simply because floor outlets were the standard for decades. Brands like Hindware, Cera, and Parryware offer both p-trap toilets and s-trap toilets, so availability is rarely the issue. The real question is which trap actually performs better in daily use. That means weighing up the pros and cons of each option. Pros and Limitations of P Trap and S Trap Toilets Both traps do the same basic job. But they don’t perform the same way in real bathrooms. Here’s what each one gets right and where each one falls short. P Trap Toilet A p-trap toilet suits homes where the drain pipe comes out from the wall. Pros: Limitations: S Trap Toilet A s trap toilet is built for bathrooms where the drain goes straight into the floor. Pros: Limitations: The self-siphonage problem is what makes most plumbers hesitant about S traps today. Water rushing through too quickly pulls the trapped water right out of the bend. After that, nothing blocks the sewer gases. With that clear, let’s figure out which trap actually makes more sense for your bathroom. Which is better: P Trap or S Trap? Straight answer — the P trap wins on performance. It holds the water seal better, handles daily use more reliably, and carries far less siphonage risk. Most licensed plumbers and modern building codes back this up. In the p trap vs s trap debate, the P-trap is simply the stronger design. That said, the S trap is not a bad choice in every situation. For many Indian homeowners, ripping out floor outlets and replumbing an entire bathroom just isn’t practical. In those cases, a properly installed S-trap does the job fine. So here’s a simple way to decide: Your bathroom layout makes the final call here. Now let’s talk about one more thing most people overlook: how to maintain whichever trap you choose. Common Mistakes to Avoid When Choosing a Toilet Trap Most bathroom problems don’t start with bad products. They start with avoidable mistakes during selection and installation. Here are five things homeowners get wrong all the time. Keeping these mistakes in mind saves you money, time, and a very unpleasant bathroom. Wrapping It Up Both traps work. Both have their place in Indian bathrooms. But if you’re building fresh or doing a full renovation, the P trap is the smarter, more reliable pick. It holds its water seal better and gives you fewer headaches over time. That said, your drain outlet makes the final decision, not
Pull Down vs Pull Out Kitchen Faucet: Key Differences Explained
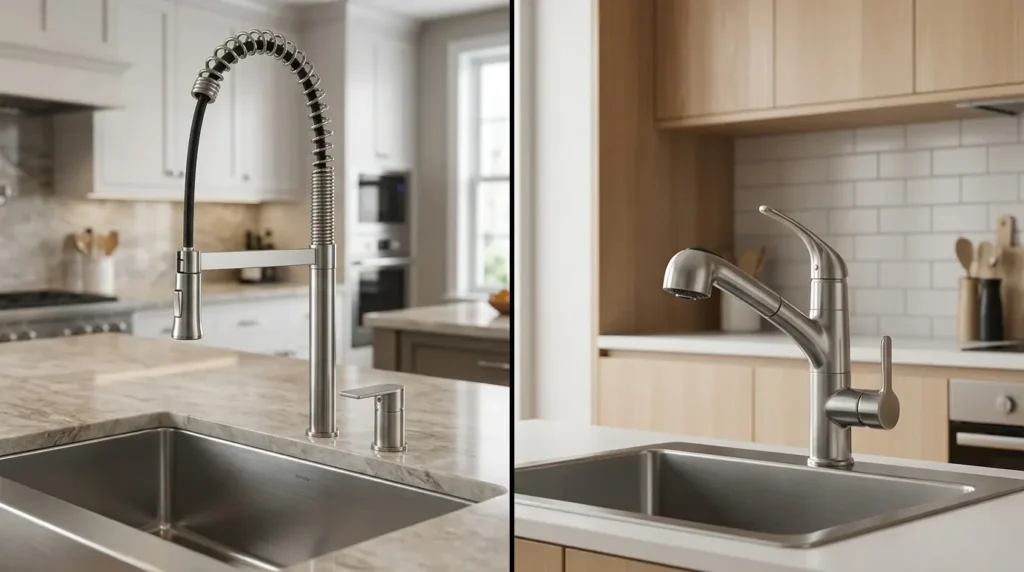
You’re staring at two faucets online. They look almost the same. But the price, the shape, and the reviews are all different. Sound familiar? Here’s the thing — choosing between a pull-down vs. pull-out kitchen faucet trips up a lot of homeowners. Both are great. Both spray water. But they work differently, and the wrong pick can drive you crazy every single day. Your kitchen size, sink depth, and how you use your sink all play a role in this decision. By the end of this, you’ll know clearly which one belongs in your kitchen. So, let’s start with the basics. What is a Pull Down Kitchen Faucet? A pull down kitchen faucet has a tall, curved neck. It looks like an upside-down “J.” That high arc gives it a bold, modern look that fits right into today’s kitchens. The spray head sits at the top of that curved neck. You grab it and pull it straight down into the sink. It moves on a flexible hose, so you can aim the water exactly where you need it. This faucet works best with deep, large sinks. The spray head snaps back into place with a magnetic docking system, so it never droops or hangs loose. What is a Pull Out Kitchen Faucet? A pull out kitchen faucet has a shorter, lower spout. It sits closer to the counter. There’s no tall arc here, just a simple, compact design. With this faucet, the spray head pulls forward, toward you. You extend it out over the counter or sink as needed. It’s great for rinsing fruits and vegetables right at the counter level. This faucet fits small, shallow sinks really well. It also works great in kitchens with low cabinets above the sink. The longer hose lets you reach spots that a fixed faucet never could. The look is clean and minimal. Nothing fancy, just functional. Pull Down vs. Pull Out Kitchen Faucet — Key Differences Factor Pull Down Pull Out Spout Height Tall, high-arc gooseneck Short, low-profile spout Spray Direction Straight down into the sink Forward and outward toward you Best Sink Type Deep, large sinks Shallow, small sinks Hose Length Shorter hose Longer hose Splash Risk Lower splash risk Higher splash risk Cabinet Clearance Needs more overhead space Works with low cabinets That table gives you a quick snapshot of the difference between pull down and pull out faucet styles. However, numbers and labels only tell part of the story. Each faucet has real strengths. Each one has a few drawbacks, too. Knowing both sides helps you make a smarter choice for your kitchen. So, let’s dig into the pros and cons of each one right now. Pros and Cons of Pull Down Faucets Before you fall in love with that tall, sleek design, know that the disadvantages of pull down faucets are worth a good look too. Pros: Cons: Pull down faucets genuinely shine in the right kitchen. But squeeze one into the wrong space, and the frustration adds up quickly. Let’s see how pull out faucets compare when it comes to their own strengths and weak spots. Pros and Cons of Pull Out Faucets Pull out faucets quietly, get the job done every day. The points below show what they do well and where they fall short. Pros: Cons: Good stuff and bad stuff on both sides, right? Next up, let’s pin down which faucet actually belongs in your specific kitchen. Which One Should You Choose? People ask all the time which is better, pull down or pull out faucet, and the honest answer is it depends on your kitchen setup. Choose a Pull Down Faucet if: Choose a Pull Out Faucet if: Your kitchen already knows the answer. Match the faucet to your sink size, your cabinet height, and how you actually cook, and the right choice becomes pretty obvious. Key Factors to Consider Before Buying Knowing what to look for when buying a kitchen faucet saves you from expensive regrets down the road. Here are six things to check before you hand over your money. Wrapping It Up Choosing between a pull-down vs. pull-out kitchen faucet really comes down to two things. How deep is your sink? And how do you actually use your kitchen every day? Pull-down faucets win in bigger kitchens with deep sinks and heavy cooking habits. Pull-out faucets are apt for tighter spaces with shallow sinks and low cabinets. The most popular faucet is not always the right one for your home. The right one is the one that fits your kitchen like it was made for it. Grab a measuring tape right now and check your sink depth. That one number will point you straight to the perfect faucet. Frequently Asked Questions Can I Replace a Pull-Out Faucet with a Pull-Down Faucet Without Replumbing? Yes, most swaps need no replumbing at all. Just check your sink hole size and make sure your under-sink cabinet has enough vertical room for the hose to hang freely. Do Pull-Down or Pull-Out Faucets Have More Water-Saving Options? Both types carry WaterSense-certified models that use 1.5 gallons per minute or less. Always check the GPM rating on the product label before buying. Which Type of Faucet is Easier to Clean and Maintain? Most modern faucets use soft rubber spray nozzles that you can clean just by rubbing your finger across them. A quick weekly wipe down keeps mineral buildup from becoming a real problem.
Is Bidet Better Than Wiping? Here’s What Science Says
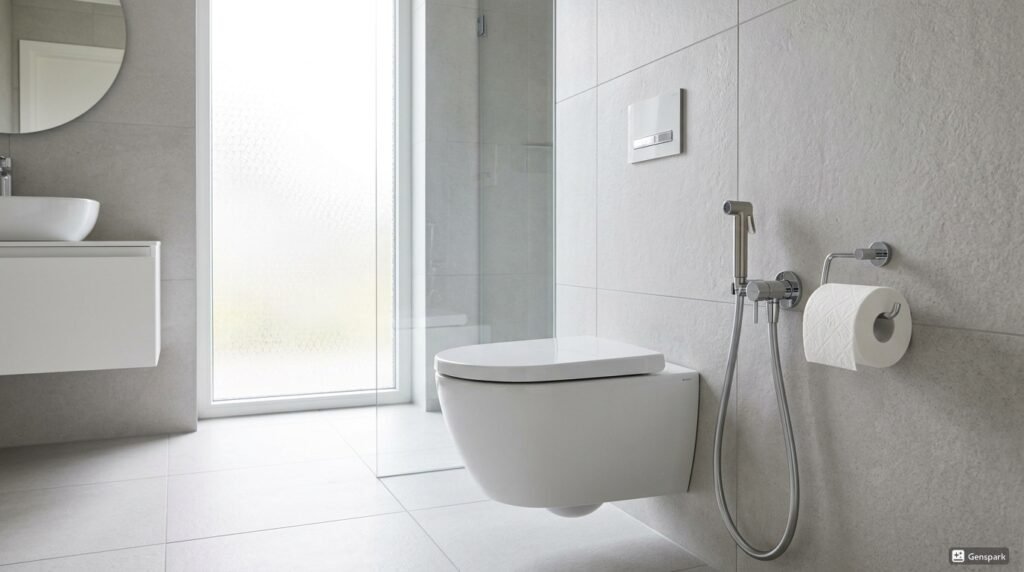
So, is bidet better than wiping — or is toilet paper just fine? If you’ve ever wondered, you’re not alone. Millions across South Asia have used water for personal hygiene forever. The West is only now catching up. But beyond habit and culture, there’s a real question here: which one is actually cleaner? Which one is kinder to your body — and the planet? Science has some surprising answers. Read on, because what you find out might just change what you do in the bathroom every day. What Actually Happens When You Wipe? Think about it honestly. You’re using dry paper to clean a wet, sensitive area. That’s not really cleaning — that’s smearing. Toilet paper moves bacteria around more than it removes them. In fact, studies show it can leave behind up to 8 times more faecal bacteria than water cleansing does. That’s a lot of bacteria you’re walking around with. It gets worse. Wiping repeatedly creates friction. That friction causes tiny micro-tears in the skin around the anus. You can’t see or feel them. But bacteria can find them easily — and that’s how infections start. Three things wiping does that most people ignore: Is a Bidet More Hygienic? What Research Shows The research is pretty clear. Water cleans better than paper. A 2011 study in Epidemiology & Infection found that bidet use significantly reduced bacterial contamination compared to wiping with toilet paper. This isn’t just academic research. The American Society of Colon and Rectal Surgeons (ASCRS) actually recommends water cleansing for patients recovering from colorectal surgery. That says a lot about how effective water is. So, is bidet better than wiping when it comes to hygiene? The evidence says yes. But not all bidets work the same way. Here’s a quick comparison to help you choose: Feature Electric Bidet Manual/Handheld Water pressure Adjustable Fixed Warm water Yes No Spray angle control Yes Manual Price range ₹8,000–₹40,000 ₹400–₹1,200 The handheld bidet, what most Indian homes call a health faucet, is affordable and works well. Electric bidets offer more comfort and control, but cost significantly more. Health Benefits of Bidets Water doesn’t just clean better. It’s genuinely kinder to your body. Here’s what that looks like in real terms: 1. Haemorrhoid Relief: Dry paper on already sore, swollen tissue? That’s just making things worse. Close to 75% of haemorrhoid patients say they felt noticeably less pain once they switched to water cleansing. The difference is immediate for most people. 2. Lower UTI Risk: Wiping front to back sounds simple. But it doesn’t always happen that way. For women and older adults, especially, bacteria travel fast toward the urethra. Water washes it away cleanly, without the guesswork. 3. Gentler for IBD and IBS: Someone with irritable bowel syndrome or inflammatory bowel disease may use the toilet six, eight, or ten times a day. Wiping that many times tears up sensitive skin fast. Water makes each visit far less painful. 4. Safer After Surgery: After colorectal or abdominal surgery, wiping can pull at stitches, cause bleeding, or simply hurt too much. Water cleansing lets patients stay clean without any of that trauma. 5. No Contact Dermatitis: Most toilet paper brands use chlorine bleach and added fragrances. Dermatologists regularly see patients with chronic rashes and irritation down there — and toilet paper chemicals are a surprisingly common culprit. The health case for water cleansing isn’t a trend. It’s based on actual clinical experience and patient outcomes. The Environmental Cost: Paper vs Water Toilet paper feels harmless. But the numbers behind it are staggering. Global toilet paper production cuts down approximately 27,000 trees every single day. Making just one roll uses around 130 litres of water. Meanwhile, a single bidet wash uses only about 0.5 litres. That’s not a small gap — that’s a chasm. Toilet Paper Bidet Water per use (production) ~130 litres ~0.5 litres Trees used globally/day ~27,000 0 Annual cost (India est.) ₹2,000–₹4,000 ₹0 (after setup) The average American spends around $40 a year, roughly ₹3,300 — just on toilet paper. Indians using TP regularly aren’t far behind. Here’s the irony. In water-stressed states like Rajasthan and Maharashtra, people worry about saving every drop. But producing the toilet paper they use costs hundreds of litres more per sitting than a bidet ever would. Bidets in the Indian Context: Not New, Just Evolved India doesn’t need convincing about water cleansing. Most Indian bathrooms already have a health faucet — that handheld jet spray next to the toilet. Water-based hygiene has always been the default here. But are you using it correctly? Here’s the right way: There’s a simple difference worth knowing. A health faucet is a handheld spray you control manually. A bidet seat is a fixed nozzle built into the toilet that sprays automatically. Electric bidet seats are quietly gaining ground in urban India. Post-COVID hygiene awareness pushed people to rethink bathroom habits — and once someone tries an auto-spray bidet seat, they rarely go back. When Might Wiping Still Make Sense? Water is better, but toilet paper isn’t going away anytime soon. And honestly, that’s fine. There are real situations where wiping is just more practical: 1. Travelling: Bidets aren’t available everywhere, and you can’t carry one on a train. 2. Power Cuts: Electric bidet seats go completely useless the moment the electricity goes out. 3. Public Restrooms: Mostly still offer toilet paper. When water isn’t an option, choose bamboo toilet paper or unbleached TP. Both are gentler on skin and far kinder to the environment than regular bleached paper. One more thing worth knowing — over-washing with a bidet isn’t ideal either. Excessive use can disrupt the natural flora of the perianal area. Moderation matters here, too. Final Thoughts The science doesn’t leave much room for debate. Bidets clean better, treat your skin more gently, and cost the planet far less than toilet paper does. So, is bidet better than wiping? For most people, in most situations — yes. For Indian readers, this isn’t even a big
How to Use Health Faucet Properly for Better Hygiene
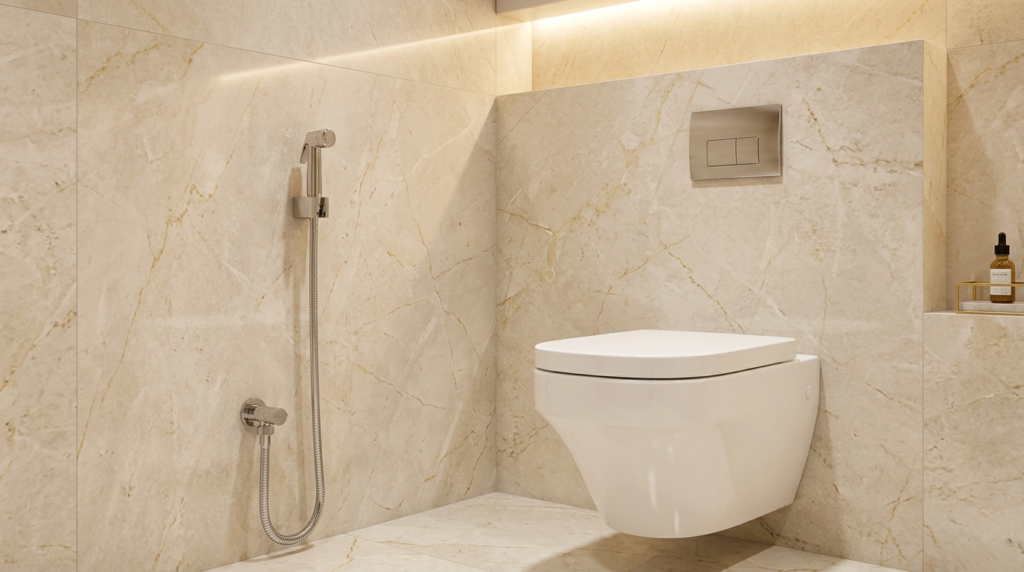
Ever finished using the toilet and still felt not quite clean enough? That’s exactly where a health faucet steps in and changes things. A health faucet is a handheld spray device attached near your toilet. It gives you a quick, targeted rinse — far more effective than dry toilet paper alone. Most people have one installed but never really learn how to use it properly. And that small gap in knowledge can affect your hygiene more than you’d think. This guide walks you through the right way to use a health faucet, the real benefits it offers, common mistakes people make, and how to keep it clean. Let’s start with the basics. How to Use a Health Faucet Properly Honestly, no one really teaches you how to use a health faucet. You put it up, you look at it, and you work it out yourself. But when you get it right, it makes a bigger difference than you might think. Here’s What You Should Do: Step 1: Stay seated after you finish: Don’t rush off just yet—sitting helps everything stay where it should, so the rinse actually works. Step 2: Point the nozzle before you spray: Don’t rush it. Take a moment to aim, then pull the trigger. A small adjustment up front prevents you from spraying in the wrong place altogether. Step 3: Squeeze the trigger gently, just a little at first: No need to go hard right away. A gentle push gives a light, steady stream. That’s really all you need for a good clean. Step 4: Move slowly: Don’t hold it in one place. As you rinse, move the nozzle a little bit. That way you’re not missing spots or over-spraying one area.” Step 5: Pat dry before getting up: Release the trigger and then pat the area dry with toilet paper or a clean cloth. Not good for your skin to walk away from it while it’s still wet. Quick Tip for Women: Always rinse front to back. This direction prevents bacteria from traveling toward the urinary tract and helps prevent infections. Water pressure is more important than most people think. If you go too high, you can get irritation. Too low and it won’t wash right. The best flow for day-to-day use is steady flow in the middle to low range. Benefits of Using a Health Faucet A health faucet does more than just keep you clean. Here’s what you actually get from using one regularly: Reduces toilet paper use, really adds up to savings over months and years, and saves money in the long run. Note: Studies have shown that toilet paper alone only removes some fecal matter. The water purification is much more thorough and hygienic. Health Faucet vs Bidet Hand-Free Toilet Spray vs Toilet Paper Not sure which option is right for you? This quick comparison breaks it down simply. Feature Health Faucet Bidet (Hands-free) Toilet Paper Cost Low High Ongoing expense Hygiene Level High Very High Moderate Water Usage Low–Moderate Moderate None Ease of Use Easy Very Easy Easy Installation Simple Requires plumber None Eco-Friendliness Good Good Poor A health faucet is the best choice for most households – affordable, easy to install, and very effective for daily hygiene. If you want a completely hands-free experience and don’t mind the higher upfront cost, then a bidet hand-free is for you. Toilet paper will do in a pinch, but as a long-term hygiene solution, it just doesn’t compare. Common Mistakes to Avoid While Using a Health Faucet Even with a simple tool like a health faucet, some bad habits can make it less effective or cause discomfort. 1. High pressure of the spray: If you adjust it too high, it may hurt, as well as cause skin irritation. Start low and work your way up. 2. Nozzle direction is wrong: Rinsing from back to front pushes bacteria toward the urinary tract. The risk of infection is higher, especially for women. 3. Not drying the area after rinsing: Any residual dampness provides moisture that can contribute to skin irritation and fungal problems over time. 4. Allowing young children to use it unsupervised: Little kids can squeeze the trigger too hard and spray everywhere but where they’re supposed to. Make sure you’re supervising until they’ve got the hang of it. 5. Skipping nozzle cleaning: When the nozzle’s dirty, bacteria collect fast. That pretty much ruins the whole point of rinsing for hygiene. 6. No cleaning between shares: If you have more than one person using the same faucet, be sure to clean the nozzle between uses to avoid cross-contamination. How to Clean and Maintain a Health Faucet A clean health faucet performs better and lasts longer. Some simple steps to keep yours in good shape. Quick Tip: Don’t spray bleach directly onto the nozzle. This can damage the internal rubber seal and significantly reduce the life of your health faucet. Who Can Benefit Most From a Health Faucet A health faucet is more than a bathroom upgrade — some people need it more than others. 1. Pregnant Women: Rinsing is safer and more comfortable than wiping in pregnancy. 2. Senior Citizens: Personal Hygiene made easy without the hassle of stretching or turning. 3. Hemorrhoids: Water rinsing is soothing rather than irritating the area further. 4. IBS or Digestive Issues: If you find yourself going to the bathroom a lot, a quick rinse makes dealing with it much simpler. 5. Women on their Periods: You will feel fresh and clean all day. 6. Limited Mobility Persons: Reduces dependency on others in personal hygiene tasks. Final Thoughts Good hygiene doesn’t have to be complicated. A health faucet is one of the simplest changes you can make in your bathroom — and the difference it makes is very real. You’ve seen how to use it correctly, step by step. You’ve also looked at the benefits, the common mistakes to sidestep, and how easy it is to keep clean with just a few minutes of care each
Bathroom Floor Drain Trap Types, Tips, and Maintenance
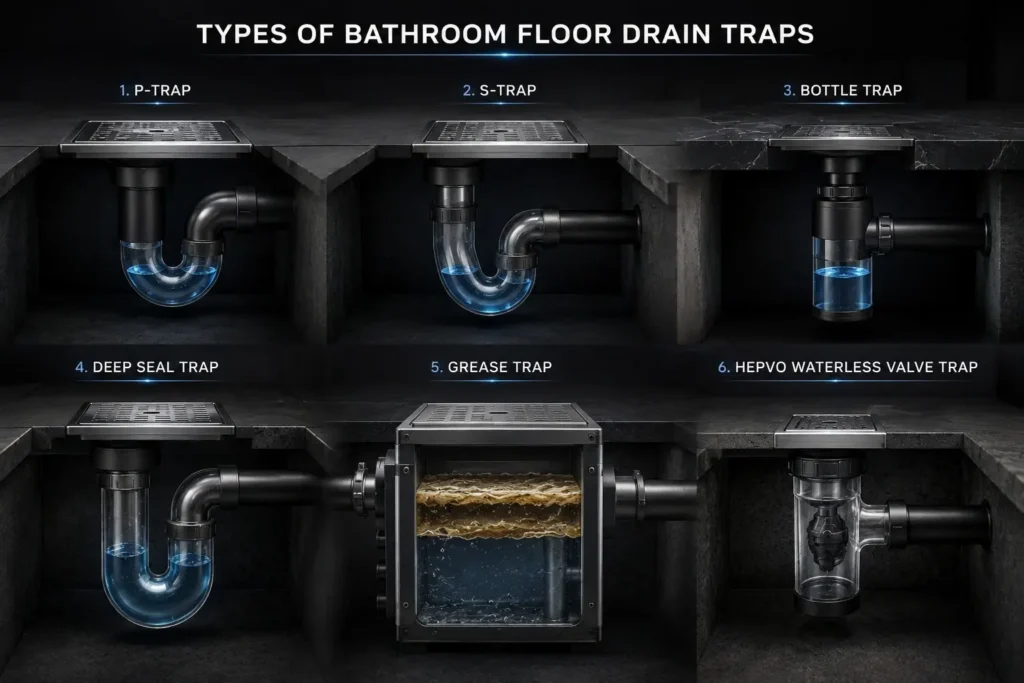
That smell creeping out of your bathroom floor isn’t random — your bathroom floor drain trap is likely the culprit. Most homeowners ignore this small but mighty component until something goes wrong. And by then, you’re dealing with foul odors, slow drains, or worse — sewer gas sneaking into your home. Here’s the good news. Once you understand how it works, you can easily stay ahead of the problem. This blog covers the different types of floor drain traps, how they keep your bathroom fresh, and simple maintenance tips to avoid blockages and bad smells. Stick around — this is easier to manage than you think. What is a Bathroom Floor Drain Trap A bathroom floor drain trap is a small curved pipe fitted beneath your floor drain. It sits quietly under the surface, completely out of sight. Think of it as a silent gatekeeper. Its one job is to stop unwanted things — sewer gases, insects, and debris — from traveling up through the drain and into your bathroom. Without it, your bathroom would be directly connected to the sewer system. Hence, foul smells and potential health hazards could enter your home freely. It’s a simple component, but it plays a surprisingly important role in keeping your bathroom clean, safe, and odor-free every single day. Difference Between Floor Drain and Floor Trap These two terms sound similar, but they do very different jobs. Here’s a quick way to tell them apart. Feature Floor Drain Floor Trap Purpose Collects and removes water Blocks gases, pests, and debris Location Visible on the floor surface Hidden beneath the floor drain Water Seal No Yes Visibility Easy to see Out of sight Works Alone No No Neither one works on its own. The floor drain handles the water, while the floor trap handles everything you don’t want coming back up. Strip one away, and the system breaks down. Together, though, they quietly do their job every single day without you ever having to think about it. Types of Bathroom Floor Drain Traps Not all bathroom floor drain traps look or work the same way. Here’s a breakdown of the most common types so you can spot which one belongs in your bathroom. 1. P-Trap Picture the letter “P” flipped on its side — that’s exactly what this one looks like. It’s the go-to choice for most homes today, used under sinks and floor drains alike. The design is straightforward, which makes both installation and cleaning far less of a hassle. 2. S-Trap This one curves twice, forming a shape that looks like the letter “S.” Older homes have them everywhere, but most building codes today won’t allow new installations. The biggest issue is self-siphoning — the trap tends to drain its own water seal dry, which defeats the whole purpose. 3. Bottle Trap This is a nice little trap with a small cylindrical body that fits nicely under the drain. Ideal for tight spaces, this is why you will often see this under pedestal sinks. It has a clean, minimal look and is a popular choice for modern bathroom designs. 4. Deep Seal Trap This one has a deeper water column – around 75mm compared to the standard 50mm. That extra depth ensures the seal takes much longer to evaporate. And making it a solid pick for bathrooms or utility rooms that rarely see regular use. 5. Grease Trap Its job is to catch fats and oils before they sneak into your drainage system. You’ll mostly find it in kitchens, but some bathrooms share drainage lines where one becomes necessary. Skip it where it’s needed, and you’re looking at stubborn, greasy blockages down the line. 6. HepvO Waterless Valve Trap Instead of relying on standing water, this trap uses a soft internal valve that flexes open when water passes through, then snaps shut on its own. No water means no evaporation problem — making it a genuinely clever solution for drains that go weeks without any use. Common Signs Your Bathroom Floor Drain Trap Has a Problem The trap in your floor drain usually gives you some hints before it stops working properly. Look for these signs, and you can fix problems early. 1. Spotless bathroom smells like sewer gas: You can’t smell that unmistakable sewer smell, but everything looks clean, don’t brush it off. The water in the trap dried up, or there is a crack, and the nasty gas comes right in. 2. Gurgling noises: If you hear gurgling and bubbles from your drain immediately after running water through it, it’s because air is trapped in the pipes. It may be because there is some form of clogging in the vent. 3. Slow drainage of water: If you find that the floor drain is slow, then it is most likely because the trap is blocked with things such as hair or soap from the bathroom. 4. Insects around the drain: There are unusual insect sightings around the drain. That water barrier is supposed to keep critters from crawling up the sewer and invading your bathroom. 5. Cracks around the drain: Even the smallest crack will allow water to get under the floor and destroy the seal. Often, you will not see them immediately. 6. Puddles on the floor: If you see water chillin’ on the bathroom floor instead of draining, you have a serious clog in your trap or drain. And now it’s backing up. Bathroom Floor Drain Trap Maintenance Tips Maintaining the floor drain trap is not difficult. Just pick up a few good habits, and you can avoid any surprises. When Should You Replace Your Bathroom Floor Drain Trap? Sometimes, fixing won’t do. Here are the times when replacement is the better option: 1. If you spot a crack or any kind of damage, getting a good seal is basically impossible. 2. Still smelling something funky after cleaning and refilling the trap? That probably means the trap is worn out. 3. When stubborn clogs just won’t budge, even
Modern Matte Black Bathroom Accessories in India
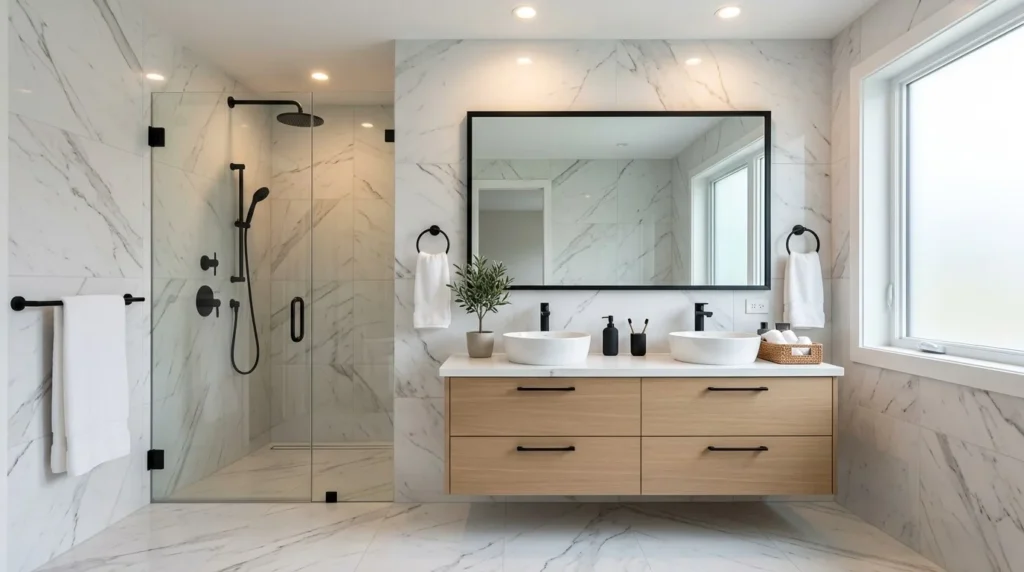
Matte black has become one of the most popular bathroom finishes in India over the last few years. Walk into a new flat in Bengaluru, Pune, or Delhi NCR, and you’ll likely spot a matte black tap or towel bar somewhere. The finish looks calm and a little expensive, without an expensive price tag. It also goes with almost any tile colour, which makes it an easy choice for both new bathrooms and quick upgrades. If you’re planning to bring matte black into your bathroom, this guide covers what to buy, how much it costs in India, and how to style it well. Matte Black Bathroom Accessories Worth Buying You don’t need to change your whole bathroom. A few well-picked pieces can shift the whole look. Matte Black Towel Bar Towel Bar: This is often the first thing you notice in a bathroom. Matte black doesn’t show smudges the way chrome does, and it comes in single, double, and longer 24-inch sizes. Price Range (₹): 800 – 3,500 Matte Black Robe Hook Robe Hook: Small but useful. Go for single, double, or triple hooks depending on how many towels you hang daily. Price Range (₹): 300 – 1,200 Matte Black Soap Dispenser Soap Dispenser: Look for a pump that doesn’t drip or jam. Resin and stainless steel options feel sturdier than plastic ones. Price Range (₹): 350 – 1,800 Matte Black Toothbrush Holder Toothbrush Holder: Ceramic holders are the easiest to clean and feel the most solid on a counter. Families usually do better with 4 to 5 slots. Price Range (₹): 250 – 1,500 Matte Black Toilet Paper Holder Toilet Paper Holder: Open-end styles are easier to load. Covered ones look neater. Most are made from zinc alloy or stainless steel. Price Range (₹): 500 – 2,200 Matte Black Shower Head Shower Head: This is where matte black really stands out, especially against white or light grey tiles. Before buying, check that it works with your building’s water pressure, since this varies a lot across Indian apartments. Price Range (₹): 1,200 – 8,500 Matte Black Faucet Faucet: A single-lever matte black mixer tap is the most popular pick right now. Pillar taps in matte black are also available if you prefer a more classic look. Price Range (₹): 2,500 – 18,000 Matte Black Shower Shelf or Corner Rack Shower Shelf: Corner racks save space and suit smaller Indian bathrooms well. Pick one with a rust-resistant coating, since it stays wet often. Price Range (₹): 600 – 3,000 Matte Black Mirror Frame Mirror Frame: Round and arch-shaped frames are trending in minimal bathrooms right now. Sizes usually range from 18 to 36 inches. Price Range (₹): 1,500 – 9,000 Matte Black Towel Ring Towel Ring: Great for smaller bathrooms where a full bar takes up too much wall space. Most come with all fittings included. Price Range (₹): 400 – 1,800 Matte Black Bathroom Shelf Bathroom Shelf: Useful for candles, skincare, or spare rolls. Floating shelf styles are the easiest to install and look the most current. Price Range (₹): 700 – 4,500 Colour Pairings That Work Well With Matte Black Matte black isn’t picky. It pairs well with a wide range of tile and wall colours, but some combinations feel better than others. How to Choose the Right Pieces of Matt Black Bathroom Accessories Start with the material. Stainless steel with a powder-coated matte black finish holds up best in wet areas like the shower. Zinc alloy works fine for drier spots such as hooks or paper holders, but it can wear faster near constant moisture. Check the finish closely before buying. A good matte black coat looks smooth and even, with no shiny patches or rough spots. Cheap coatings tend to chip within months, especially in humid Indian bathrooms near the coast. A Few More Things to keep in mind: On upkeep, matte black needs a little more care than chrome. Water spots and soap scum do show up, especially with hard water. A soft, damp cloth after use prevents most buildup, and mild soap once a week handles deeper cleaning. Skip steel wool, harsh chemicals, and vinegar-based cleaners, since these strip the coating over time. PVD-coated pieces resist scratches and daily wear far better than painted ones, and they last years longer, even though they cost more upfront. Common Mistakes to Avoid Frequently Asked Questions Does Matte Black Go Out of Style? Unlikely. It’s been a staple in design for decades and only recently became popular in bathrooms. Is Matte Black More Expensive Than Chrome? Usually, yes, by around 20 to 40 percent. The gap shrinks with mid-range brands. Are Matte Black Fittings Suitable for Hard Water Areas in India? Yes, though mineral spots show up more visibly. Wiping down every couple of days keeps this in check. Does Matte Black Scratch Easily? Painted finishes scratch more easily than PVD-coated ones. If your household is rough on fittings, PVD is worth the extra cost. Can Matte Black Rust in Coastal Cities Like Mumbai or Chennai? Lower-quality zinc alloy pieces can, over time, if exposed to salty, humid air. Stainless steel with a proper powder coat holds up much better in these conditions. Can I Mix Matte Black with My Existing Chrome Fittings During a Renovation? You can for a short period, but it’s best to plan a full switch. A mismatched bathroom rarely looks finished, even temporarily. Is Matte Black a Good Choice for Small Bathrooms? Yes, if you keep the number of pieces limited and pick wall-mounted styles. Too many dark pieces in a tiny space can make it feel smaller. Can I Install Matte Black Accessories Myself? Simple items like hooks, rings, and toilet paper holders are easy DIY jobs. Faucets and shower heads usually need a plumber, especially if plumbing lines need adjustment.