

Different Types of Waste Couplings for Indian Homes
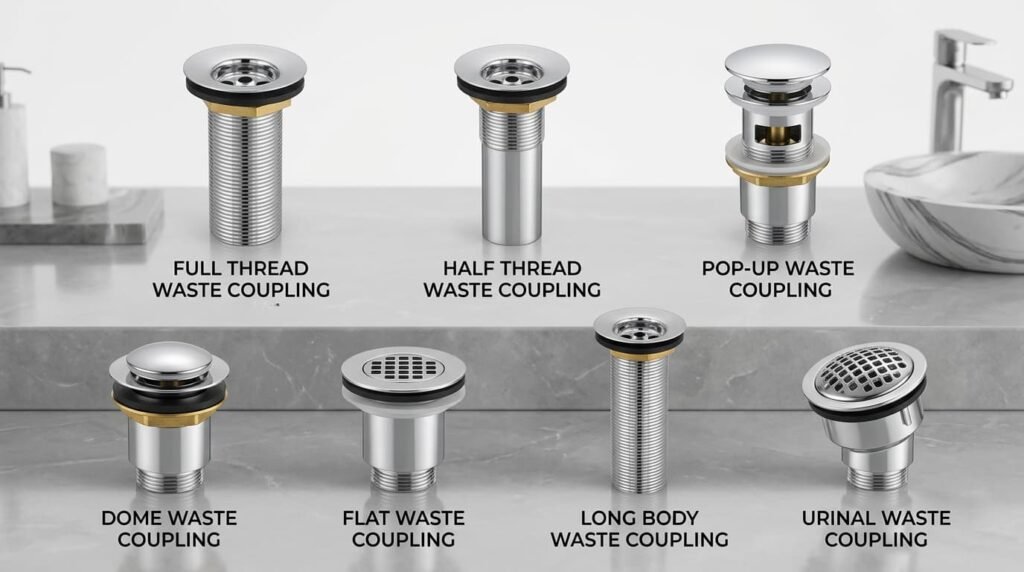
A waste coupling is the small fitting that joins your sink, basin, or urinal to the drain pipe below. It looks tiny, but it decides whether your drain leaks, smells, or works quietly for years. Pick the wrong one, and you will deal with wobbly fittings, bad odour, or water pooling under the sink. Pick the right one, and you will forget it is even there. This guide walks through every common waste coupling type sold in India, what each one is best for, and how to choose without guesswork. What Does a Waste Coupling Do? A waste coupling sits directly under the drain hole of a basin, sink, or urinal and carries used water into the waste pipe without letting it escape at the joint. Depending on the design, it may also catch hair, food scraps, and soap residue before they reach the pipe — or seal against sewer gas rising back up into the room. You’ll find one under nearly every fixture that drains: wash basins, kitchen sinks, urinals, bathtubs, and floor drains. Anywhere water needs to leave a fixture and enter a pipe, a waste coupling is doing the work quietly in between. The Main Types of Waste Couplings Manufacturers build different couplings for different jobs — thread pattern, drain mechanism, and shape all change depending on where the fitting is going. Full Thread Waste Coupling Threading runs the entire length of the body, top to bottom, which locks the fitting firmly into the drain outlet once fully screwed in. Thick countertops and vessel basins that see constant daily traffic benefit most from this design, since the full-length grip resists loosening over time. Half Thread Waste Coupling Only the lower portion is threaded; the rest slides in without turning. Installation takes fewer turns and less time, which is probably why it’s the type installers reach for most often on standard table-top and wall-hung basins across Indian homes. Pop-Up Waste Coupling A push-button stopper replaces the manual plug — press once to fill the basin, press again to drain it. Mid-range and premium basins favour this mechanism because it keeps the sink looking clean, with nothing sitting loose on the counter. Dome Waste Coupling A raised dome covers the drain hole, letting water pass through the gaps while blocking larger debris. Kitchens and bathrooms both use this often, since it’s cheap, easy to clean, and does a reasonable job keeping food scraps and soap chunks out of the pipe. Flat Waste Coupling No raised dome here — the strainer sits level with the sink surface, which suits shallow drain outlets that can’t accommodate a raised fitting. Modern, minimal basin designs tend to specify this for a smoother, low-profile look. Long Body Waste Coupling For basins positioned further from the waste pipe than usual, this coupling’s extra length closes the gap directly, without stacking on additional pipe joints. It saves both material and installation time on non-standard layouts. Urinal Waste Coupling Built specifically for urinals, connecting to the trap below and handling frequent, steady water flow. It isn’t interchangeable with basin or sink couplings — the size and flow design are different. Every type has its place. But full thread and half thread tend to confuse people the most at the time of buying. Let us sort that out right now. Half Thread vs Full Thread: Quick Comparison Feature Half Thread Full Thread Thread coverage Lower half only Entire body Best for Standard, thin countertops Thick countertops, vessel basins Installation Quick, fewer turns Takes longer to thread in Grip strength Good for regular use Stronger, more secure Rule of thumb: thin countertop or wall-hung basin → half thread. Thick counter or deep vessel basin → full thread. Materials to Know Before You Buy Waste Coupling Price Range in India Type Approximate Price (INR) PVC Coupling ₹80 – ₹250 Stainless Steel Coupling ₹200 – ₹600 Brass Coupling ₹350 – ₹1,200 Chrome-plated brass/pop-up/click-clack ₹500 – ₹2,000+ Treat these as indicative ranges. Actual prices shift with brand, finish, and whether the coupling includes an overflow connector. Always check current listings before buying, since prices move. How to Pick the Right Waste Coupling Bottom Line Once you know your basin type, outlet size, and how much daily use it’s in for, picking a waste coupling stops being a guessing game. Measure the outlet first, match the thread type to your countertop, and choose a material suited to your water conditions. Get those three things right, and you genuinely won’t think about this fitting again for years. Not sure which size or type fits your basin? Browse our waste coupling collection at Begin Faucets — filter by size, material, and finish, or send us your basin’s outlet measurement and we’ll point you to the right match before you order. Frequently Asked Questions What’s the Difference Between a Waste Coupling and a P-Trap? A waste coupling connects the basin to the pipe. A P-trap is the curved section of pipe that holds water to block sewer gas. Bottle trap couplings combine both functions in a single fitting. Can I Install a Waste Coupling Myself? For most basin types, yes — a wrench and plumber’s tape are usually enough. Concealed or floor couplings are better left to a plumber, since they involve wall or floor work. Does a Waste Coupling Need Plumber’s Tape? Yes, on threaded types. Wrapping tape around the threads before fitting helps prevent leaks at the joint. Why Does My New Waste Coupling Still Leak? Usually one of three things: the locking nut isn’t fully tight, the washer is sitting crooked, or the coupling size doesn’t match the drain outlet. Is a Costlier Waste Coupling Always Better? Not necessarily. Brass lasts longer, but a good stainless steel coupling handles normal home use perfectly well at a lower price point. How Long Does a Waste Coupling Last? Roughly 5 to 10 years under normal use, depending on material and local water quality. Is There an Indian Standard for Waste Couplings? Copper-alloy (brass) waste
How to Install a Grab Rail: A Complete Step-by-Step Guide
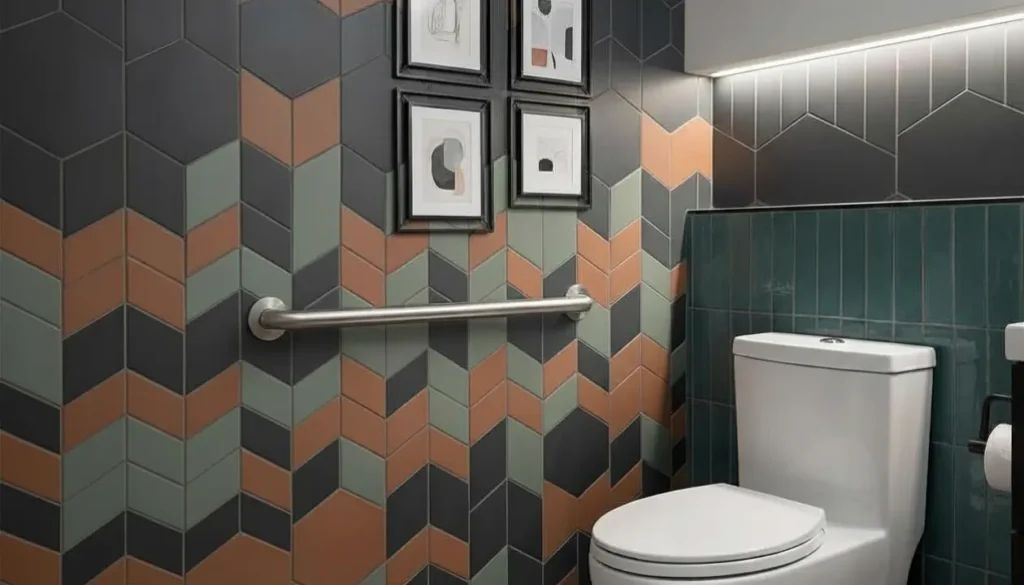
A wet floor. A missed step. One fall can change how a person moves through their own home for good. For families with elderly or disabled members, that risk lives in the bathroom every single day. A correctly installed grab rail fixes this. Fit one at 33 to 36 inches from the floor, secure it into a wall stud or a load-rated anchor, and make sure it can hold at least 100 kg — check the manufacturer’s exact rating, since many rails go higher. This guide walks through exactly how to install one, step by step, along with placement rules, tools, and Indian pricing. What Tools You’ll Need Before You Start Gather everything first. A mid-installation trip to the hardware store is avoidable. How to Install a Grab Rail: Step-by-Step Step 1: Assess the User’s Needs First Don’t buy a rail and figure out placement afterward. Walk through the bathroom with the person who’ll use it and note where they struggle most — standing from the toilet, stepping over the bath edge, balancing in the shower. This decides where every rail goes. Height, grip strength, and whether they use a walking aid all affect which rail diameter and surface texture work best. Step 2: Mark Your Fixing Points Hold the rail in position and mark each screw hole with a pencil. Check the position with the user standing in place before moving on — it’s easier to erase a pencil mark than fill a drilled hole. Step 3: Scan for Pipes and Wires Run a pipe and cable detector over every mark. This takes under a minute and prevents a burst pipe or an electric shock. Step 4: Find a Stud, or Choose the Right Anchor A stud finder tells you what’s behind the wall. Screwing into solid timber gives the strongest hold. If there’s no stud in range, use cavity anchors rated for load-bearing use. Note: Standard wall plugs will not hold under real body weight. Step 5: Match the Drill Bit to Your Wall Tile needs a tile bit, started slowly to avoid cracking the glaze. Brick or plaster needs a masonry bit. Timber takes a standard wood bit. Step 6: Drill the Holes Go slow, especially on tile. Wrap tape around the bit at the correct depth so you don’t drill past what the plug needs. Step 7: Insert wall plugs, if needed Tap them flush with the surface. Skip this step only if you’re screwing straight into a timber stud — plugs reduce grip there instead of adding it. Step 8: Fix the rail to the wall Start each screw by hand, then tighten gradually, moving between screws rather than finishing one at a time. This keeps the mounting plate flat and even. Step 9: Check the level Rest a spirit level along the rail. Even a small tilt affects grip comfort and confidence — adjust before moving on. Step 10: Load test it Push down and outward on the rail with real force, the kind someone would apply mid-slip. There should be no movement, flex, or creaking. If anything feels loose, remove the rail and check the fixings again. A single rail usually takes 30 to 45 minutes once your tools and fixings are ready. Add extra time if you need to locate studs or work around tile. Where to Place a Grab Rail: Exact Measurements Placement follows the movements that put a person most at risk: sitting, standing, and stepping over wet surfaces. Choosing the Right Type of Grab Rail Type Best For Notes Fixed/permanent rail Daily, long-term use Bolts into the wall; strongest and most stable option Folding rail Shared or small bathrooms Folds flat against the wall when not needed Suction cup rail Travel, short-term use Easy to move, but not rated for full body weight Vertical rail Pushing up to stand Common near the toilet and bath entry Horizontal rail Side-to-side balance Common in the shower area Angled rail (45°) Getting in and out of a bathtub Combines both push and balance support Stainless steel (SS 304 grade) is the standard material for Indian bathrooms because it resists rust in humid conditions. Chrome-plated and PVC-coated grab bars also exist, but steel lasts longer in wet, high-use spaces. Grab Rail Prices in India Prices vary by material, finish, and load rating. As a general guide: Rail Type Approximate Price Range (₹) Suction cup rail 400 – 1,200 Folding rail 1,200 – 3,500 Fixed stainless steel rail 800 – 2,500 Angled bathtub rail 1,500 – 4,000 Heavy-duty adhesive/tenant-friendly rail 1,000 – 3,000 These are approximate street and online retail ranges — always confirm current pricing with the supplier, and don’t choose on price alone. Compare the load rating and finish (satin vs. polished) first. Common Mistakes That Cause Rail Failure Popular Grab Rail Brands in India Cera: Mid-range stainless steel rails, widely stocked Signxpress India: SS 304 grade rails in straight, L-shaped, and swing designs Begin Faucets: Bathroom fittings and accessories, including grab bars, for home and commercial use Ruhe: stainless steel and brass rails sold directly by an Indian manufacturer Ess Ess, Ruwido, and Ken: Grab rails available through hardware and sanitaryware dealers Final Thoughts Installing a grab rail correctly is a small job with a big outcome — it gives someone back their independence in the room where falls happen most. Take the extra ten minutes for stud checks, load tests, and the right anchors. It’s the difference between a grab bar that looks secure and one that actually is. If any part of this feels outside your comfort zone, call a professional installer. There’s no downside to getting it checked. Frequently Asked Questions How Much Weight Should a Bathroom Grab Rail Hold? Most quality rails are rated for 100–150 kg. For an elderly or heavier user, check the manufacturer’s exact weight rating before buying — don’t assume a lower-end rail will be strong enough. Can I Install a Grab Rail on Plasterboard or Drywall? Yes, but only with cavity
Can You Install an Outdoor Faucet to Poly Pipe?
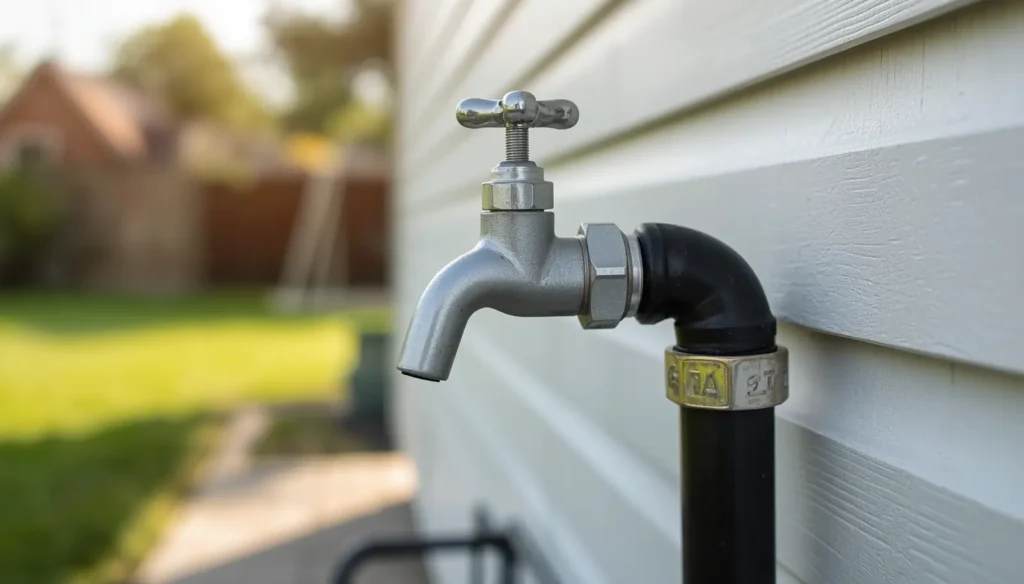
You’re standing in your yard, staring at that black poly pipe sticking out of the ground. You’ve got a faucet in your hand. And one big question in your head—can I actually connect these two things? Good news: yes, you can. But here’s the thing — there’s a right way to do it and a wrong way. If you do it wrong, you’ll end up with leaks, loose fittings, or a faucet that doesn’t hold. If you do it right, you will have a solid, reliable outdoor water source. In this guide, you’ll learn exactly what fittings you need, how to connect them step by step, and the common mistakes you’ll want to avoid. What is Poly Pipe? Poly pipe is a flexible plastic pipe made from polythene. It’s lightweight, inexpensive, and built to take on outdoor waterlines like a boss. You’ve probably seen that black, flexible pipe that goes underground to a well, garden, or irrigation system. That’s a poly drop. There are a Few Common Types: Can You Connect an Outdoor Faucet Directly to Poly Pipe? The short answer is yes, you can. But not directly. Here’s the deal. The poly pipe doesn’t have threads on it. It’s just a smooth, flexible plastic tube. Most outdoor faucets, also called hose bibs or spigots, have threaded metal connections. So you can’t just push the two together and call it a day. You need a fitting in the middle to make it work. Think of it like an adapter. It bridges the gap between the smooth poly pipe and the threaded faucet. Without it, you’ll get leaks, loose connections, or nothing will fit at all. The fitting you need is called a poly insert fitting. It has two ends: Once you have the right fitting, the whole job becomes pretty straightforward. It’s not complicated; you just need to know what to grab at the hardware store. Tools and Materials You’ll Need Before you start, gather everything you need. It saves you from making three trips to the hardware store. Here’s a simple list to work from: Item What It’s For Outdoor faucet / hose bib The actual spigot you’re installing Poly insert adapter (match your pipe size) Connects poly pipe to the threaded faucet 2 stainless steel hose clamps Keeps the fitting locked tight on the pipe Screwdriver or nut driver Tightens the hose clamps Teflon tape Seals the threaded connection Pipe cutter or sharp utility knife Cuts the poly pipe clean and straight Pressure-treated wood / mounting board Gives the faucet a solid surface to mount on Mounting screws Secures the faucet to the board or wall Heat gun or warm water (optional) Softens the pipe end for easier fitting insertion Getting the right pipe size matters most. Poly pipe usually comes in ½ inch or ¾ inch, and make sure your insert adapter matches exactly. Quick Tip: Grab one extra insert fitting while you’re at the store. They’re cheap, and if one cracks during install, you’ll be glad you have a backup. Step-by-Step: How to Install an Outdoor Faucet to Poly Pipe Let’s get to work. Follow the directions below and you’ll have a working outdoor faucet in no time at all. Step 1: Turn Off the Water Start at your main water shutoff and turn it off completely. Then open a faucet inside your home to release any pressure left in the lines. Don’t skip this step. Working on a live waterline is a mess waiting to happen. Step 2: Pick Your Spot and Mount a Backer Board Choose where you want the faucet to sit. If you plan on mounting it on a post or fence, or in an area where there is no flat surface, you can first screw some pressure-treated wood to that location. This will provide your faucet something to grip onto. Step 3: Cutting the Poly Pipe Either a pipe cutter or a sharp utility knife may be used when cutting the poly pipe. The sharper your cut, the easier you will find it sealing the cut pipe. Tip: Score the pipe slowly with a utility knife and rotate it as you cut. You’ll get a much cleaner edge. Step 4: Warm the End of the Pipe Dip the cut end of the poly pipe into hot water for about 30 seconds. This softens the plastic just enough to make sliding in the fitting much easier. No hot water? A heat gun on low works too, just make sure you don’t overdo it. Step 5: Slide the Hose Clamps On First Before you insert the fitting, slide two stainless steel hose clamps onto the pipe. This step is easy to forget and annoying to fix later once the fitting is already in. Step 6: Push the Insert Adapter Into the Pipe Now push the barbed end of the poly insert adapter firmly into the pipe. It should be tight and secure. Screw it in all the way until the pipe sits against the shoulder of the fitting. Step 7: Tighten the Two Hose Clamps Put both hose clamps over the barbed end of the fitting and tighten with a screwdriver. Tip: Don’t skip the second clamp. A poly pipe needs two clamps for a truly tight seal. One just isn’t enough to hold underwater pressure. Step 8: Wrap the Faucet Threads With Teflon Tape Take your Teflon tape and wrap it around the threaded end of the adapter two or three times. Always wrap in the direction of the threads. This makes a watertight seal when you screw the faucet on. Step 9: Screw the Faucet On Begin by hand-threading your outdoor faucet or hose bib onto the adapter. Once it’s hand-tight, take a wrench and snug it up well. Don’t overdo it; it should be firm and secure, not a death grip. Step 10: Turn the Water Back On and Check for Leaks With the connections in place, slowly turn the main water shutoff back on. Don’t rush it. Watch
Rain Shower vs Normal Shower: Which Should You Pick?
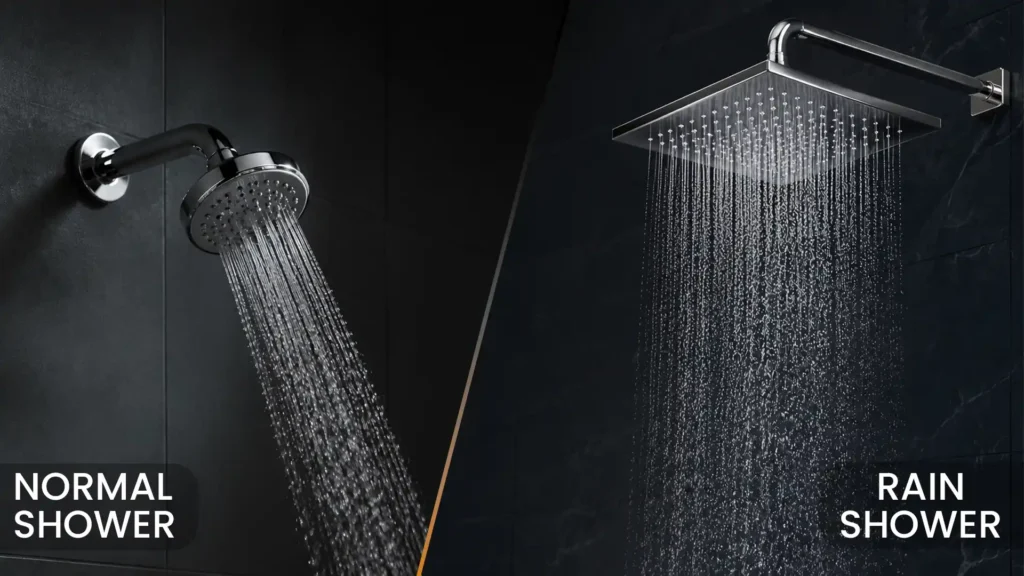
You’re standing in a showroom, staring at two very different showerheads, and somehow the one that costs more doesn’t feel like an obvious win. The rain shower vs normal shower debate comes up in almost every bathroom renovation. Both look great in photos. But photos don’t show you water pressure, installation costs, or how your back feels after a long day. Choosing the wrong one can mean wasted money or a shower you regret every morning. This blog covers all the important things like cost, pressure, health benefits and installation. There are no confusing terms and no guesswork. Just clear, honest information to help you make the right call for your bathroom and your budget. What is a Rain Shower and How Does It Work? A rain showerhead is basically a large, flat head that sits above you and showers water evenly over your body from all sides. Most models are between 8 and 12 inches wide. Some go even larger. The water flows straight down from above, just like rain falling from the sky. That’s exactly where it gets its name. These showerheads are generally mounted on the ceiling or on a long overhead arm. This type of shower allows water to fall vertically, hitting your shoulders, head, and back simultaneously. The flow is wide and gentle, not a strong, focused stream. Many homeowners exploring the rain shower vs normal shower choice are drawn to this style for its calm, spa-like feel. It turns a regular rinse into something that actually feels relaxing. What is a Normal Shower and How Does It Work? You’ll find a normal showerhead in most homes across the country. It’s smaller, usually around 3 to 5 inches wide, and mounts directly on the wall. The water comes out in a focused stream aimed at your body from the side. Most standard showerheads let you switch between spray settings — wide spray, massage, mist, or a strong single stream. That flexibility is one reason they’ve stayed popular for decades. The controls are simple. All you do is twist the knob, set the angle, and you’re good to go. No special installation, no ceiling work. For anyone just starting the rain shower vs normal shower research, this is the baseline. It’s reliable, affordable, and works well in almost any bathroom size or layout. Rain Shower vs Normal Shower: Key Differences Attribute Rain Shower Normal Shower Sprayer Head Dimension 8–12 inches or larger 3–5 inches Type of Water Sprayed Wide and gentle Narrow and concentrated Water Pressure Low and gentle pressure High pressure Positioning Mounted on the ceiling or overhead arm Wall mounted Water Consumption 2–5 gallons per minute 1.5–2.5 gallons per minute Suitable For Lavish bath and relaxation Quick showers It is safe to say that the main criteria for deciding between a rain shower vs normal shower are practical aspects and personal experience. Rain showers are lush, but they use more water and take more setup. Normal showers are straightforward, water-efficient, and fit almost any bathroom without extra work. Knowing these basic differences makes every other decision in this blog much easier to follow. Water Pressure: Rain Shower vs Normal Shower Water pressure matters more than most people think when picking a showerhead. Rain showers spread water across a wide surface area. That means the pressure at each nozzle is softer and more spread out. The result is a gentle, calm flow. But here’s the catch – if your home already has low water pressure, a rain showerhead can feel like a light drizzle. Not exactly refreshing. Normal showers work differently. The smaller head concentrates water into a tighter stream, which naturally feels stronger. Most standard showerheads also let you adjust the spray intensity, so you get more control over how the water hits. When looking at rain shower vs normal shower performance, water pressure is often the deciding factor. Check your home’s water pressure before buying a rain showerhead. Anything below 40 PSI may give you disappointing results with a rain showerhead. Installation Process: What Each Shower Type Requires Installation is one of the biggest practical differences in the rain shower vs normal shower decision. Rain Shower Installation: Normal Shower Installation: When you’re remodeling from scratch, setting up a rain shower is something you can handle without too much extra effort. But if you’re upgrading an existing bathroom, a normal showerhead saves you significant time, hassle, and disruption. Cost Comparison: Rain Shower vs Normal Shower Money is usually what makes or breaks a bathroom decision. Here’s a straightforward cost breakdown for the Indian market. Cost Factor Rain Shower Normal Shower Base Model Price ₹3,000 – ₹8,000 ₹500 – ₹2,500 Premium Model Price ₹10,000 – ₹40,000+ ₹3,000 – ₹8,000 Professional Installation ₹2,000 – ₹8,000 ₹500 – ₹1,500 Long-Term Water Bill More expensive monthly Monthly expenses lower Total Budget Needed ₹5,000 – ₹50,000+ ₹1,000 – ₹10,000 The cost gap is real and something to take seriously. Rain showers cost more to install up front and will raise your water bill over time. Normal showers, on the other hand, are affordable from day one. If you’re on a tight renovation budget, a good normal showerhead can give you good performance without raising your cost. Water Consumption: Which Shower Uses More Water? Water usage is something most people overlook until the bill arrives. Rain showers typically use between 7 and 12 litres per minute. That wide, open flow feels amazing, but moves through a lot of water fast. Over a month of daily showers, that adds up to a noticeable difference on your water bill, especially in Indian cities where water charges are rising steadily. Normal showers use around 5 to 9 litres per minute. The focused stream wastes less water while still getting the job done. In the rain shower vs normal shower comparison, normal showers clearly show the more eco-friendly and efficient choice. Rain showers consume roughly 20 to 40 percent more water per session. Now, some manufacturers have developed water-saving rain showerheads that have
Double Bowl Sink Benefits: Price, Sizes & Buying Guide for Indian Kitchens (2026)
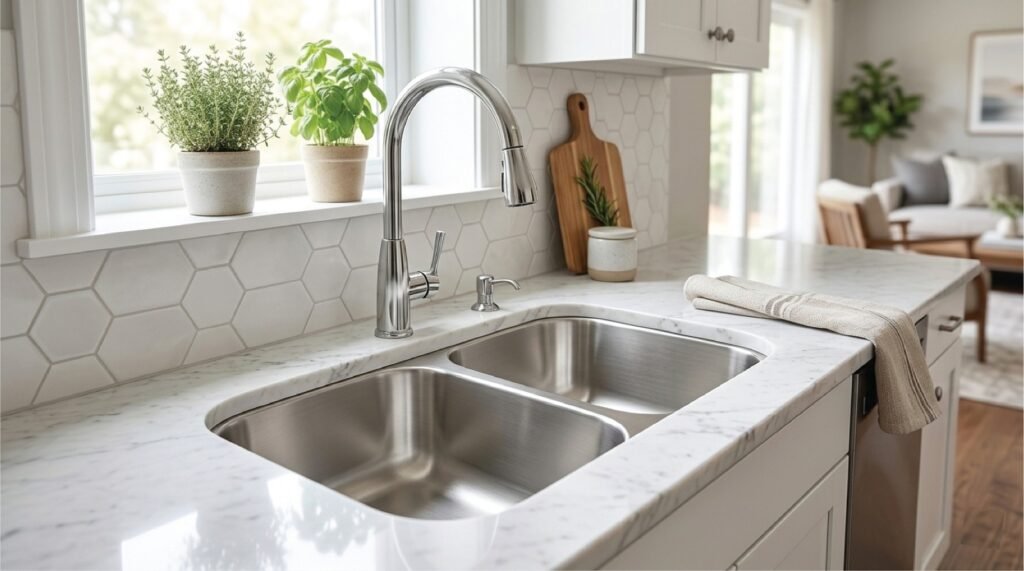
A double bowl sink is fast becoming the go-to choice for Indian kitchens, and it’s not just a style trend. It solves real problems: washing and soaking at the same time, keeping raw food away from dirty dishes, and letting two people cook without bumping into each other. This guide covers the real double bowl sink benefits, how to pick the right material for your water conditions, how to size a sink to your actual counter, and what you should reasonably expect to pay in 2026. What is a Double Bowl Sink? A double bowl sink has two separate basins side by side, typically each connected through a double-bowl waste kit to a common drain line. You can use both sides at once, or keep one dry while the other does the heavy lifting. It’s built for kitchens where more than one thing happens at a time, which, in most Indian homes, is every single day. There are Two Main Types: 7 Real Benefits of a Double Bowl Sink for Indian Homes The Trade-Offs A double bowl sink isn’t right for every kitchen. It takes up more counter space than a single bowl, and it eats into your under-sink storage because of the extra plumbing. Each bowl is also a bit smaller than one big basin, so oversized tawas or baking trays can be awkward to fit. If your kitchen is compact or you live alone, a single bowl sink with more open space might actually serve you better. Equal Bowl vs. Offset Double Bowl: Which is Better? Select an equal bowl if: Select an offset bowl if: Which Material Should You Pick? Your water conditions and budget should guide this decision, not looks alone. Hard water isn’t the only factor in corrosion — water chemistry, chlorides, cleaning chemicals, and the quality of the steel itself all play a role. As a rule, a SS 304 sink of good quality will be more corrosion resistant than a similar quality SS 202 sink, particularly in hard water or humid conditions. Material Best For Watch Out For Price Range Steel Grade 304 Hard water cities like Delhi, Jaipur, Ahmedabad Costs more than 202 ₹5,000 – ₹20,000 Steel Grade 202 Tight budgets, rental homes Rusts faster over time ₹1,500 – ₹8,000 Granite composite Quiet, scratch-resistant kitchens Light colours show turmeric stains ₹8,000 – ₹30,000 Quartz composite Long-term, low-maintenance use Higher upfront cost ₹15,000 – ₹50,000 Fireclay Farmhouse-style kitchens Heavy, can chip ₹20,000 – ₹60,000+ Note: Prices vary by brand, dimensions, thickness, finish, and accessories included — treat these as approximate retail ranges, not fixed prices. SS 202 is generally more budget-friendly but offers lower corrosion resistance than SS 304 in demanding environments. In hard water or heavy daily use, it may show staining or wear before SS 304 — but exactly when depends on thickness, manufacturing quality, and maintenance, not a timeline. What Size Fits Your Kitchen? Home size (1BHK, 2BHK, etc.) is a rough starting point, but it doesn’t actually determine sink size — a 2BHK can have anything from a tiny galley kitchen to a large modular one. The better starting point is your available counter width and cabinet size. Available Kitchen Space Useful Starting Point Compact counter 24–30 inch sink Standard modular kitchen 30–36 inch sink Spacious kitchen 36–42 inch sink Large kitchen / heavy daily use 42–45 inch sink Most Indian modular counters are around 600mm deep, which is a useful general reference, but counter depth and sink cutout dimensions aren’t the same thing. Always check the manufacturer’s cutout template against your actual cabinet width and depth before ordering, and confirm the cabinet has enough internal space for the bowls and waste plumbing. Also leave 4–5 inches of space behind the sink for the tap. Bowl depth matters too. A shallow bowl causes more splashing and makes washing large utensils harder; a very deep bowl can be uncomfortable to reach into, especially for shorter users. Compare overall depth, bowl depth, and your counter height rather than picking on size alone. Double Bowl Sink Price in India Prices vary by brand, dimensions, steel grade, thickness, finish, mounting style, and included accessories. The ranges below are approximate retail bands rather than fixed prices. Budget What You Get Best For ₹2,000 – ₹5,000 Thin steel, basic finish, no sound padding Rentals, very tight budgets ₹5,000 – ₹10,000 Grade 304 steel, decent thickness 1BHK and small 2BHK homes ₹10,000 – ₹15,000 Thicker gauge, anti-scratch coating Families with heavy daily use ₹15,000 – ₹30,000 Granite composite, sound-dampened Modern modular kitchens ₹30,000+ Quartz or fireclay, long warranty Premium kitchens Keep an extra ₹1,000–₹2,500 aside. Sink prices rarely include installation, drain pipes, or tap fitting — those come separately, and actual installation cost depends on your existing plumbing, whether a double waste kit is included, and local plumber charges. Best Double Bowl Sink Types for Different Indian Kitchens Should You Pick Double Bowl or Single Bowl? Go double bowl if you cook daily in large amounts, hand-wash everything, or often have two people working in the kitchen at once. Go single bowl if your kitchen is small, you live alone or as a couple, or you mostly wash large flat items like tawas that need one big open space. Neither choice is wrong; it depends on how busy your kitchen actually gets. Quick Checklist Before You Buy a Double Bowl Sink Final Thoughts The right double bowl sink comes down to a few things: your water quality, your available counter space, and how your family actually cooks. Check the steel grade, measure your cabinet and cutout properly, and pick a size that matches your actual counter rather than your home type. Do that, and you’ll have a sink that handles your daily cooking chaos for years without a single complaint. Frequently Asked Questions Does a Double Bowl Sink Cost More to Install Than a Single Bowl? It can, since it typically needs a double-bowl waste kit and extra fitting work. The exact cost depends on
Magnifying Mirror vs Vanity Mirror: Which One Do You Actually Need?
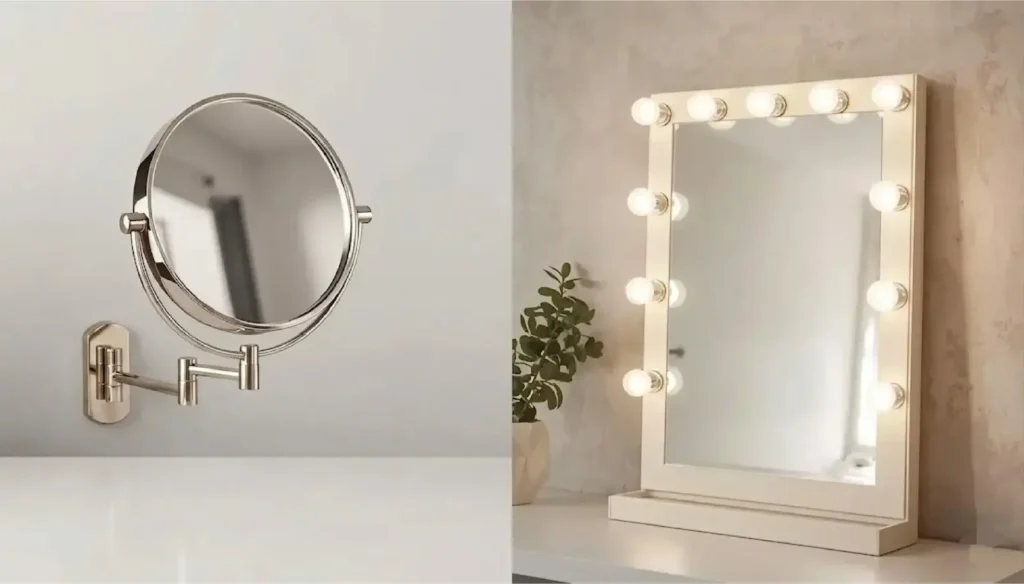
A magnifying mirror zooms in close on your face. A vanity mirror shows your whole face at once, usually with lights. Most people need both, but for different jobs. If you are buying your first mirror for makeup, skincare, or grooming, this guide clears up the confusion in plain terms with real price ranges for the Indian market. Quick Comparison Feature Magnifying Mirror Vanity Mirror Main job Close-up detail work Full-face view Size Small, often 4–8 inches Large, 15 inches and up Zoom 3x to 10x 1x, sometimes with a small zoom panel Lights Optional, small LED ring Common, full LED strip Best for Eyeliner, tweezing, skincare Foundation, hairstyling, outfit checks Price in India ₹300 to ₹3,500 ₹1,200 to ₹15,000+ Space needed Fits on any shelf Needs a table or wall spot What is a Magnifying Mirror? A magnifying mirror uses curved glass to make your face look bigger than it is. This helps you catch small details a normal mirror hides. Common zoom levels are 3x, 5x, 7x, and 10x. A higher number means a closer, bigger view. At 10x, you can see single pores and fine hairs. People buy magnifying mirrors for eyebrow shaping, eyeliner, tweezing, and daily skin checks. Many Indian bathrooms also use a wall-mounted brass magnifying mirror as a fixed second mirror next to the main one, since brass holds up well in humid weather. Example: Begin Faucets sells a Brass Magnifying Mirror (model AC0075) built for exactly this use. It is priced around ₹2,599, down from its listed price of ₹6,500, and suits bathrooms where you want a sturdy metal mirror that won’t rust from steam or splashes. What is a Vanity Mirror? A vanity mirror gives you a clear, full view of your face and upper body. It does not zoom in. It shows you as you actually look. Most vanity mirrors sit on a dressing table or hang on a wall. Many come with built-in LED lights around the frame, which is why they are also called lighted mirrors or Hollywood mirrors. People use vanity mirrors for full makeup looks, hairstyling, and a final outfit check before stepping out. The wide, even light helps you judge how your makeup will look under real daylight. Key Differences Between Magnifying Mirror and Vanity Mirror What Magnification Level is Ideal? 3x – Everyday use and for beginners. 5x – Best all-around for everyday makeup application, like eyeliner or filling in eyebrows. 7x – Suited to tweezing, threading, and closer skincare checks. 10x – For very fine tasks like ingrown hair removal. Can feel too close for regular use. Note: Start with 5x if you are unsure. It gives enough detail without feeling odd to look at. Best Uses for Each Mirror Magnifying Mirror Works Best For Vanity Mirror Works Best For Price Ranges in India Prices vary by size, brand, and lighting. Mirror Type Budget Mid-Range Premium Basic magnifying mirror (no light) ₹300–₹800 ₹800–₹1,800 ₹1,800–₹3,500 LED magnifying mirror ₹900–₹2,000 ₹2,000–₹4,500 ₹4,500–₹8,000 Brass/wall-fixed magnifying mirror ₹1,500–₹2,600 ₹2,600–₹4,000 ₹4,000–₹6,500+ Basic vanity mirror ₹1,200–₹3,000 ₹3,000–₹6,000 ₹6,000–₹10,000 Hollywood-style lighted vanity mirror ₹2,500–₹5,000 ₹5,000–₹9,000 ₹9,000–₹15,000+ Brass and metal-bodied mirrors, like the Begin Faucets AC0075, tend to last longer in Indian bathrooms because they resist rust from humidity and hard water splashes better than plastic frames. Can You Use Both Mirrors Together? Yes, and most beauty experts suggest it. Use the magnifying mirror first for detail work like eyeliner, brows, or spot-checking skin. Then step back and check your full face in the vanity mirror before you finish. This two-step routine catches small mistakes early and still gives you the full picture at the end. How to Choose the Right Mirror Ask yourself these four questions: If your budget allows, buying one of each gives you the most complete routine. Wrapping It Up Neither mirror beats the other. A magnifying mirror wins for precision. A vanity mirror wins for the complete view. Pick based on what your morning routine actually needs, not just looks or price. If you want a mirror that handles both humidity and daily use well, a brass option like the Begin Faucets AC0075 magnifying mirror is a solid, budget-friendly starting point for Indian bathrooms. You can also check the magnifying mirror collections. Frequently Asked Questions Is a Magnifying Mirror Bad for Your Eyes? No, but staring at a 10x mirror for long periods can feel tiring. Use high magnification only for short, focused tasks, not for your whole routine. Can I Mount a Magnifying Mirror Right on My Bathroom Wall? Yes. For this purpose, there are brass or metal wall-fixed magnifying mirrors, for example extendable arm models, which are swung out when needed and folded back against the wall when not in use. Does a Vanity Mirror Need Electricity? Only if it has built-in LED lights. Basic vanity mirrors without lighting need no power source at all. Will a Magnifying Mirror Make My Skin Look Worse Than It Is? It can make small areas like pores or fine lines appear larger to others than they actually are. This is normal and not a sign of bad skin. Use it for precision tasks, not for judging your overall look. What Size Vanity Mirror Suits a Small Indian Bathroom? A mirror between 18 and 24 inches wide usually fits well above a standard washbasin without overcrowding the wall. Do Brass Mirrors Need Special Care? Wipe them with a dry or slightly damp soft cloth. Don’t use harsh chemical cleaners that will dull the brass finish over time. Is a 2-in-1 Mirror, With Both Flat and Magnifying Sides, Worth Buying? Yes, if you are short on space. A double-sided mirror gives you both views without having two separate mirrors, though the magnifying side will usually be smaller than a dedicated one.