
How to Install a Tabletop Wash Basin: Steps & Tips 2026

A tabletop wash basin looks simple to fit. But most leaks, wobbly basins, and splash problems in Indian bathrooms trace back to a few avoidable mistakes. Get the height right, pick the correct waste coupling and trap, and seal it properly, and the basin will serve you for years. To install a table top wash basin, work out your counter height based on the basin’s own height, mark the drain position, cut the counter as per the manufacturer’s template, fit the tap, fit the waste coupling, apply sealant, place and level the basin, connect the trap and water lines, test for leaks, and let the sealant cure for about 24 hours before use. This guide covers what to check before you start, the tools you need, the full process, how to pick the right waste and trap, common mistakes, and cost in India. What is a Table Top Wash Basin A table top wash basin sits on top of a counter or vanity instead of being built into the wall or under the counter. It looks like a bowl placed on a table, which is where the name comes from. You will also see it called a countertop basin or a vessel basin. This style is popular in Indian homes because it gives a clean, hotel-like look and frees up storage space below the counter. It is also easier to replace later than a wall-hung basin if you want to change your bathroom design. Planning the Right Height for Your Wash Basin Before Installation Since the basin sits above the counter, the finished rim ends up taller than the counter itself. Build the counter at the same height as a normal vanity, and the basin may sit too high for comfort. Use this Simple Method: Counter height equals your target rim height minus the basin’s own height. For example, if you want a certain rim height and know how much the basin adds on top of the counter, subtract that basin height to get your counter height. The exact basin height varies by model, so always check the product’s spec sheet before fixing your counter height. This one check prevents most comfort complaints later. Things to Check Before You Start Installing Counter Wash Basin Tools and Materials You Need A Note on Sealant: Neutral-cure silicone is the safer choice for bathrooms, since it will not corrode metal fittings or discolour natural stone the way some acid-cure sealants can. Acid-cure types bond well to plain ceramic and glass but are best avoided near stone counters and metal fixtures. Steps to Install a Tabletop Wash Basin Step 1: Turn off the water supply at the isolation valves before touching any pipework. Step 2: Mark the position. Decide where the basin sits and mark the centre line, leaving enough space on both sides for comfortable use. Step 3: Cut the hole, if needed, using the manufacturer’s template. Go slow, especially on stone. Step 4: Dry-fit the basin to check alignment with the waste outlet. Step 5: Fit the tap first. It is easier to tighten from below before the basin is in place. Step 6: Fit the waste coupling. Place the gasket and tighten it into the drain hole. Most Indian basins use a 32mm waste coupling, but check your basin’s spec sheet to confirm. Step 7: Apply sealant. Run a smooth, even bead of neutral-cure silicone where the basin meets the counter. A thin, even line seals as well as a thick one and looks neater. Step 8: Place and level the basin, checking with the spirit level. Step 9: Connect the trap, keeping it straight and aligned with the wall drain, not angled. Step 10: Connect the water supply with flexible hoses, then turn the water on slowly and check every joint for drips. Step 11: Let the sealant cure, usually around 24 hours, though this varies by product. Avoid heavy use until then. Choosing the Right Waste Coupling, Trap, and Tap Waste Coupling Check for a small overflow hole near the basin’s top rim. If it has one, use a slotted waste coupling, which lets overflow water drain safely. If there is no overflow hole, use an unslotted waste coupling. Fitting the wrong type can cause leaks or make the overflow useless. Trap Type A bottle trap is common with table top basins in India, since it looks neat where plumbing is visible and takes less space. If your drain line is concealed inside a vanity or wall, a P-trap works just as well and can be easier to clean. What matters most is that the trap sits straight, holds water to block drain smells, and stays accessible for cleaning. Tap Choice A tall body basin mixer or wall-mounted spout usually suits a table top basin better than a short tap, since a short tap may not reach the bowl’s centre and can cause splashing. A tap set too high above a shallow basin causes the same problem. Check the spout’s height and reach against your basin’s depth before buying. Common Mistakes to Avoid DIY or Call a Plumber If your plumbing points are ready and the cut-out is done, installing the basin yourself is manageable with basic tools and patience. Many homeowners in India do this successfully. Hire a professional if you are cutting a stone counter, setting up new plumbing lines, or fitting the vanity and basin together for the first time. A mistake with stone cutting can be costly to fix. Troubleshooting and Maintenance Tips If something is not working right after installation, use this table to find the likely cause. Problem Likely Cause Basin feels wobbly Sealant has not cured, or the basin was not levelled before it set. Water splashes outside the bowl Tap’s spout height or reach does not match the basin’s depth. Slow drainage Trap is blocked, or the waste coupling is the wrong size. Bad smell from the drain Trap is not holding water properly. Leak under the basin Sealant line
Stainless Steel Grab Bar: Types, Grades & Buying Guide
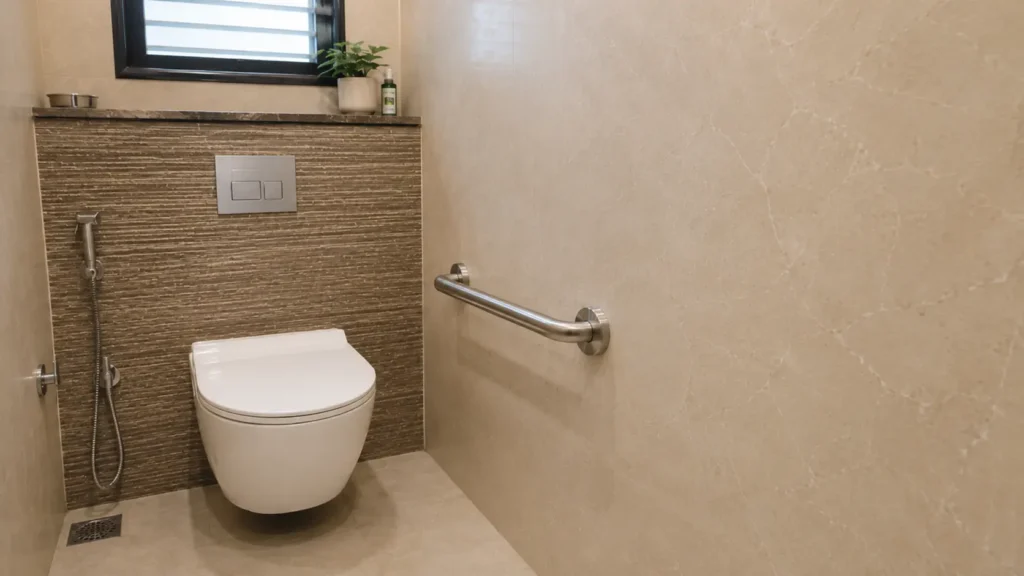
A stainless steel grab bar is a metal rail that you mount to the wall that provides you with something sturdy to hang on to in the bathroom. Homeowners and architects, hospitals, and commercial projects all select this hardware because it can take the daily wear, wet floors, and heavy use without breaking down. Stainless steel is a winner over plastic or regular metal because it doesn’t rust, stays strong for years, and looks clean in any bathroom. But not all stainless steel is the same – the grade you choose will determine how well the bar resists rust, particularly in humid or coastal areas like India. Pick the wrong grade and your solid-looking bar could corrode in a few years. This guide will take you through steel grades, finishes, sizes, installation, pricing, and upkeep, so you can select the right grab bar for your bathroom and your budget. What is a Stainless Steel Grab Bar and Why is It Preferred? A stainless steel grab bar is a fixed rail mounted on a wall to give you a firm grip when standing, sitting, or moving in the bathroom. Its only job is to hold your body weight safely, unlike a towel bar, which just hangs cloth and cannot bear real pressure. Many buyers confuse the two, but pulling on a towel bar for support can snap it off the wall and cause a fall. There are some obvious reasons why stainless steel is the best choice for grab bars: Because of these strengths, you will find stainless steel grab bars in home bathrooms, hospitals, hotels, accessible washrooms, and elderly care facilities. Each of these spaces needs hardware that stays safe and clean under daily, heavy use. Quick Tip: Never use a towel bar as a substitute for a grab bar; they are built for completely different jobs. SS202 vs SS304 vs SS316: Which Stainless Steel Grade Should You Choose? Buy any stainless steel grab bar, and it will look shiny on day one. But the metal underneath that shine is not always the same, and that difference shows up years later as rust spots, weak joints, or a bar that just feels flimsy. In India’s mix of dry cities and damp coastal towns, the grade you pick matters as much as the size or design. Start with SS202. It has less chromium and nickel than the other two grades, and those two elements are what keep rust away. So SS202 holds up fine in a dry indoor bathroom with little water splash, but leave it in constant moisture, and you will see dull spots creep in within a couple of years. Treat it as a budget option, not a long-term one. SS304 is what most Indian bathrooms use, and there is a simple reason for that. It strikes a fair balance between price and rust protection, so it survives daily water contact without much trouble. Unless you have a specific reason to go higher, SS304 covers the job well. Then there is SS316. It costs more because it carries molybdenum, an added element that stands up to salt air and harsh chemicals far better than SS304 can. If your home sits near the sea, or your city stays humid for most of the year, this extra cost pays off over time. In India, stainless steel sheet and strip used to manufacture fittings like these falls under IS 6911:2017, the Bureau of Indian Standards specification that governs chemical composition, mechanical properties, and surface finish for stainless steel. BIS certification under this standard is mandatory for manufacturers, so it’s worth asking your supplier whether the raw steel behind your grab bar is IS 6911 compliant — it’s a concrete way to check quality claims rather than taking a shiny finish at face value. Internationally, the closest equivalent is ASTM A240, the standard that covers chromium and chromium-nickel stainless steel plate, sheet, and strip, which is why grades like SS304 and SS316 read the same whether you’re buying in Mumbai or Munich. Grade Corrosion Resistance Best For Approx. Price Range (India) Limitation SS202 Low to moderate Dry, low-moisture bathrooms Cheapest of the three Rusts sooner in wet or humid air SS304 Good Everyday home bathrooms Mid-range Struggles a bit near the coast SS316 Excellent Coastal and humid homes Highest of the three Higher upfront cost Which Grade is Best for Indian Homes SS304 suits most households; it holds up well, is easy to find, and does not stretch the budget. If salty air or heavy humidity is part of your daily life, spend a bit more on SS316. SS202 only makes sense when your bathroom rarely sees water and your budget is the top concern. Quick Tip: Ask the seller to show the grade stamped on the bar itself — a sticker or a verbal promise is not proof. A BIS-marked mill test certificate for the underlying steel is stronger proof than either. How to Choose the Right Stainless Steel Grab Bar The best grab bar is determined by five factors: size, grip thickness, shape, finish, and hardware. Get these right, and the bar will feel natural to use for years. 1. Size: A grab bar that is too short or placed wrong will not give you the support you need. Here is a quick size guide: Length Typical Use 12″ Small spaces, near soap dishes or corners 16″–18″ Beside the toilet 24″ Inside a shower, vertical mount 32″–36″ Along a shower wall, horizontal mount for full support 2. Grip Diameter: Most stainless steel grab bars come with a grip between 32 mm and 38 mm thick. This range fits an average adult hand well, so you get a firm hold even with wet or soapy palms. A grip that is too thin or too thick can slip out of your grasp when you need it most. 3. Shape: A straight bar works for simple wall support. An L-shaped bar covers two directions, so it helps near a toilet where you need
Bathroom Grab Bars for Elderly in India | Complete Guide
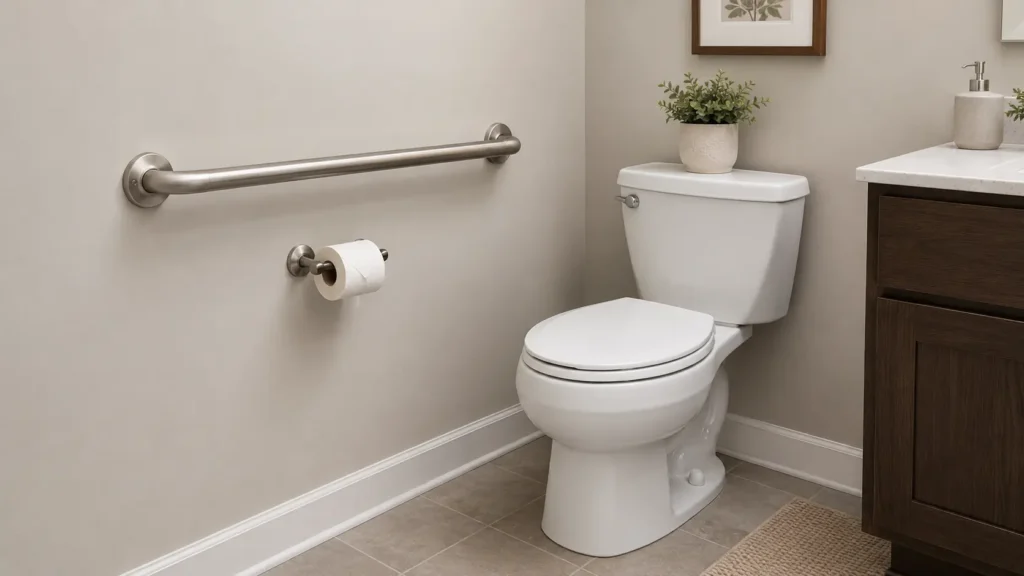
Walk into most Indian bathrooms, and you’ll find the same setup: a bucket and mug near a floor-level tap, wet ceramic tiles underfoot, and nothing on the wall to hold onto. Your parents use this bathroom alone, every morning, often while half-asleep and moving slower than they used to. That combination — standing water, hard tiles, and no support is exactly how most falls at home happen. Not on stairs. Not in the kitchen. In the bathroom. A grab bar is a small fix for a big risk. This guide covers what the data actually shows, where bars need to go, which type and size fit an Indian bathroom, what “correct height” really means here (not just the American number every site copies), and what the whole job realistically costs. Why Elderly Falls in Indian Bathrooms Are So Common This isn’t a guess — it’s backed by India’s largest study on ageing. The Longitudinal Ageing Study in India (LASI), a nationally representative survey of more than 28,000 adults aged 60 and above, found that about 11.6% of them reported a fall. Among older adults already classified as frail, that number climbs to roughly 15%, compared to under 12% for those who aren’t frail. Other regional studies in India have found even wider variation — anywhere from 14% to over 50% depending on the state and how the survey was conducted, which tells you fall risk isn’t evenly spread; it depends heavily on local conditions, age, and health status. The bathroom sits at the centre of this risk because Indian plumbing habits are structurally different from Western ones: None of these are unusual bathrooms; they’re the default layout in most Indian homes, which is exactly why this deserves more attention than it usually gets. Where You Actually Need a Grab Bar A grab bar only helps if it’s where the body actually moves. Think through the real path: door → across the wet floor → commode or bathing area → back to the door. Types of Grab Bars in India No single bar type fits every bathroom. Most homes end up using a mix. Type Best for What to know Straight bars Everyday commode and shower use The default option; mounted horizontal, vertical, or diagonal L-shaped / angled bars Corners, shower entries Combine a vertical and horizontal grip in one unit Folding / flip-up bars Compact Indian bathrooms Hinge flat against the wall when not needed — useful where space is tight Diagonal-mount bars Users with arthritis A 45° angle can follow the arm’s natural arc more comfortably than a flat horizontal bar Suction-cup bars Travel or short-term use only Not rated for full body weight — treat as temporary, never a daily-use substitute for a wall-anchored bar What Size Grab Bar Do You Need? Length should match the spot, not personal preference: As a rule of thumb: shorter near the commode, longer along shower walls and approach paths. Grab Bar Height: India vs. the ADA Numbers Most articles on this topic quote the American ADA standard of 33–36 inches (about 84–91 cm) from the floor, because it’s the most searchable number online. It’s a legitimate reference, but it’s a US commercial-building code, not something written for Indian homes or Indian body proportions. India does have its own accessibility framework: the Harmonised Guidelines and Standards for Universal Accessibility in India, 2021 (issued by the Ministry of Housing and Urban Affairs and CPWD under the Rights of Persons with Disabilities Act, 2016), along with the older IS 4963:1987 from the Bureau of Indian Standards. These are the correct reference points for Indian accessible design, and they exist primarily to guide public buildings rather than private homes. For a home installation, the more useful approach and the one geriatric and occupational therapists generally recommend is to mount the bar level with your parent’s hip height while they’re standing next to it, rather than defaulting to a fixed number pulled from a foreign code. A few centimetres of difference matters far more to the actual user than matching an imported standard exactly. Whatever height you choose, the bar must be anchored into a wall stud, brick, or solid concrete — never into tile or drywall alone. Stainless Steel, Nylon, or Aluminium: Which Material Should You Pick? The right material depends more on your local climate than on price. Material Best For Watch Out For SS304 stainless steel Humid and coastal climates; long-term daily use Higher upfront cost, but holds up where cheaper materials corrode Nylon/composite Budget installs, lighter use, warmer grip for arthritic hands Lower load capacity; can degrade faster in extreme heat Aluminium Lightweight installs Wears faster in high-humidity, coastal conditions For most Indian homes, especially anywhere near the coast or dealing with heavy monsoon humidity — SS304 stainless steel with a textured, non-slip grip is the safer long-term choice, even at a higher initial cost. What Affects Your Total Grab Bar Cost The bar itself is only part of the bill. Two things matter more: Product prices vary widely by brand, material, and load rating, so treat any single figure you see online as a rough guide rather than a fixed number — always confirm current pricing and the certified load rating directly with the seller before buying. As a general pattern, basic bars sit at the lower end of the market, while branded with anti-slip grips and higher load ratings cost noticeably more. It’s usually more cost-effective to budget for a full three-bar bathroom setup at once than to add bars one at a time later. If a parent is recovering from surgery and only needs support for a few months, renting is worth exploring — several home-care and mobility-equipment suppliers in India now offer short-term grab bar rentals as an alternative to buying. Installation and Buying Checklist Most grab-bar failures come down to poor installation, not a weak bar. Before you buy or install: Beyond Grab Bars: Building a Genuinely Fall-Safe Bathroom A grab bar alone doesn’t cover everything.
Wall Mixer With Hand Shower: Types, Uses & Buying Tips
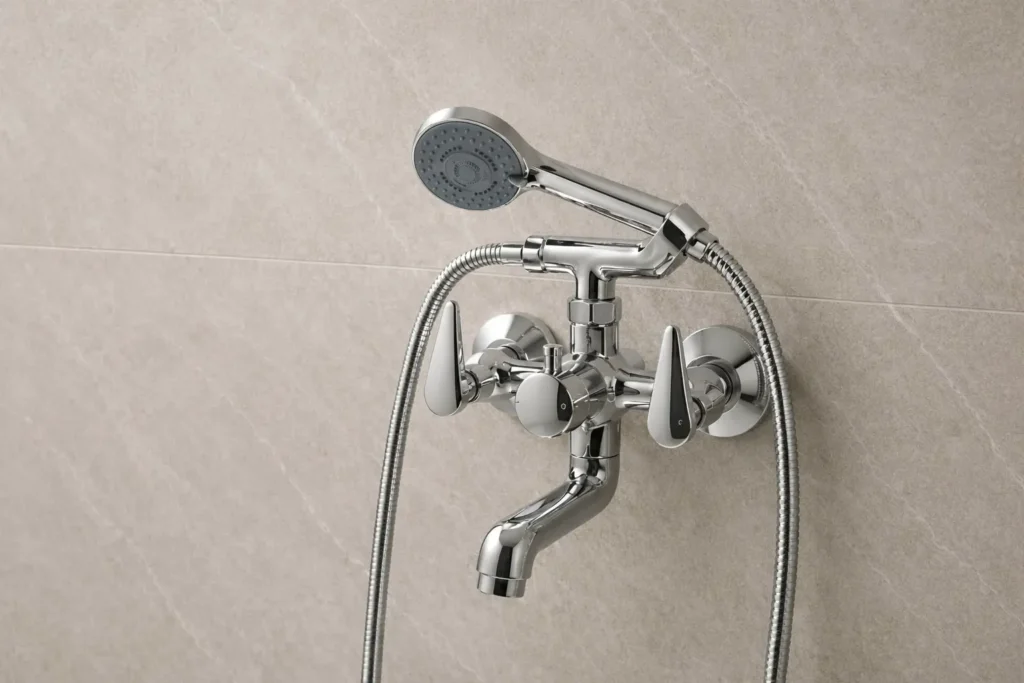
A wall mixer with hand shower is a bathroom fitting that mixes hot and cold water and sends it out through a handheld shower head. Indian homeowners now prefer this setup because it offers flexible bathing, unlike a fixed showerhead alone. Here’s what many buyers miss: two units can look almost the same on a store shelf, yet perform very differently. The cartridge quality, body material, and finish decide how long the fitting lasts and how well it handles daily use. Before buying, weigh the type of mixer, its body material, water pressure compatibility, plumbing requirements, and spare parts availability. These five factors affect performance far more than looks do. This guide explains each of them, so you can choose a fitting that suits your bathroom and lasts for years. What is a Wall Mixer With Hand Shower and How Does It Work? A wall mixer tap with hand shower, also called a hot and cold mixer tap with hand shower, blends hot and cold water into a single flow. It then sends that water out through a fixed spout or a handheld shower, whichever you need. Most Units are Built From These Parts: The working part is simple once you break it down. Hot water comes in from one pipe, cold water from another, and both meet inside the mixing chamber. Turning the handle changes how much of each goes in, so you get the temperature you want. Once that’s set, the diverter lever decides whether the water exits through the spout below or travels up through the hose to the hand shower. This makes the fitting useful for more than just bathing. People rely on it to fill buckets, rinse the floor, wash their hair, or bathe kids, all from one point on the wall. Types of Wall Mixers with Hand Shower Available in India Not every wall mixer with hand shower set works the same way. The differences come down to how the hand shower connects, how many outlets the unit offers, and how the pipework is installed. Brands such as Jaquar, CERA, Hindware, and Parryware all sell both non-telephonic and telephonic ranges in India, usually across zinc alloy and brass body options. Non-Telephonic Wall Mixer This type holds the hand shower in a fixed bracket close to the mixer body. It has a simple design, so there’s less to go wrong and less to maintain over time. Telephonic Wall Mixer Here, the hand shower pulls out on a flexible hose, much like a telephone receiver. This gives you longer reach and makes bathing easier for elderly users and children who may struggle with a fixed unit. 2-in-1 Wall Mixer This unit combines a spout and a hand shower in one compact fitting. It’s the most common setup found in Indian homes today, since it covers bucket-filling and hand shower use without needing extra plumbing points. 3-in-1 Wall Mixer A 3-in-1 wall mixer adds a third outlet: provision for an overhead shower, along with the spout and hand shower. This type needs an extra water line planned in advance. Because of this, it suits new construction or a full renovation, where the plumber can lay out all three connections before the walls are finished. Exposed vs Concealed Installation Whichever type you pick, you’ll also choose between two installation styles, and this choice matters as much as the mixer type itself. Installation Advantage Trade-off Exposed Easier to service and repair Visible pipework Concealed Cleaner, minimal look Needs planning before tiling An exposed wall mixer sits on top of the wall, so a plumber can reach the pipes quickly if there’s a leak or a part needs changing. A concealed wall mixer hides the pipework inside the wall, which gives the bathroom a neater finish, but this route only works if the plumbing is planned before tiling starts. Keep in mind that all price ranges above are indicative for 2026 and will shift based on the brand you pick, your city, and whether you buy in-store or online. Note: Wall mixers are available in finishes such as chrome, matte black, brushed nickel, gunmetal, and rose gold. Chrome remains the most popular choice because it matches most bathroom fittings and is usually the easiest to maintain. What Actually Matters When Buying a Wall Mixer with Hand Shower Looks and price tell you very little about how a fitting will hold up. These are the details that decide whether your purchase lasts five years or fifteen. Brass Body vs Zinc Alloy Body A good-quality brass wall mixer with hand shower resists corrosion and hard water better than zinc alloy. It is often made from high-grade brass, the same kind used in other sanitary fittings. It also lasts longer and handles repairs more easily because the metal is stronger around threads and joints. The trade-off is cost: brass units usually cost more than zinc alloy, but the extra spend often pays back in fewer replacements. Finish Quality A good chrome finish does more than improve appearance. Multi-layer nickel and chrome plating helps protect the mixer from rust, stains, and daily wear. A thicker, well-applied finish also keeps the fitting looking newer for longer. Cartridge Quality The cartridge controls how smoothly the handle turns and how well the mixer resists leaks. Ceramic disc cartridges outperform older rubber-washer or plastic mechanisms on both counts, and they tend to last many years longer under daily use. Water Pressure Compatibility Most hand showers work with low water pressure, but the spray becomes stronger and more even as pressure increases. Many manufacturers recommend an operating pressure of around 0.5 to 3 bar, so it’s worth checking the product specifications before buying. Diverter Quality The diverter is one of the parts that wears out most quickly because it is used every time you switch between the spout and the hand shower. A good-quality internal mechanism helps reduce leaks and keeps switching smooth over time. A durable internal mechanism matters far more here than the outer chrome finish.
2-in-1 vs 3-in-1 Wall Mixer: Differences & Buying Guide
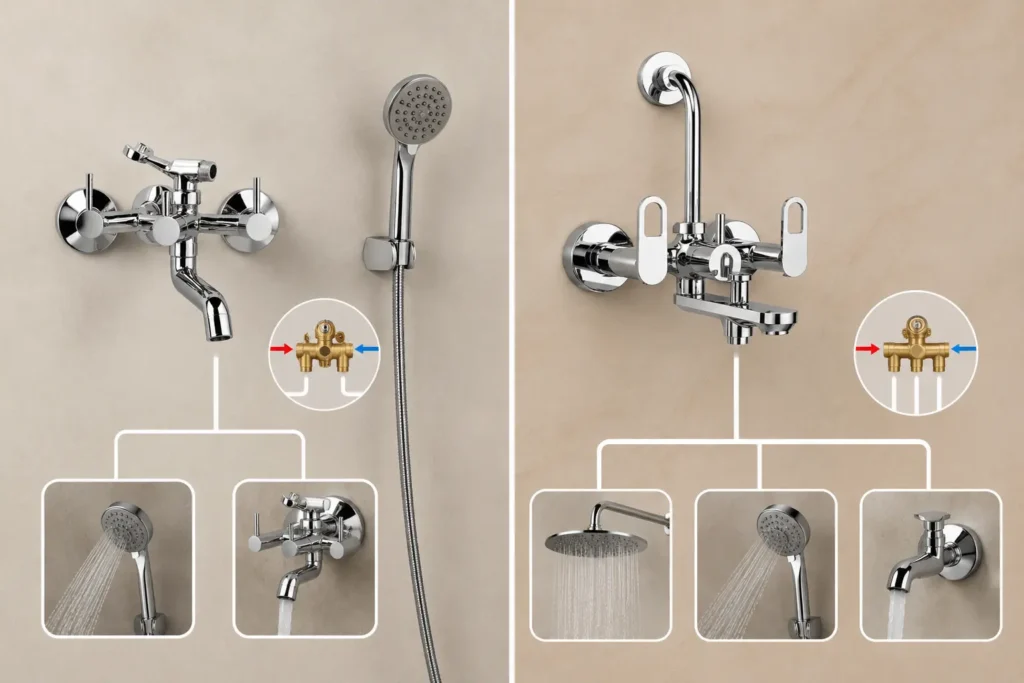
Picking a wall mixer sounds simple until you actually walk into a shop and see the options. Most people are unsure if they need a 2-in-1 or a 3-in-1 model. Here’s the basic idea: a wall mixer is a fitting fixed into your bathroom wall. It lets you control and switch water flow between outlets like your shower head and tap. Now, the tricky part. Both mixers often sit next to each other on store shelves, looking almost identical. But their function is not the same, and that’s exactly why buyers get stuck. This brings us to the real question people search for — 2-in-1 vs 3-in-1 wall mixer. Truthfully, one isn’t superior to the other. It comes down to how many outlets your bathroom has and how you plan to use them. Over the next few sections, we’ll break down how each type works, where they fit best, and what to check before you buy one. What is a 2-in-1 Wall Mixer? A 2-in-1 wall mixer is a wall-mounted fixture with two water outlets. The number of outlets can vary by brand, but it is generally designed for generic bathroom use with a limited number of water connections. It’s a simple design. You turn one handle, and water moves to either the shower or the tap, not both at once. Most homes with a basic bathroom layout use this type. If your bathroom only has a shower and a tap, this mixer covers your needs without extra plumbing work. Because it controls fewer outlets, installation stays straightforward. Plumbers often finish the job faster with this setup. What is a 3-in-1 Wall Mixer? A 3-in-1 wall mixer adds a third outlet for more flexibility. In many models, this is used for an overhead shower or another water outlet, depending on the brand. This third point is where the difference lies. This is a popular option with homeowners who want a rain shower or ceiling-mounted shower head later, even if they don’t install it right away. As a result, this mixer suits bathrooms planned for future upgrades. It also works well in larger bathrooms where multiple water outlets get used regularly. Some people install all three outlets immediately. Others activate the third one later, once they’re ready to add the extra fitting. One thing to keep in mind: outlet configurations aren’t identical across brands. A few manufacturers add different combinations, like a spout instead of a hand shower. Because of this, always check the exact product specifications before you finalize your purchase. What one brand calls “3-in-1” might work slightly differently from another. 2 in 1 vs 3 in 1 Wall Mixer: Complete Comparison Before picking one over the other, it helps to look at both side by side. This wall mixer comparison lays out the practical differences so you’re not guessing at the shop. Feature 2-in-1 Wall Mixer 3-in-1 Wall Mixer Number of water outlets Usually 2 Usually 3 Hand shower compatibility Yes Yes Overhead shower compatibility No Yes Plumbing requirement Needs simpler plumbing May need extra plumbing for the additional outlet Installation complexity Usually easier Usually a little more involved Best suited bathroom size Small to medium Medium to large Maintenance Fewer parts to check Slightly more upkeep Price range in India Approximately ₹1,700–₹6,000 Approximately ₹3,500–₹10,000+ Upgrade flexibility Limited Higher, room for overhead shower later Best suited for Basic bathrooms, tighter budgets Bathrooms where you may add an overhead shower later Actual prices depend on the brand, material, and finish you pick. Exact outlet design, plumbing needs, and naming may differ from brand to brand, so always check the product specification before buying. So what’s the actual difference between 2 in 1 and 3 in 1 wall mixer options once you get past the spec sheet? Mostly, it’s about how much your plumbing has to do. A 2-in-1 keeps things basic. Fewer pipes go into the wall, so the plumber’s job gets done quicker, and repairs later stay cheap too. A 3-in-1, though, plans ahead. Even if you don’t hook up an overhead shower right away, the outlet sits there waiting. That means no breaking tiles again if you decide to add one next year. There’s a maintenance angle too. Less hardware behind the wall usually means less can go wrong, which is partly why 2-in-1 setups tend to need fewer repair visits. None of this makes one option the smarter buy across the board. It really depends on whether your bathroom plumbing needs to stay simple now, or stretch a little further down the road. Which Wall Mixer is Right for Your Bathroom Not every bathroom needs the same setup. Here’s how the choice usually plays out based on your specific situation. This wall mixer buying guide isn’t about finding the best wall mixer for bathroom use in general. It’s about matching the mixer to your actual layout, plans, and budget. How to Choose the Right Wall Mixer Picking between 2-in-1 and 3-in-1 covers is just part of the decision. A few other things determine whether the fitting actually lasts once it’s installed. Wrapping It Up At its core, the 2 in 1 vs 3 in 1 wall mixer decision comes down to how many outlets your bathroom actually needs right now, and later. A 2-in-1 works well if your plumbing stays simple and an overhead shower isn’t part of your plans. A 3-in-1 suits homes that want that flexibility built in from the start. Before you buy either one, check your existing plumbing layout with a plumber first. This one step can save you from mismatched fittings, extra construction, or costly changes once the mixer is already installed. Frequently Asked Questions Can a 2-in-1 Wall Mixer Be Upgraded to a 3-in-1 Later? Not directly. The body itself only has two outlet points, so upgrading usually means removing the old fitting and installing a new one, along with fresh pipework behind the wall. Does a 3-in-1 Wall Mixer Need Different or Extra Plumbing Work? Yes, in most
How to Install a Hand Held Shower Diverter
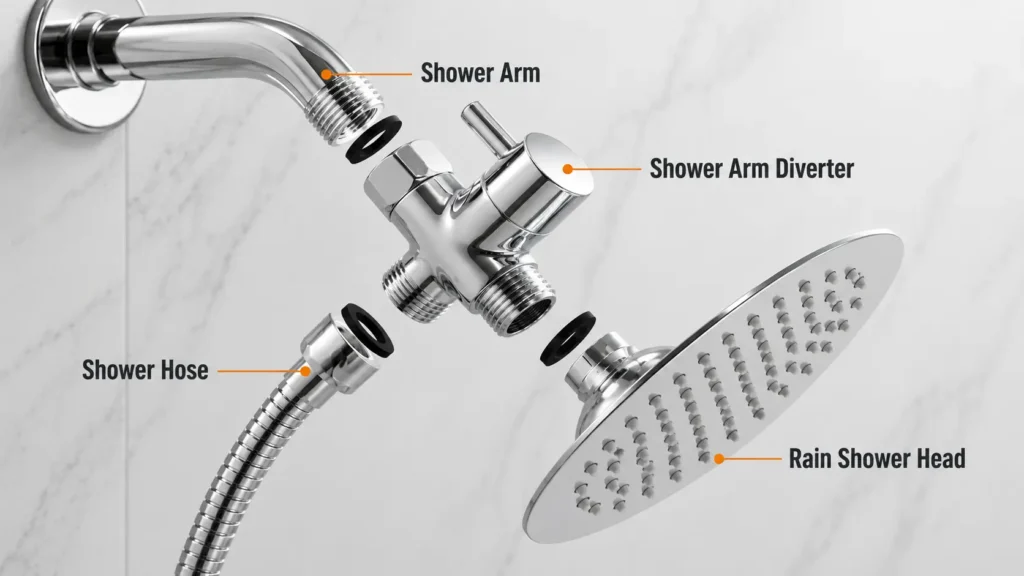
A handheld shower diverter allows you to switch between your overhead shower and a hand shower. You can easily change the water flow between the two. Most homeowners can install a handheld shower diverter themselves without calling a plumber. The job usually takes 30 to 60 minutes with basic tools. Difficulty level: easy and beginner-friendly. More Indian homeowners want flexible bathing options these days. A fixed overhead shower alone doesn’t wash pets, clean corners, or rinse the bathroom floor easily. That’s why an overhead shower with a hand shower setup is becoming common in homes across cities and towns. A diverter makes this switch simple. You get both shower types on one wall, without adding new pipes or breaking tiles. This guide walks you through every step to install hand-held shower diverter fittings on your own, from tools to final testing. What is a Hand-Held Shower Diverter A hand-held shower diverter is a small fitting that controls where your water goes. It sits between your shower pipe and the showerhead. This shower diverter valve lets you switch water flow between your overhead shower and your hand shower. Turn the diverter one way and water flows overhead. Turn it the other way, and water flows through the hand shower hose instead. The hand shower diverter is useful because it gives you two shower options from one water line. You don’t need separate plumbing or extra pipework for each shower type. You’ll usually find this fitting on the shower arm — the metal pipe that connects the wall outlet to your showerhead. Expert Tip: Most shower fittings sold in India use a G1/2 (½-inch BSP) threaded connection — the same global standard used on bathroom accessories worldwide. In most cases, a hand-held shower diverter will thread on directly without extra adapters. Still, check the thread type on your wall outlet before buying, since older buildings or some local brands may differ. Tools & Materials Required Gather these items before you start, so you’re not dripping wet and hunting for a wrench halfway through. A little prep now saves you a messy pause later. Tool/Material Purpose Adjustable wrench Grips and turns pipe nuts of different sizes PTFE tape (Teflon tape) Thin white tape you wrap on threads so water doesn’t seep out Soft cloth Mops up spills and keeps the chrome finish scratch-free Bucket Sits under the pipe to catch leftover water Hand shower hose Carries water from the diverter fitting to your hand shower Diverter valve Lets you switch water between the overhead and hand shower Rubber washer Presses into joints to stop small drips at the seams Things to Check Before Installation Before you touch a single pipe, run through this checklist. It takes five minutes and saves you a lot of frustration later. Step to Install a Hand Held Shower Diverter Once your checks are done, the actual fitting doesn’t take long. Follow these steps in order, and don’t rush the tightening. Step 1: Turn Off the Water Supply Find your main water valve and shut it firmly before touching anything. Water can spray out unexpectedly the moment you loosen the old showerhead. This one step keeps the whole job dry and manageable. Tip: Open the tap briefly afterward to drain any water still sitting in the pipe. When nothing drips out, and the pipe stays dry, you’ll know it worked. Step 2: Remove the Old Showerhead With one hand, hold the shower arm and with the other, use an adjustable wrench to loosen the showerhead. Turn it counter-clockwise until it comes free. You need bare, exposed threads before the new diverter can go on. Tip: Slip a cloth between the wrench and the pipe so the chrome finish doesn’t get scuffed. After this step, the arm sits empty and ready for cleaning. Step 3: Clean the Threads Use a soft cloth to wipe away any rust, dirt, or bits of old tape from the exposed threads. A clean surface lets the diverter sit tight without rocking. Leftover dirt here often causes a leak later. Tip: Use your finger to feel along the threads for rough or worn spots. Good threads will be smooth and bare with no rough spots. Step 4: Apply PTFE Tape Wrap the PTFE tape (aka Teflon tape) 3-5 times around the threads in the direction of the threading (clockwise direction). This tape fills the tiny gaps between the threads so water can’t leak through. Most leaks trace back to someone skipping this small step. Tip: Keep the tape pulled tight as you wind it so it doesn’t bunch or fold over. Done right, the threads should feel padded but not sticky. Step 5: Install the Diverter Thread the diverter valve onto the shower arm by hand, turning it clockwise until it stops moving easily. Give it one more gentle quarter-turn with the wrench to seat it firmly. This is the core step in the whole install shower diverter process. Tip: If it resists early on, back off and restart. Forcing it usually means the threads have caught wrong. Once fitted, the diverter should sit flat against the wall with no visible gap. Step 6: Install the Hand Shower Hose Screw the hose clockwise onto the diverter’s side outlet until tight. Before you tighten fully, check that the rubber washer inside the connector is sitting flat and in place. A washer that’s missing or sitting crooked will leak right at this spot. Tip: Hand-tighten as far as it’ll go, then use the wrench for just a small final turn. The hose should hang steady afterward, with no looseness at the joint. Step 7: Install the Hand Shower After that, screw the hand shower head onto the open end of the hose in a clockwise direction until snug. This is the final step of the hand shower installation and ties the whole thing together. Stop before it gets hard to turn — overtightening cracks the thread seal. Tip: Press the buttons on the hand shower and
How to Change a Shower Arm: Step-by-Step Guide
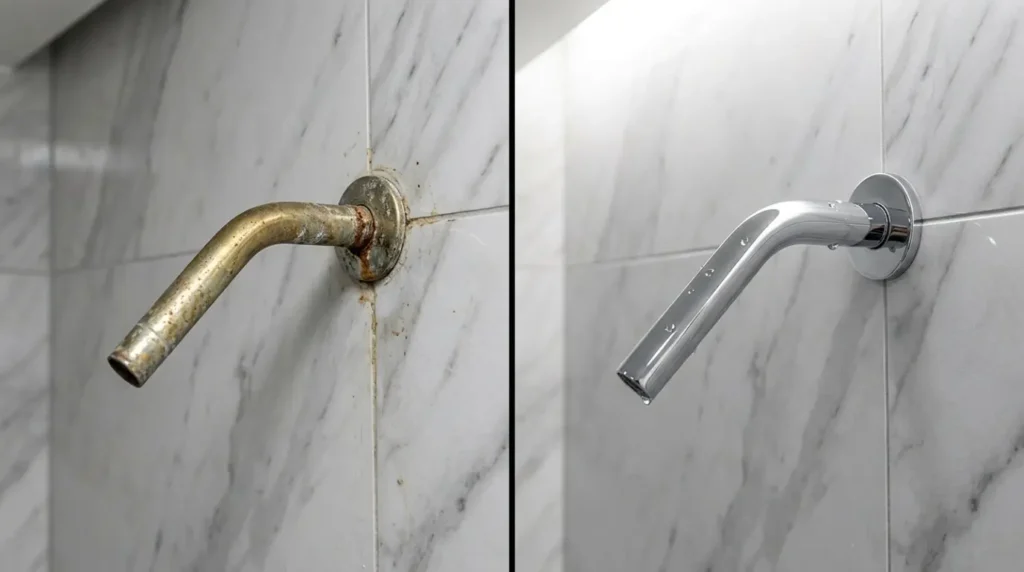
Replacing a shower arm is usually a 30-60 minute DIY job as long as the threads are clean and undamaged. A shower arm is the short pipe that connects your showerhead to the wall plumbing behind the tiles. People tackle shower arm replacement for different reasons. You might have a leaking shower arm dripping near the wall, a visibly corroded pipe, or simply want to upgrade to a rain shower head. Sometimes it’s just a cosmetic update, a chrome finish that’s gone dull. Before you buy anything, check your fittings. Most Indian homes use a 1/2-inch BSP fitting, but some imported fixtures use NPT or metric threads. These look nearly identical but won’t seal correctly if mixed. Here’s one warning worth remembering: wrong thread sealing causes most post-installation leaks on any wall-mounted shower arm. PTFE tape is strongly recommended for threaded shower-arm joints. Finally, shut your isolating valve before starting. If you don’t have one, keep a bucket and old towels close by. Tools and Materials You Need Before Starting Gathering everything before you start means you won’t be hunting for a wrench with water dripping on your floor. What You’ll Need Optional But Useful Caution: Metal wrench jaws and chrome finishes do not get along. Always wrap a cloth around the arm first; bare jaws leave scratches that rust quickly in hard water conditions. Important Checks Before You Remove the Old Shower Arm Rushing straight to removal is how small jobs turn into big ones. Take five minutes here and save yourself a lot of trouble later. Check the Thread Size and Compatibility Most Indian homes use a 1/2-inch BSP (British Standard Pipe) fitting where the shower arm meets the wall. To confirm yours, check the product spec sheet that came with your existing shower arm. No spec sheet? Take your old arm to a local hardware store and compare it physically against a known 1/2-inch BSP fitting. One thing to watch: BSP and NPT threads look almost identical side by side. But they have different thread angles — BSP uses 55 degrees, NPT uses 60 degrees, and this difference alone is enough to prevent a reliable seal, even though both share the same 14 threads per inch. Identify the Type of Shower Arm You Have Shower arms come in a few common styles — straight, curved, wall-mounted, and ceiling-mounted. Most Indian bathrooms use a standard straight shower arm or a gently curved shower arm that angles the head downward. Switching to a rain shower arm that drops from the ceiling is a different matter entirely. That usually means rerouting pipework inside the wall — a job for a plumber, not a weekend DIY session. Measure the Length and Projection Measure from the wall surface to the centre of your showerhead connection point. Use that number to pick the right replacement. Common Length Metric Equivalent Best For 6 inches 150 mm Small shower spaces 9 inches 225 mm Standard bathrooms 12 inches 300 mm Larger enclosures 15 inches 375 mm Rain shower heads Getting the shower arm length wrong means your showerhead either sits too close to the wall or sticks out awkwardly into the spray zone. Look for Corrosion or Old Sealant Before removing anything, shine a torch around the flange, the decorative plate sitting flush against your wall. Look for rust patches, flaking chrome, or layers of hardened old tape sitting on the exposed threads. A corroded shower arm usually comes off fine. But if you spot damaged threads inside the wall elbow itself, stop. A rusted shower fitting deep in the wall may need the tiles opened up to fix properly. At that point, consider a licensed plumber rather than pushing forward alone. How to Change a Shower Arm: Step-by-Step Work through each step in order. Skipping ahead is how small mistakes turn into bigger ones. Step 1: Remove the Shower Head Turn the shower head anticlockwise to loosen it. Keep a soft cloth wrapped around it so the finish stays scratch-free. If it won’t budge, spray a little penetrating oil around the joint and wait 10–15 minutes before trying again. Once it’s off, check the rubber washer inside; if it looks flat or cracked, swap it out now rather than later. Step 2: Slide Back the Escutcheon Plate Next, slide the escutcheon plate, the cover plate sitting against your wall tiles, back along the pipe to expose the entry point. If someone has sealed it with silicone, run a utility knife carefully around the edge first. Before moving on, take a close look at what’s behind it. Moisture, mould patches, or rust at this stage usually point to a slow, hidden leak that needs attention. Step 3: Unscrew the Old Shower Arm Wrap a cloth around the arm near the wall, grip it with your adjustable wrench, and turn anticlockwise. If the fitting feels seized, apply penetrating oil and give it ten minutes to work before you force anything. One thing to be careful about is never pushing hard against the wall tiles directly. Sudden pressure can crack grout lines or the tile itself. Step 4: Clean the Internal Threads Once the old arm is out, clear away every bit of old PTFE tape, limescale, and debris using a stiff brush or an old toothbrush. Always brush debris outward, away from the pipe opening. You don’t want grit falling into your wall plumbing. Look inside the wall elbow and check the inner threads for any damage or corrosion before going further. Step 5: Apply PTFE Tape the Right Way Hold the pipe end facing you and wrap the PTFE tape clockwise around the threads. Wrapping in this direction stops the tape from bunching up and unravelling as you screw the arm in. Two to four wraps are enough for a standard joint, or follow the tape manufacturer’s guidance if specified. Keep the tape off the very end of the pipe opening. If your fitting uses tapered BSPT threads, consider adding a small amount of
Pop-Up Waste Coupling Types, Price, and Brands
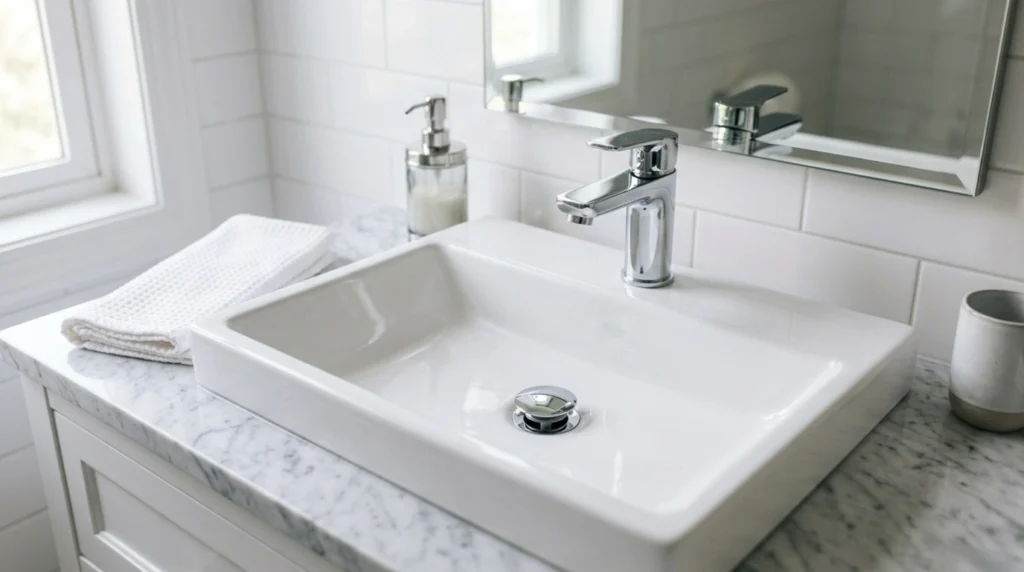
Gone are the days of rubber plugs and rusty chains in your bathroom sink. Today, the pop-up waste coupling does the same job but smarter, cleaner, and with one push. A waste coupling is the fitting that connects your basin or bathtub drain to the pipe below. You find it in countertop basins, wall-mount basins, pedestal basins, and bathtubs across Indian homes. But not all waste couplings work the same way. Some pop up with a push. Others use a rod or a click button. Each type suits a different basin style and budget. So whether you are renovating your bathroom or picking fittings for a new home, this guide covers everything. You will find types, sizes, brands, and prices all in one place. How Does a Pop-Up Waste Coupling Work? A pop-up waste coupling opens and closes your drain without a plug or chain. You activate it from above, and a stopper inside the drain moves up or down. Here is how the parts connect. A lift rod sits behind your tap. It connects to a pivot rod running horizontally inside the pipe. That pivot rod pushes the stopper up or down as you move the lift rod. Also, check if your basin has an overflow hole. Basins with an overflow slot need a waste coupling that has an overflow channel built in. A standard one will not fit correctly. In India, you will find three activation types: In the Indian market, you’ll primarily come across two types: click-clack (push-button) pop-up couplings, which are by far the most common in countertop and wall-mount basins, and full-thread or knob-operated variants used in older or more basic setups. Lever-operated couplings, where a rod behind the tap controls the stopper, exist but are largely limited to imported fittings or very high-end installations. If you’re buying locally, click-clack is almost certainly what you’re looking for. Waste Couplings Types – Material, Finish & Size Waste couplings are available in different materials, finishes, and sizes. Picking the wrong one means leaks, rust, or a poor fit; so each detail matters. Material Solid brass waste couplings handle hard water best and last the longest. Stainless steel is rust-proof, mid-range in price, and works well in humid Indian bathrooms. ABS or PVC couplings cost the least but wear out faster; they are fine for guest bathrooms with light use. Finish The finish you pick should match your tap and bathroom fittings. CP chrome is the most common and easiest to clean. But gold, glossy, matte black, rose gold, and ceramic top finishes are now widely available in India for premium bathrooms. Size and Shank Length This is the detail most buyers miss. Getting the wrong shank length means the coupling will not reach your drain pipe. Size Use Case 32mm / 1.25″ Wash basins — countertop, pedestal, wall-mount 38mm / 1.5″ Kitchen sinks and bathtubs Shank lengths available in India: 3″, 5″, 6″, 7″, and 9″. Longer shanks fit thick countertop basins where the basin wall is deeper. Note: Always measure your basin thickness before ordering online. A 3″ shank will not reach the nut on a 60mm thick countertop basin; you will need at least a 5″ or 6″ shank. Pop-Up vs. Traditional Waste Coupling For home and hotel bathrooms, pick a pop-up waste coupling every time. For high-traffic public washrooms, a traditional waste coupling is the smarter, lower-maintenance choice. Feature Pop-Up Waste Coupling Traditional Waste Coupling Ease of use One push or press Manual plug insertion Look Sleek, no visible plug or chain Basic, utilitarian Debris build-up Hair can collect under the stopper Open drain, easy to clear Maintenance Needs occasional rod adjustment Almost zero moving parts Cost ₹300 – ₹2,500+ ₹40 – ₹400 Best for Homes, hotels, premium bathrooms Public washrooms, high-traffic areas Traditional waste couplings win on one thing — simplicity. Fewer parts mean fewer things that break. So in a busy airport washroom or a school toilet block, they make sense. But in your home or a hospitality project, the pop-up wins on every other count. Brands to Know Before You Buy The brand you pick affects more than just price. It decides your warranty coverage, spare part availability, and how well the finish holds up in hard water over time. Entry to Mid Range Hindware is a reliable starting point and also widely available offline and priced for standard residential bathrooms. Ruhe, Krysstal, and Bassino are design-led brands offering PVD finish options at mid-range prices. Mid to Premium Range Begin Faucets makes solid brass pop-up waste couplings in shank sizes of 3″, 5″, 6″, and 9″. They cover chrome and gold finishes, plus a ceramic pop-up variant for premium countertop basins. Their couplings fit countertop, wall-mount, and pedestal basins. You can browse the full range at Jaquar remains one of the most recognized names in Indian bathrooms, with a wide finish range and strong after-sales infrastructure across the country. The brand advertises a 10-year warranty, though coverage varies by product category. CERA is equally worth considering, especially if you’re buying from a physical store. Most mid-size plumbing and sanitary showrooms stock it. Not the flashiest option, but reliable and easy to find spare parts for. Luxury Tier Kohler and Grohe are global brands. They offer great build quality, but at a considerable price premium. Tip: See if the brand sells spare parts separately. A broken pivot rod should not mean replacing the entire waste coupling. Pop-Up Waste Coupling Price in India A pop-up waste coupling in India starts at under ₹100 and goes beyond ₹2,500 for premium branded options. Material and finish drive most of the price difference. Tier Material Price Range Budget ABS / PVC ₹50 – ₹200 Mid-Range Brass chrome / Stainless steel ₹300 – ₹800 Premium Ceramic top / PVD / Branded brass ₹800 – ₹2,500+ Five Factors Push the Price Up or Down How to Choose the Right Waste Coupling for Your Bathroom The right waste coupling depends upon your basin type, countertop thickness, and water
Waste Coupling for Kitchen Sink: Types, Sizes & Materials
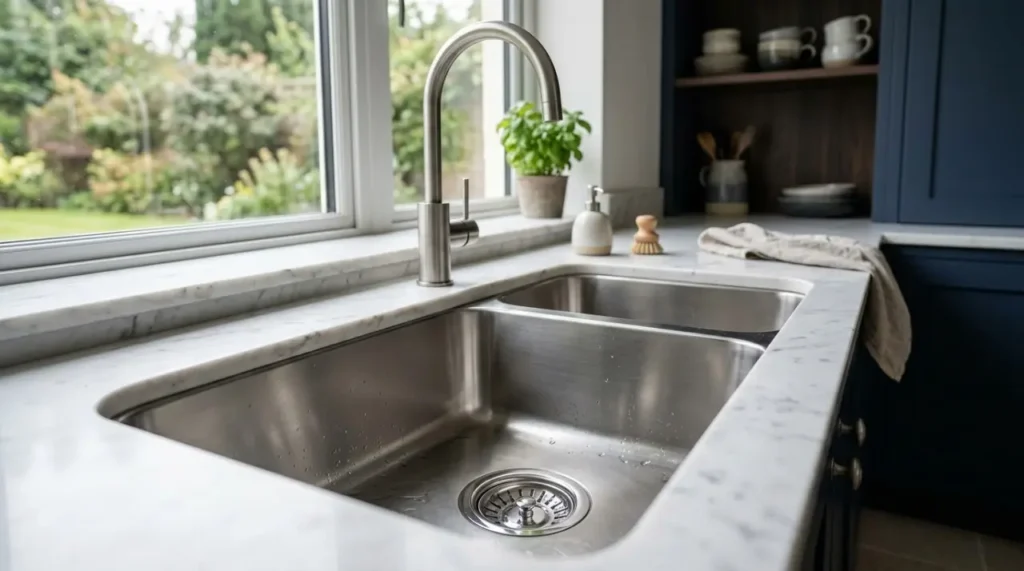
When you’re renovating your kitchen, every fitting matters, including the one most people overlook. A waste coupling for a kitchen sink is the connector that joins your sink’s drain outlet to the waste pipe running into your wall or floor. It sounds simple. It isn’t. Most buyers pick the first one they see at the hardware store. That’s usually the wrong call. There are multiple types, at least three common size standards, and material choices that directly affect how long your fitting lasts. This guide walks you through everything — types, sizes, materials, and how to pick the right waste coupling for your specific kitchen setup. What is a Waste Coupling for a Kitchen Sink? Most people think the waste coupling is just the drain plug or the strainer sitting at the top of the sink. It is not. The waste coupling is the fitting that connects your sink’s drain outlet to the waste pipe system beneath it. It does two things. First, it gives wastewater a clear exit path out of your sink. Second, it creates an airtight seal that blocks sewer gas from rising back up through your drain. The fitting has four main parts. The flange sits on top, covering the drain hole from above; this is the part you actually see. Underneath the sink, the threaded body grips the fitting securely in place. Between the two, a rubber washer does quiet but critical work: it presses against the sink base and stops water from finding a way through. The locking nut tightens from below to secure the whole assembly in place. One thing worth knowing: the waste coupling is not the same as the P-trap. The P-trap is the curved pipe you see lower down, and it serves a different function entirely. Because kitchens handle grease, food debris, and hot water daily, not every coupling is built for the job, which is why type and material matter. Types of Waste Coupling for Kitchen Sink Not all waste couplings look the same or work the same way. Before you buy, know which type actually fits your sink. 1. Full-Thread Flat Strainer Coupling Walk into any plumbing shop in India, and this is what you will see first. It fits stainless steel single-bowl sinks and has threading running the full length of its body. That full threading is what keeps it locked tight against the drain hole. It also comes with a removable strainer basket, so food debris does not go straight into your pipe. Most options in the market sit between ₹150 and ₹600. 2. Half-Thread Coupling Your sink has a small overflow slot near the top rim? Then this is your type. The threading stops halfway down the body, leaving the lower half open. That gap lets overflow water drain back in without getting blocked. It fits a specific kind of sink, so do not buy this one if your sink has no overflow channel. You will find these priced between ₹200 and ₹700. 3. Pop-Up Waste Coupling This one has a lever or knob that opens and closes the drain. No bending down, no pulling out a stopper by hand. It suits premium kitchen setups where ease of use matters. That said, kitchens with heavy daily food waste can clog the pop-up mechanism faster than you expect. Plan to spend between ₹400 and ₹1,200 for a decent unit. 4. Square Waste Coupling Granite and quartz composite sinks do not always have round drain holes. Many come with square cutouts, and the standard size you will see is 90x90mm. These couplings usually ship as part of the composite sink package, but if you are buying separately, confirm the cutout size first. Prices generally fall between ₹350 and ₹900. 5. Y-Coupling / Dual Outlet Two bowls, one drain pipe. That is the problem this type solves. It also works when your dishwasher drain needs to connect to the same sink outlet. Two inlets feed into one waste pipe, which keeps things tidy under the sink cabinet. Brass variants cost between ₹300 and ₹800. Quick Decision Shortcut: Waste Coupling Size and Material: What to Know Before You Buy Size is where most buying mistakes happen. Here is what you need to check before ordering anything. Drain hole shape: Your sink has either a round or a square drain hole. Do not assume, look at it. Round drain holes on Indian stainless steel sinks typically measure between 38mm and 45mm. Most single-bowl SS sinks from brands like Futura, Carysil, and Franke sit at 38mm to 40mm. Check the product sheet before buying. Square drain holes follow a standard 90x90mm cutout with a tolerance of plus or minus 4mm. These are almost always found on granite or quartz composite sinks. Waste pipe outlet at the wall or floor side is nearly always 40mm (1.5 inches) for kitchen sinks. Never use a 32mm bathroom basin coupling here. The pipe diameter is different, and the connection will not hold under the kitchen water volume. Measure your drain hole before ordering. A 2mm mismatch means a permanent micro-leak. Choosing the Right Material and Finish Material decides how long your fitting lasts. Here is a straight comparison: Material Best For Price Range Lifespan PVC Cold-water utility sinks ₹80–₹250 2–4 years SS 304 All Indian kitchen sinks ₹350–₹900 8–12 years Brass Premium and heavy-use setups ₹700–₹1,800 10–15 years PVD Finish Luxury and modern kitchens ₹1,200–₹3,500 10+ years PVC degrades with repeated boiling water exposure. Brass holds threads better than SS but costs more. For any Indian kitchen sink, SS 304 is the right call. On finishes, Chrome works with most taps and is the standard choice. Matte or Gunmetal suits modern flat-panel kitchens. Matte Black PVD is scratch-resistant and outlasts standard chrome plating. Rose Gold PVD sits in the luxury segment and is mostly a design choice. How to Choose the Right Waste Coupling for Your Kitchen Sink Buying the wrong coupling costs you twice — once at purchase, once when it leaks. Run
What is a Wash Basin Waste Coupling? Complete Guide
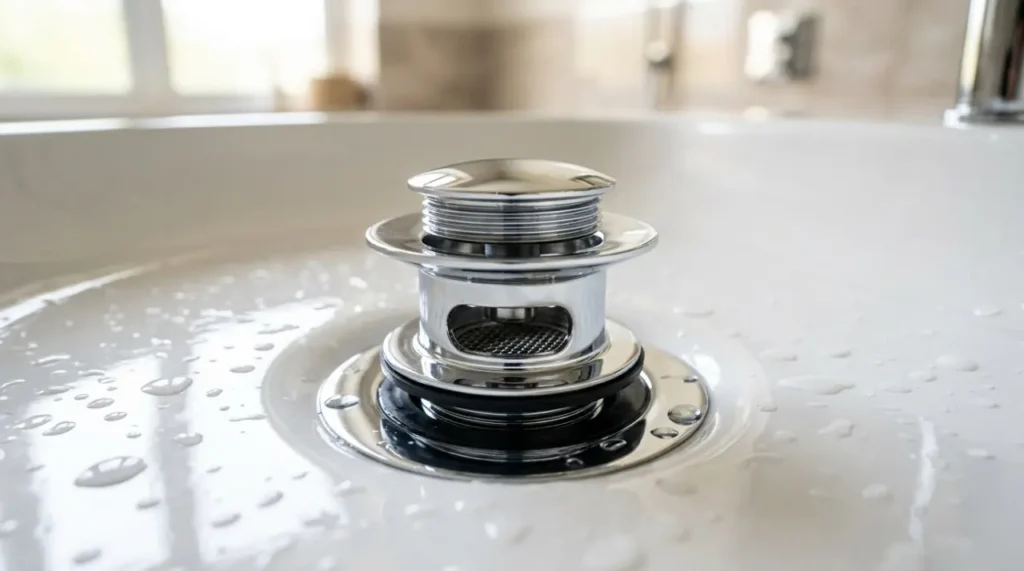
Water pooling under your basin. A drain that barely moves. A smell that won’t leave the bathroom. Most of the time, one small part is responsible, the wash basin waste coupling. People buy expensive basins, premium taps, and designer tiles. Then they fit a cheap coupling and wonder why things go wrong in 6 months. This blog covers types, sizes, materials, installation, and fixes — everything you need before you buy or before you call a plumber. What is a Wash Basin Waste Coupling and What Does It Contain? A wash basin waste coupling is a drain fitting that joins the outlet hole of a wash basin to the waste pipe below it, and which provides a seal to the joint to prevent leaks. Each Coupling is Made of 5 Parts: 1. Top Flange: The visible ring on the top of the basin drain. It acts as a strainer or jali to prevent hair and debris from entering the drain pipe. 2. Threaded Body: The cylindrical tube that goes through the drain hole in the basin and into the drain below. A full-thread body has threads along its entire length for more grip, while a half-thread body has threads only near the base and is used where there is limited space below the basin. 3. Overflow Slot: That notch on the side of the threaded body is what connects your basin’s overflow channel to the drain. A slotted coupling keeps that path open; an unslotted one seals it shut completely. Put an unslotted coupling in a basin built with an overflow hole, and water backs up inside the channel with nowhere to go. 4. Rubber Washer + Plastic Washer: These 2 washers sit between the basin’s underside and the locking nut. Their job is simple: stop water from pushing through the outlet hole and dripping below. No washer, no seal — it leaks from day one. 5. Locking Nut: The large nut is tightened from below the basin that clamps the entire assembly firmly in place. Types of Waste Couplings and Which One Fits Your Bathroom The type you need depends on two things — your basin design and how often the bathroom is used. Type How It Works Best For Not Suitable For Price Range (India) Open / Free-Flow No stopper; water drains freely at all times High-traffic bathrooms, utility areas, servant toilets Basins where water retention is needed (shaving, soaking) ₹60–150 Dome / Jali Perforated dome sits over the outlet; no moving parts Kitchen sinks, outdoor basins, high-debris areas Basins requiring water retention or a tight seal ₹80–200 Click-Clack / Push-Button Push down to close, push again to open Personal bathrooms, easy DIY replacement Basins with very shallow outlet depth; some vessel basins ₹250–600 Pop-Up The rod linkage connects to a lever near the tap; the tap handle opens and closes the drain Designer basins, premium bathrooms, wall-mount basins Basins with no pre-drilled overflow or linkage hole ₹500–1,500 Plug & Chain Rubber plug on a chain; needs a chainstay hole on the basin Vintage, classic, or clinic-style basins Modern basins without a chainstay anchor point ₹150–400 Waste Coupling Sizes and Materials Indian wash basins use a 32mm (1.25 inch) drain outlet as standard. Kitchen sinks use 40mm (1.5 inch) — these 2 sizes are not interchangeable, and fitting the wrong one creates a poor seal and a persistent leak from day one. To measure your drain hole, place a ruler across the widest internal diameter of the outlet opening. That number decides which wash basin waste coupling goes in. Waste Coupling Materials In Indian cities with high TDS water, SS304 or solid brass are the only materials worth using in a primary bathroom. How to Choose the Wash Basin Waste Coupling Before purchasing, run through these 5 steps in order. 1. Check Your Basin Type: Pedestal basins have an overflow channel built into the ceramic, so they need a slotted wash basin waste coupling. Countertop and vessel basins have no overflow path, so they need an unslotted coupling. Wall-hung basins follow the same rule as pedestals — slotted. 2. Measure the Drain Hole: Use a ruler across the widest internal diameter. A standard wash basin reads 32mm. A kitchen sink reads 40mm. Buy only what matches that number. 3. Choose the Coupling Type: Use the basin type and bathroom-use logic from the previous section. Do not guess. The wrong type creates either a flooding risk or a drain that never fully closes. 4. Choose the Material: SS304 or solid brass for any primary bathroom. ABS or PVC only in a secondary or guest bathroom with light daily use. 5. Check Finish and Trap Compatibility: Make sure the Finish of the coupling matches your tap (chrome, matte black, rose gold). Then confirm the lower thread exit diameter fits your existing bottle trap, P-trap, or concealed trap inlet before you leave the shop. Red Flags When Buying: How to Install a Waste Coupling Without a Plumber Tools you will need: Steps to Install a Waste Coupling 1. Clean the drain hole — scrape out all old sealant, putty, and residue from the basin outlet. Dry the surface completely before starting. 2. Apply silicone sealant or plumber’s putty around the underside rim of the top flange before pushing it in — this is what stops water from seeping between the flange and the basin. 3. Insert the coupling from above. Push it downward through the drain hole and press the flange firmly flat against the basin. 4. From below, slide on the rubber washer first, then the plastic washer, then hand-tighten the locking nut until it holds. 5. Hold the top flange steady by pressing a flat-head screwdriver into the strainer slots. Tighten the locking nut with pliers — firm, not forceful. Overtightening cracks ceramic. 6. On slotted couplings, align the overflow slot with the basin’s internal overflow channel before final tightening. A misaligned slot blocks the overflow path completely. 7. Wrap PTFE tape around the lower thread exit —