
Geyser Connection Pipe Guide: Types, Sizes & Price
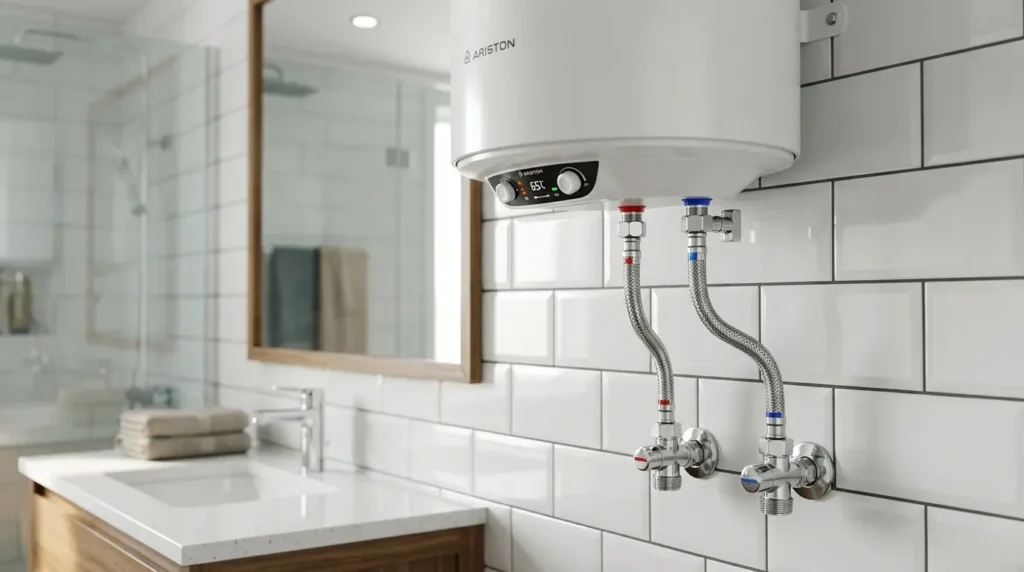
A geyser connection pipe is the short pipe that links your water heater to the wall’s shut-off valve (the tap that stops water flow). One pipe carries cold water into the geyser; another carries hot water out to your taps. Choosing the right material and size prevents leaks, burns, and costly repairs. In this guide, you will learn which pipe materials handle Indian water conditions best, what sizes fit standard geysers, how to install and maintain your pipes, and what to budget for quality fittings. Types of Geyser Connection Pipes Geyser connection pipe selection is based on the heat resistance, water hardness, and city air. SS 304 Braided Stainless Steel SS 304 is the most common choice for the hot water outlet side. It handles temperatures up to 90°C and holds pressure up to roughly 3 bar — well within the range of a standard home geyser. The “304” refers to the alloy mix: approximately 18% chromium and 8% nickel. That combination creates a tough oxide layer on the surface, which fights rust effectively. But “highly rust-resistant” is not the same as “rust-proof.” In areas with hard water or mineral-heavy supply, check the fittings every six months for early signs of surface discolouration. SS 316 Braided Stainless Steel SS 316 looks identical to SS 304 from the outside. The difference is inside the alloy: SS 316 adds molybdenum (a hardening element that blocks chloride attack — the kind caused by salt in coastal air). If you live in Mumbai, Chennai, or Kochi, the salt air accelerates corrosion on standard SS 304 fittings. SS 316 handles that environment significantly better and is worth the small price premium in those cities. PTMT Pipe PTMT stands for Poly Tetra Methylene Terephthalate, but you don’t need to remember that. What matters is that no metal touches the water path. That eliminates rust entirely and removes the risk of galvanic corrosion (the slow damage that happens when two different metals sit in contact with water). PTMT is a practical choice for Delhi, Jaipur, Lucknow, and other hard-water cities where mineral deposits accelerate metal wear. It is already the default fitting in many urban apartment buildings across India. The threads are metal-reinforced for a tight seal, so installation is straightforward. PVC Pipe PVC is the cheapest option on the shelf. For the cold water inlet side only, it works fine. The problem is temperature: standard PVC softens above roughly 60–65°C, which means it should never go on the hot outlet side of a geyser. A softened PVC joint can bulge, drip, or fail under pressure. Use PVC only where the water stays cold. If your plumber suggests PVC for the hot side to save money, push back. Material Heat Resistance Best For Typical Use-Case SS 304 Braided Up to 90°C Hot outlet + cold inlet Most Indian cities, general residential use SS 316 Braided Up to 90°C Hot outlet in coastal areas Mumbai, Chennai, Kochi, Goa PTMT Up to 85°C Hard-water cities, no-rust requirement Delhi, Jaipur, Lucknow, urban flats PVC Up to 60°C Cold inlet only Budget installs, cold water side only Geyser Connection Pipe Size Guide Before you think about length, check the thread. Nearly all Indian geysers, such as Crompton, Havells, Racold, AO Smith, use a ½ inch BSP thread (British Standard Pipe, the measurement standard used across Indian plumbing). Your geyser connection pipe must match this thread size, or no amount of PTFE tape (thread-seal tape) will stop a slow drip at the joint. Matching Length to Your Install The right length depends on one thing: the physical gap between your geyser’s inlet/outlet port and the angle valve (the small shut-off tap fixed to your wall). Here is a quick-pick guide for each standard size: The Practical Buying Rule Measure the distance from the geyser port to the angle valve. Then add 3 inches to that number. That buffer accounts for the angle of the connections, any slight misalignment in the fittings, and the gentle loop you leave in the pipe to absorb thermal expansion (the small amount a pipe stretches when hot water runs through it). Never buy the exact measured length. A pipe that is even half an inch too short puts stress on both end fittings every time hot water runs, and that stress causes leaks over months, not years. Quick Tip: If you are unsure which length to buy, pick 24 inch. You can coil the extra length neatly behind the geyser. You cannot stretch a pipe that is too short. How to Install a Geyser Connection Pipe Fitting a geyser connection pipe correctly takes under 60 minutes, but skipping any one of these steps can mean a leak, a burnt element, or an electric shock risk. Step 1: Shut Off Water and Electricity Turn off the main water supply valve and switch off the geyser’s MCB (the circuit breaker in your electrical panel) before you touch anything. Both must be off — cutting only the water or only the power is not safe enough. Step 2: Identify the Inlet and Outlet Ports Find the cold water inlet port (usually at the bottom of the geyser) and the hot water outlet port (usually at the top). Connecting these in reverse sends cold water out to your taps and hot water back into the supply line — a mistake that is easy to make and easy to avoid. Step 3: Wrap PTFE Tape on Every Male Thread Wrap PTFE tape (a thin white thread-seal tape that fills microscopic gaps in the joint) 3–4 times clockwise around every male thread end before fitting. Wrapping anticlockwise causes the tape to unwind as you tighten the nut, which defeats its purpose entirely. Step 4: Insert the Rubber Washer Into Both End Nuts Drop an EPDM rubber washer (a heat-resistant rubber ring that creates a watertight seal) inside both end nuts before you screw them on. A missing washer is the single most common cause of a slow drip at the fitting joint.
SS Connection Pipe Buying Guide: Grades, Sizes & Uses
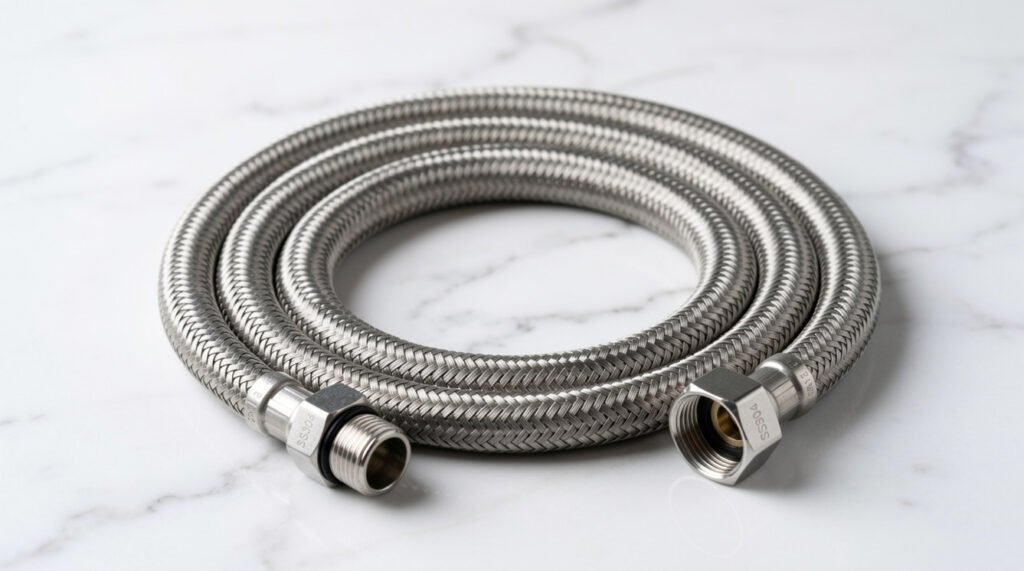
You bend down to check under the basin and find a small puddle of water. Or maybe water keeps dripping behind your toilet, no matter how many times you tighten the joint. The real problem often comes from a worn-out connection pipe. An SS connection pipe is a flexible tube that carries water from the wall or floor outlet to your tap or appliance. You will find it under basin taps, kitchen faucets, showers, health faucets, geysers, and toilet cisterns. But not every SS connection pipe performs the same way. Quality depends on the steel grade, the inner tube material, the braid strength, and the fittings used. This guide will help you pick the right SS connection pipe for your home, so you avoid leaks, rust, and repeat plumbing repairs. Why SS Connection Pipes are Preferred in Modern Plumbing Indian homes now prefer an SS connection pipe over old rubber or PVC tubes. Here is why builders and plumbers across India now default to SS connection pipes. 1. Corrosion Resistance: Stainless steel contains chromium. When stainless steel meets air, a thin, invisible layer forms on its surface. This layer blocks moisture and oxygen. That is what stops it from rusting the way ordinary iron does Note: Resistant doesn’t mean immune; given enough time and the wrong water conditions, even SS will show wear. 2. Flexible: Because of the braided design, this pipe bends and twists into spots a rigid pipe never could. Behind a basin, under a kitchen sink, squeezed inside a narrow cabinet; it goes there without kinking or snapping. 3. Durability: Most Indian homes push water through household lines at around 1 to 3 bar pressure. A decent SS connection pipe takes that pressure day after day and doesn’t crack, swell, or give out. 4. Appearance: The metal braid has a chrome-like shine to it, so it doesn’t look out of place next to modern taps and fittings. It actually adds a bit of polish to a bathroom or kitchen setup. Expert Tip: Corrosion-resistant does not mean “rust-proof.” The steel grade and your local water quality both decide how long the pipe lasts. What’s Inside an SS Connection Pipe: Construction Breakdown Before making a purchase, you must know what’s inside an SS connection pipe. Each layer plays a different job. The Inner Tube The inner tube carries the actual water flow. Most pipes use EPDM rubber for this layer, though some use PVC or nylon. EPDM handles both hot and cold water, and most household-grade pipes rate it up to 90°C. PVC versions cost less, but they cannot take high heat as well, so they suit cold-water points better. The Stainless Steel Braided Layer This layer wraps tightly around the inner tube like a metal mesh. This prevents the tube from expanding or blowing up under the extra pressure put upon the water within it. This is where the real difference between a strong pipe and a weak pipe comes into play. Wire thickness, how tightly the wires weave, and the steel grade all determine how much pressure the braid can take. End Fittings and Washers The fittings connect the pipe to your tap or wall outlet, and most are made from brass or stainless steel. Brass fittings dominate Indian plumbing because they grip threads firmly and resist corrosion well. Inside each fitting sits a small rubber washer, and this washer causes most leaks. So always check its condition before you tighten the connection. Types of SS Connection Pipes and Where to Use Them Indian markets sell two main types of SS connection pipes. Each one suits a different job in your home. Braided SS Flexible Connection Pipe This type dominates Indian homes today. A stainless steel wire braid wraps around an inner tube made from EPDM or PVC. The braid bends easily, so you can route it behind cabinets and tight fixture spaces without trouble. Use this type for basin taps, kitchen mixers, health faucets, and toilet cistern connections. Corrugated Stainless Steel Connection Pipe This pipe skips the rubber tube entirely. This type is all metal, so it can take more heat and pressure than the braided type. It is not that flexible, but it is stiffer and more durable in harsh environments. This type should be used for geysers, hot water lines, and commercial plumbing. Feature Braided SS Pipe Corrugated SS Pipe Pipe Flexibility High Moderate Temperature Range Up to ~90°C Up to ~150°C Common Use Household fixtures Geysers, hot lines Cost (India) ₹80–₹350 ₹200–₹700 SS Connection Pipe Sizes, Thread Standards & Price Range in India Picking the right length and thread size matters as much as picking the right material. Common Lengths Length Typical Use 30 cm Close-fit connections under counters 45 cm Standard basin and tap installations 60 cm Slightly longer reach behind cabinets 100 cm Geyser connections, extended runs Thread Sizes Indian plumbing fittings follow the BSP thread pattern set under IS 554. Most homes use two sizes. The ½ inch thread fits basin taps, kitchen faucets, and health faucets. ¾ inch thread is for higher flow points like geyser connections. Price Range in India Buying Tip: Buy a pipe a little longer than your exact gap, with a nice curve. A tight pipe adds more stress to the fittings and wears out faster. How to Choose the Right SS Connection Pipe This is the part that decides whether your pipe lasts five years or fails in five months. 1. Check the Steel Grade First Grade Composition Best For SS 304 18% Cr, 8% Ni Standard household plumbing, most reliable choice SS 304L 18% Cr, 8% Ni, Low Carbon Where welding is involved, better weld-zone corrosion resistance SS 202 17% Cr, 4–6% Ni Budget segment — lower corrosion resistance; avoid for long-term use Expert Note: SS 304 suits most Indian homes. SS 202 is less costly, but it rusts faster, especially in hard water areas. 2. Check the Braid Before you buy, run your eyes over the weave pattern closely. A good
Connection Hose Pipe: Types, Sizes & Buying Guide
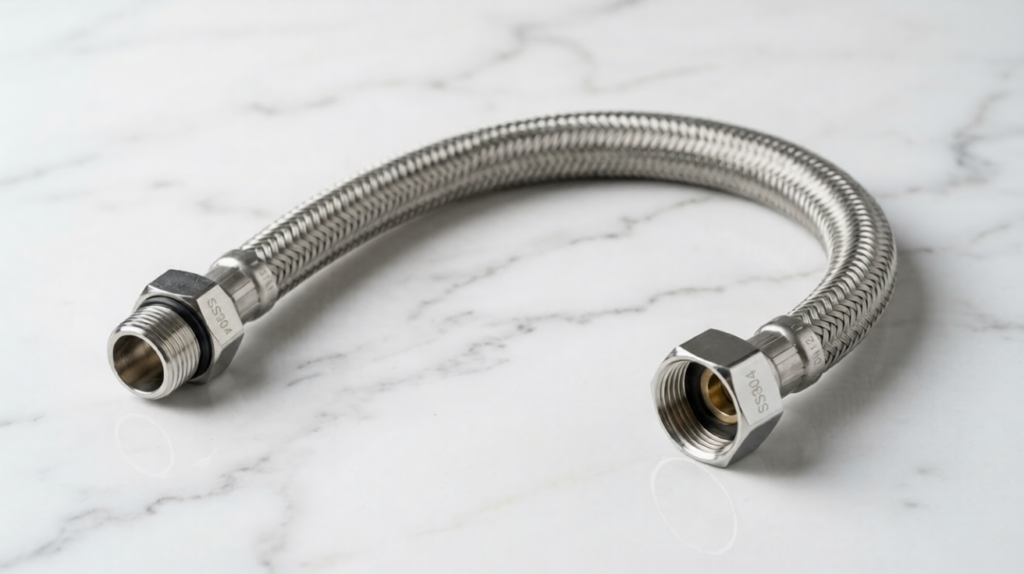
A connection hose pipe is a short, flexible tube that connects your water supply line to a tap, toilet, geyser, or appliance. Without the right one, even a small leak can quietly damage walls, floors, and fittings over time — costing you far more than the pipe itself. You will find a connection hose pipe in more places around your home than you might expect. The bathroom tap, the kitchen sink, the geyser on your wall, the washing machine in the corner — each one depends on a hose to carry water safely from the inlet valve to the fixture. If that hose is the wrong size or made from a weak material, it can burst, drip, or corrode within a year or two. Choosing the right connection hose pipe means knowing which material suits your water pressure, which size fits your fittings, and how long the pipe will realistically last. This guide walks you through all of that in simple, practical terms. Different Types of Connection Hose Pipes and Their Applications There are three types of connection hose pipe you will commonly find in Indian homes — stainless steel braided, PVC, and rubber. Which one you need depends on where you are fitting it, how much water pressure that point carries, and how long you want it to last. Stainless Steel Braided Connection Hose Pipe Look closely at a braided hose pipe, and you will see a steel mesh wrapped around a rubber or PVC inner tube. That outer layer is what gives it strength under pressure. Most plumbers reach for this type first when working on bathroom taps, kitchen sinks, or geyser connections. It costs more upfront, yes. But it easily holds up for 5–10 years without cracking or leaking. PVC Connection Hose Pipe A PVC hose pipe makes sense when your budget is tight, and the water pressure at that point is low. Toilet inlet valves and under-sink connections are where you will see it used most often. Just know that PVC can stiffen and crack over time, usually within 2 to 5 years, particularly in warm rooms. Note: Never use a standard PVC hose on a hot water line or geyser connection. The heat softens the inner tube, which can cause it to balloon and fail suddenly. Rubber Connection Hose Pipe Rubber is naturally bendy, which is exactly why a flexible hose pipe works so well for washing machine connections. The pipe needs to curve around corners without kinking, and rubber handles that do so without any trouble. The one thing to watch, rubber breaks down faster when heat or direct sunlight hits it regularly, so keep it away from geysers and open windows. Type Best For Durability Price Range (₹) Stainless Steel Braided Bathroom, kitchen, geyser High ₹80–₹500+ PVC Low-pressure connections Moderate ₹30–₹100 Rubber Appliances Moderate ₹50–₹200 Connection Hose Pipe Sizes and How to Choose the Correct Length Generally, hose pipes are available in two standard sizes in India: 1/2 inch and 3/4 inch. Most bathroom taps and geyser inlets use ½ inch, while kitchen sink connections and washing machines often need ¾ inch. The correct length depends upon the distance between your wall outlet and the tap or appliance you are connecting. Common lengths available in the market are: Before you buy, measure the exact distance from the centre of your wall outlet to the inlet point on your tap or appliance. Use a simple measuring tape and add about 5–8 cm extra to that number; this gives the hose a gentle curve instead of a straight, pulled line. A connection hose pipe that is too short will stretch tight between the two fittings. That constant tension is one of the most common causes of hose pipe leakage, poor sealing at the joints, and stress cracks over time. Always go slightly longer, never shorter. How to Choose the Best Connection Hose Pipe Before Buying When buying a connection hose pipe, four things matter most: water pressure at the point of use, material quality, connector build, and whether the product carries a warranty or certification. Getting even one of these wrong can mean a leaking joint or a burst pipe within months. 1. Check the Water Pressure First Homes in upper floors or areas with municipal supply often deal with low pressure, while ground-floor homes and those using booster pumps can see quite high pressure. A hose that cannot handle your actual water pressure will balloon, weaken at the joints, and eventually fail. Always check the pressure rating printed on the pack before buying. As a reference, most municipal water supply in Indian homes runs between 1 and 3 bar. If your building uses a booster pump, that can go up to 5 or 6 bar. Look for a hose rated at least 10 bar — most decent braided hoses are — so you have a comfortable safety margin above your actual pressure. 2. Inspect the Material Quality Closely Take the hose and bend it a little. A good hose will be firm but not hard to the touch. Look for a smooth, even interior tube with no visible bubbles or thin spots. If you have a braided hose pipe, the outer steel mesh should be tight and even along the entire length, with no loose or broken wires anywhere. 3. Examine the Connector Quality Carefully The small metal ends on either side of the hose, called hose pipe fittings, matter more than most people realise. Brass connectors resist corrosion far better than plain metal ones and grip the thread more reliably over time. Also, check the rubber washer sitting inside each connector. A thin or uneven washer is a common cause of dripping joints right from day one. 4. Brand, Warranty, and Certifications A hose pipe that comes with even a one-year warranty tells you the manufacturer stands behind it. If the pack carries a BIS or ISI mark, that is a good sign — it means the product has been tested against
Toilet Cistern Types, Price & Buying Guide for Indian Homes
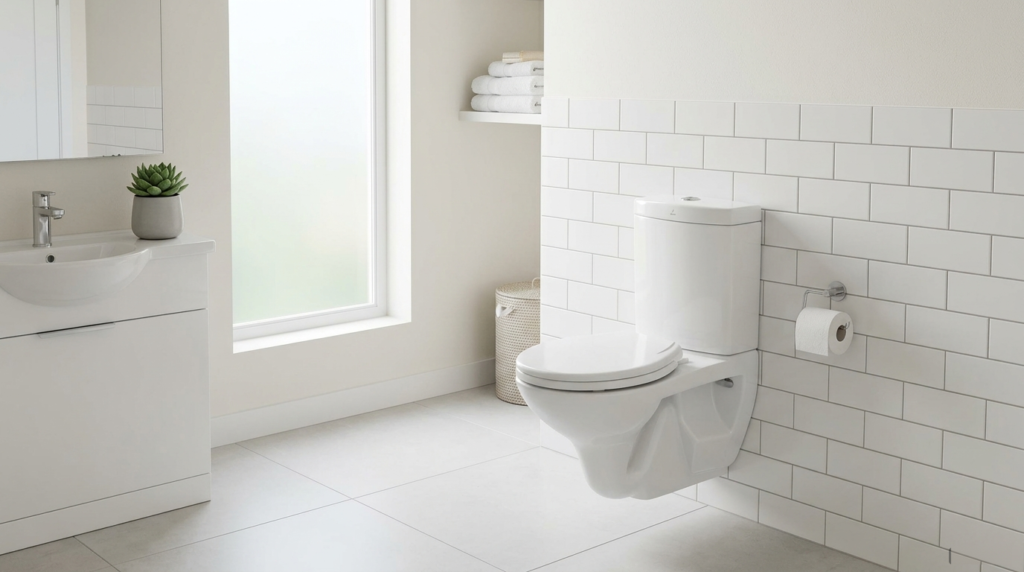
A toilet cistern, also called a flush tank, is the water tank that sends water into the toilet bowl when you flush. In India, you can buy them as exposed tanks or concealed ones hidden inside the wall, with a single flush or a dual flush option. Prices depend on the type, size, material, and brand you pick. This guide covers how a cistern works, the real types available in India, current price ranges, how to choose one, and how to fix common problems. Is a Cistern the Same as a Flush Tank? Yes. In India, people use “cistern,” “flush tank,” and “flush cistern” for the same part. The word changes by region and by brand, but the job stays the same: store water, then release it to clean the bowl. How a Toilet Cistern Works Water enters your home through the main supply line. It travels through the fill valve into the cistern. A float sits on top of the water. As the tank fills, the float rises. Once it reaches a set height, it shuts the fill valve off. When you press the button or pull the handle, the flush valve opens at the bottom of the tank. Water rushes down through the flush pipe and into the bowl. This clears out waste and pushes it into the drain pipe. A few small parts make this whole system work: When even one of these parts wears out, you get a weak flush, a running cistern, or a leak. Different Types of Toilet Cistern in India Older guides often list “wall-hung,” “close-coupled,” and “concealed” as if they are five separate types sitting in one row. They aren’t. These words actually describe three different things: where the cistern sits, how it connects to the bowl, and how the toilet pan is mounted. Here’s the clearer way to look at it. Cistern Position: Toilet Pan Mounting Style: By How the Toilet Pan is Mounted: So a wall-hung toilet almost always uses a concealed cistern too. These aren’t rival types. They are different layers of the same design choice. Toilet Cistern Price in India Prices change based on material, brand, and flush type. Here is a realistic price range based on current Indian market listings: Type Approx. Price Range Basic plastic exposed cistern ₹330 – ₹1,500 Branded exposed cistern (Hindware, Parryware, CERA) ₹900 – ₹3,000 Close-coupled cistern (tank + bowl combo parts) ₹2,000 – ₹8,000 Concealed cistern only (tank unit) ₹3,000 – ₹8,000 Concealed cistern with steel frame, for wall-hung WC ₹10,000 – ₹30,000+ Installation, the flush plate, and the WC pan usually cost extra. A plumber’s labour charge for fitting a cistern is separate from the product price. Which Toilet Cistern Should You Buy? Your Situation Best Choice Tight budget Basic exposed plastic cistern Want easy repairs Exposed cistern Renting your home Exposed cistern (easy to replace, no wall work) Small bathroom Concealed or back-to-wall setup Modern bathroom design Concealed cistern Want to save water Dual-flush cistern (6/3 litre or 4/2 litre) Full renovation, higher budget Concealed cistern with wall-hung WC How to Choose the Right Cistern Flush Capacity Under the Indian Standard IS 774, most modern cisterns use a dual-flush design of 6 litres for solid waste and 3 litres for liquid waste. Older single-flush tanks often hold 10 litres. A dual-flush model uses far less water over a year. Water pressure This part often gets skipped, but it matters. Water pressure is measured in bar. Most fill valves are built to work between about 0.2 bar and 5 bar, though this varies by brand, so always check the box. If your home uses an overhead tank, height creates the pressure — every 1 metre of height above the cistern adds roughly 0.1 bar. A tank that sits too low may not give your fill valve enough pressure, causing slow refills. In that case, ask for a low-pressure fill valve designed for low-flow homes. Wall Type for Concealed Cisterns You don’t need a solid brick wall for every concealed system. Most concealed cisterns come with their own steel support frame, which can be fitted against a masonry wall or built into a stud partition wall. What matters most is following the frame manufacturer’s fitting instructions, not the wall alone. Spare Parts Before buying a concealed system, check that flush plates, inlet valves, and flush mechanisms are easy to find for that brand near you. Exposed cisterns are usually easier here, since most plumbers already carry common spare parts for them. Hard Water If you live in an area with hard water, such as parts of Delhi, Chennai, or Rajasthan, check the fill valve and flush mechanism often. Mineral buildup collects there first. Common Cistern Problems and Fixes Loud Hissing While Refilling: Usually a worn fill valve or pressure that’s too high for the valve. A new fill valve solves this in most cases. Cistern Won’t Fill or Fills Slowly: Usually a blocked or worn fill valve, or low water pressure. Clean or swap the fill valve. If pressure is the real issue, call a plumber to check a low-pressure valve. Water Keeps Running: A worn rubber seal or a float set too high stops the flush valve from closing fully. Replace the seal first. Adjust the float if that doesn’t fix it. Weak Flush: Often caused by a low water level in the tank or a partly blocked flush valve. Raise the water level slightly, or clear the valve of any buildup. Cistern Leaking at the Base: A cracked tank body or a worn seal where the tank meets the bowl. Replace the seal. If the tank itself is cracked, it needs full replacement. Cleaning and Maintenance of Toilet Cistern Follow the cleaning instructions from your cistern’s manufacturer first. Many brands warn against strong bleach tablets placed inside the tank, since they can wear down rubber seals faster over time. For limescale buildup, clean the removable parts separately with a mild descaling solution instead of dropping chemicals straight into
P Trap vs S Trap: Key Differences, Uses & Which is Better
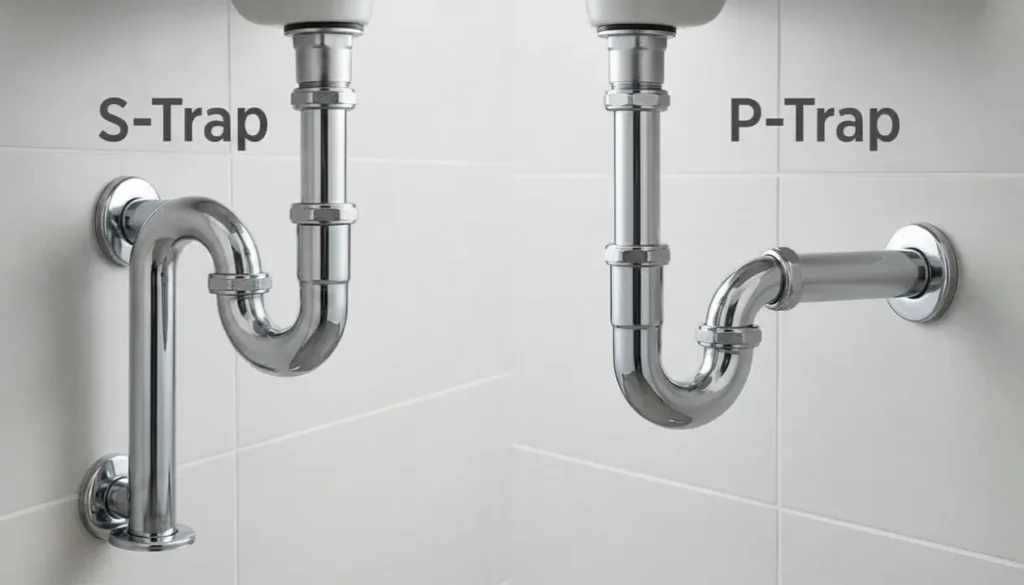
You’re renovating your bathroom. The plumber holds up two pipe fittings and asks, “P trap or S trap?” Suddenly, the p trap vs s trap debate feels very real. Most homeowners in India have no idea which one to pick. A wrong choice can cause bad smells, leaks, or even failed inspections. So before you nod and let the plumber decide, let’s make sure you understand what’s going on. In this blog, you will learn about the main differences, where each trap works best and which one is better for Indian bathrooms. Let’s start with the basics. What is a Plumbing Trap and Why Does It Matter? A plumbing trap is just a bent pipe. It is located under your bathroom drain, toilet or sink. That bend holds a small amount of water at all times. Simple as that. That trapped water does something really important. It blocks sewer gases from creeping up through your pipes and into your bathroom. Gases like methane smell terrible and can actually be harmful. The water acts like a plug, stopping those gases at the bend. Plumbers call this a “water seal.” Now, not all traps look the same. Across Indian homes, the two most common plumbing trap types are the P trap and the S trap. Both hold water. Both block gases. But their shapes are different, and that difference matters more than most people think. Use the wrong trap in the wrong spot, and you’ll deal with slow drains, gurgling sounds, and a bathroom that never stops smelling. That brings us to the real question — what makes a P trap different from an S trap? P Trap vs S Trap: Know the Basic Difference A P-trap is named after its shape. Look at it from the side, and it resembles the letter “P.” The pipe curves down, loops back up, and then exits horizontally through the wall. The p trap’s meaning is straightforward — it’s a wall-outlet trap that holds a reliable water seal without depending on the floor below. An S trap also gets its name from its shape. Viewed from the side, it looks like the letter “S.” The pipe curves down, loops back up, and then exits downward through the floor. The s trap meaning is simple too — it’s a floor-outlet trap, and it’s been a go-to choice in older Indian bathroom designs for decades. The real difference between a P-trap and an S-trap comes down to one thing: where the pipe goes after the bend. That single detail changes how each trap performs, how long the water seal lasts, and where you can actually install it. Feature P Trap S Trap Shape/Design Looks like the letter “P” Looks like the letter “S” Pipe exit direction Exits through the wall Exits through the floor Common use in India Modern flats, modular bathrooms Older homes, floor-drain setups Siphonage risk Low Higher Ease of installation Needs wall outlet access Easier in floor-drain layouts Water seal reliability More consistent Can dry out faster Both traps have their place, but how they perform in real Indian bathrooms tells a much bigger story. Where are P Traps and S Traps Used in Indian Bathrooms? Indian bathrooms do not follow one standard layout. Older homes, newer apartments, and independent houses all have different plumbing setups. So the trap you need depends a lot on where your drain outlet actually sits. P-traps work best in: S traps work best in: Many older Indian homes still rely on S-traps simply because floor outlets were the standard for decades. Brands like Hindware, Cera, and Parryware offer both p-trap toilets and s-trap toilets, so availability is rarely the issue. The real question is which trap actually performs better in daily use. That means weighing up the pros and cons of each option. Pros and Limitations of P Trap and S Trap Toilets Both traps do the same basic job. But they don’t perform the same way in real bathrooms. Here’s what each one gets right and where each one falls short. P Trap Toilet A p-trap toilet suits homes where the drain pipe comes out from the wall. Pros: Limitations: S Trap Toilet A s trap toilet is built for bathrooms where the drain goes straight into the floor. Pros: Limitations: The self-siphonage problem is what makes most plumbers hesitant about S traps today. Water rushing through too quickly pulls the trapped water right out of the bend. After that, nothing blocks the sewer gases. With that clear, let’s figure out which trap actually makes more sense for your bathroom. Which is better: P Trap or S Trap? Straight answer — the P trap wins on performance. It holds the water seal better, handles daily use more reliably, and carries far less siphonage risk. Most licensed plumbers and modern building codes back this up. In the p trap vs s trap debate, the P-trap is simply the stronger design. That said, the S trap is not a bad choice in every situation. For many Indian homeowners, ripping out floor outlets and replumbing an entire bathroom just isn’t practical. In those cases, a properly installed S-trap does the job fine. So here’s a simple way to decide: Your bathroom layout makes the final call here. Now let’s talk about one more thing most people overlook: how to maintain whichever trap you choose. Common Mistakes to Avoid When Choosing a Toilet Trap Most bathroom problems don’t start with bad products. They start with avoidable mistakes during selection and installation. Here are five things homeowners get wrong all the time. Keeping these mistakes in mind saves you money, time, and a very unpleasant bathroom. Wrapping It Up Both traps work. Both have their place in Indian bathrooms. But if you’re building fresh or doing a full renovation, the P trap is the smarter, more reliable pick. It holds its water seal better and gives you fewer headaches over time. That said, your drain outlet makes the final decision, not
Different Types of Waste Couplings for Indian Homes
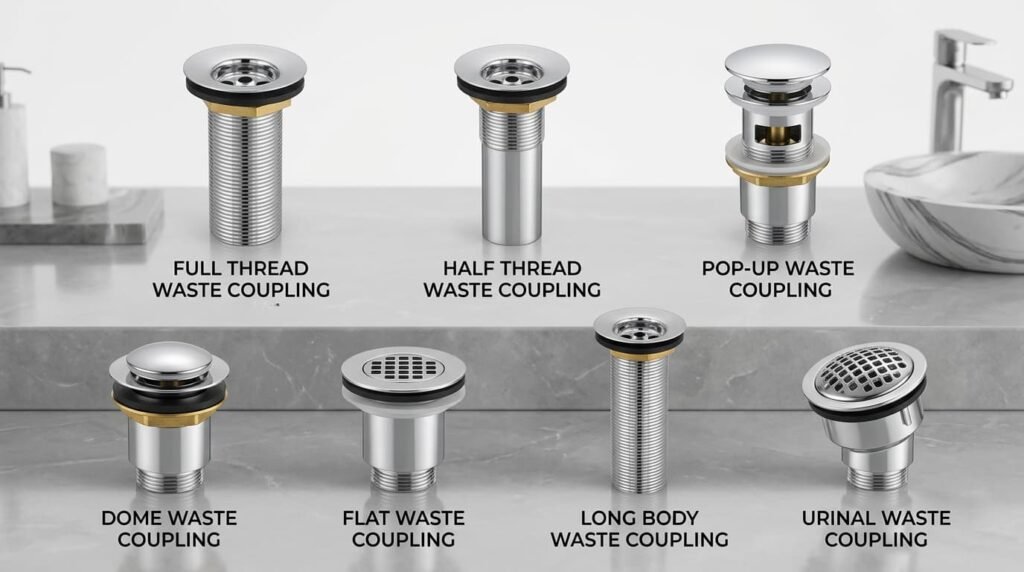
A waste coupling is the small fitting that joins your sink, basin, or urinal to the drain pipe below. It looks tiny, but it decides whether your drain leaks, smells, or works quietly for years. Pick the wrong one, and you will deal with wobbly fittings, bad odour, or water pooling under the sink. Pick the right one, and you will forget it is even there. This guide walks through every common waste coupling type sold in India, what each one is best for, and how to choose without guesswork. What Does a Waste Coupling Do? A waste coupling sits directly under the drain hole of a basin, sink, or urinal and carries used water into the waste pipe without letting it escape at the joint. Depending on the design, it may also catch hair, food scraps, and soap residue before they reach the pipe — or seal against sewer gas rising back up into the room. You’ll find one under nearly every fixture that drains: wash basins, kitchen sinks, urinals, bathtubs, and floor drains. Anywhere water needs to leave a fixture and enter a pipe, a waste coupling is doing the work quietly in between. The Main Types of Waste Couplings Manufacturers build different couplings for different jobs — thread pattern, drain mechanism, and shape all change depending on where the fitting is going. Full Thread Waste Coupling Threading runs the entire length of the body, top to bottom, which locks the fitting firmly into the drain outlet once fully screwed in. Thick countertops and vessel basins that see constant daily traffic benefit most from this design, since the full-length grip resists loosening over time. Half Thread Waste Coupling Only the lower portion is threaded; the rest slides in without turning. Installation takes fewer turns and less time, which is probably why it’s the type installers reach for most often on standard table-top and wall-hung basins across Indian homes. Pop-Up Waste Coupling A push-button stopper replaces the manual plug — press once to fill the basin, press again to drain it. Mid-range and premium basins favour this mechanism because it keeps the sink looking clean, with nothing sitting loose on the counter. Dome Waste Coupling A raised dome covers the drain hole, letting water pass through the gaps while blocking larger debris. Kitchens and bathrooms both use this often, since it’s cheap, easy to clean, and does a reasonable job keeping food scraps and soap chunks out of the pipe. Flat Waste Coupling No raised dome here — the strainer sits level with the sink surface, which suits shallow drain outlets that can’t accommodate a raised fitting. Modern, minimal basin designs tend to specify this for a smoother, low-profile look. Long Body Waste Coupling For basins positioned further from the waste pipe than usual, this coupling’s extra length closes the gap directly, without stacking on additional pipe joints. It saves both material and installation time on non-standard layouts. Urinal Waste Coupling Built specifically for urinals, connecting to the trap below and handling frequent, steady water flow. It isn’t interchangeable with basin or sink couplings — the size and flow design are different. Every type has its place. But full thread and half thread tend to confuse people the most at the time of buying. Let us sort that out right now. Half Thread vs Full Thread: Quick Comparison Feature Half Thread Full Thread Thread coverage Lower half only Entire body Best for Standard, thin countertops Thick countertops, vessel basins Installation Quick, fewer turns Takes longer to thread in Grip strength Good for regular use Stronger, more secure Rule of thumb: thin countertop or wall-hung basin → half thread. Thick counter or deep vessel basin → full thread. Materials to Know Before You Buy Waste Coupling Price Range in India Type Approximate Price (INR) PVC Coupling ₹80 – ₹250 Stainless Steel Coupling ₹200 – ₹600 Brass Coupling ₹350 – ₹1,200 Chrome-plated brass/pop-up/click-clack ₹500 – ₹2,000+ Treat these as indicative ranges. Actual prices shift with brand, finish, and whether the coupling includes an overflow connector. Always check current listings before buying, since prices move. How to Pick the Right Waste Coupling Bottom Line Once you know your basin type, outlet size, and how much daily use it’s in for, picking a waste coupling stops being a guessing game. Measure the outlet first, match the thread type to your countertop, and choose a material suited to your water conditions. Get those three things right, and you genuinely won’t think about this fitting again for years. Not sure which size or type fits your basin? Browse our waste coupling collection at Begin Faucets — filter by size, material, and finish, or send us your basin’s outlet measurement and we’ll point you to the right match before you order. Frequently Asked Questions What’s the Difference Between a Waste Coupling and a P-Trap? A waste coupling connects the basin to the pipe. A P-trap is the curved section of pipe that holds water to block sewer gas. Bottle trap couplings combine both functions in a single fitting. Can I Install a Waste Coupling Myself? For most basin types, yes — a wrench and plumber’s tape are usually enough. Concealed or floor couplings are better left to a plumber, since they involve wall or floor work. Does a Waste Coupling Need Plumber’s Tape? Yes, on threaded types. Wrapping tape around the threads before fitting helps prevent leaks at the joint. Why Does My New Waste Coupling Still Leak? Usually one of three things: the locking nut isn’t fully tight, the washer is sitting crooked, or the coupling size doesn’t match the drain outlet. Is a Costlier Waste Coupling Always Better? Not necessarily. Brass lasts longer, but a good stainless steel coupling handles normal home use perfectly well at a lower price point. How Long Does a Waste Coupling Last? Roughly 5 to 10 years under normal use, depending on material and local water quality. Is There an Indian Standard for Waste Couplings? Copper-alloy (brass) waste