
Shower Heads with Filters for Hard Water | India Buyer Guide
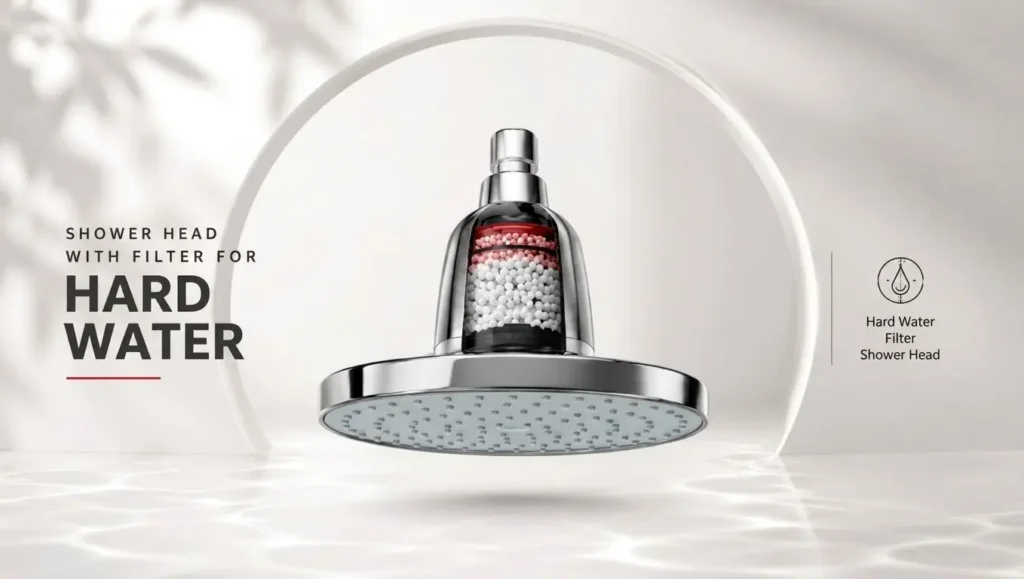
Shower heads with filters for hard water work for some problems and not others, so setting the right expectation matters before you buy. These filters reduce chlorine, loose sediment, and bad smell in your water, and some models with KDF (a copper-zinc alloy that reduces chlorine and certain metals through a chemical reaction) or calcium sulfite media may reduce staining associated with treated water, but do not significantly reduce mineral scale caused by hardness. What they generally cannot do is remove dissolved calcium and magnesium, the minerals that make water “hard” under BIS IS 10500, India’s drinking water standard. That job usually needs a water softener. This guide covers which filter media actually work, when a filter alone is enough for your bathroom, and how to pick one suited to Indian water sources. Do Shower Heads with Filters for Hard Water Really Work? A hard water shower filter reduces sediment, chlorine smell, and the harsh feel of treated municipal water. Independent testing of shower filtration systems shows it does not fully remove dissolved calcium and magnesium, the minerals responsible for scale and limescale buildup. For genuine hardness reduction, you need a different technology altogether. That technology is a water softener. A softener uses ion exchange (a process that swaps calcium and magnesium ions for sodium ions) to actually lower hardness, while a shower filter only screens and chemically alters certain contaminants as water passes through. Before you buy either, test your water correctly. Hard Water in India: Borewell, Tanker & Municipal Water Your water source shapes what a filter needs to handle, and India’s three main sources differ sharply. Borewell Water Borewell water is drawn from underground rock layers, so it picks up dissolved calcium, magnesium, iron, and sometimes fluoride as it moves through soil and stone. A shower filter for borewell water can reduce iron staining and sediment, but the calcium and magnesium pass through largely unaffected, which is what leads to calcium deposits, magnesium deposits, and soap scum on tiles and fixtures over time. Tanker Water Tanker water quality depends entirely on its source and route, since one tanker may draw from a clean bore and another from a contaminated one, with no consistent standard across suppliers. Municipal Water Municipal water usually starts from a treated surface or ground source and gets chlorine added for disinfection, so its main added contaminant is chlorine rather than extra minerals. BIS IS 10500 sets: for drinking water. This is a drinking-water reference, not a bathing-water rule, so treat it as context rather than a target for your shower. Note: Match your filter choice to your water source, not to a generic hardness number. Types of Shower Filter Media Filter Media Helps With Hard Water Impact PP cotton/sediment filter Traps dirt, rust, and visible particles Does not affect dissolved calcium or magnesium Activated carbon Reduces chlorine taste and smell Does not soften water KDF media Reduces chlorine and some heavy metals through a copper-zinc reaction Does not remove dissolved hardness minerals Vitamin C (ascorbic acid) Neutralizes chlorine and chloramine Has no effect on calcium or magnesium Ion exchange resin Swaps hardness ions for sodium or potassium ions Reduces hardness, but resin capacity is limited in a shower-head format Polyphosphate/scale inhibitor Coats minerals to slow scale formation on surfaces Does not remove minerals, only reduces buildup As the table shows, no single common shower-filter media fully softens water on its own. Each type is built to solve a narrow problem, whether that is chlorine odor, loose particles, or surface scale, and combining media in one cartridge only stacks these narrow effects rather than creating a true softening function. A basic sediment filter, for instance, keeps your water visibly clean but leaves mineral content untouched. Similarly, an anti-scale shower head that uses a polyphosphate scale inhibitor can slow down limescale spots on your fixture without lowering the hardness of the water itself; unlike a standard shower filter cartridge aimed at chlorine or sediment, this scale inhibitor depletes over time and needs periodic replenishment. Note: Pick your filter media based on your actual problem, whether that is chlorine, sediment, or surface scale, rather than expecting one cartridge to solve all three. Shower Filter vs Water Softener vs RO: Which One Do You Need? Your choice depends on what problem you’re actually solving, not which product sounds the most advanced. The table below breaks down which option fits which situation. Option Best For What It Does Not Do Shower head filter Renters, mild chlorine smell, light sediment, day-to-day comfort. Does not lower dissolved calcium and magnesium in a meaningful way. Bathroom or whole-house softener Severe hardness, visible limescale on tiles and taps, geyser scaling, borewell water. Requires installation and space, so it is less practical for rented homes. RO purifier Makes drinking water safe by removing dissolved solids and contaminants. Treats only drinking water, not bathing water, so it does nothing for your shower or geyser. A water softener shower head can help in transitional cases, such as a rented flat with moderately hard water where a full whole-house unit isn’t possible, since it fits directly onto your existing pipe without major plumbing changes. How to Choose the Best Filtered Shower Head for Indian Bathrooms Choosing a filtered shower head for hard water comes down to matching the product to your actual water problem, not chasing the highest stage count. Use this checklist before you buy: If you’re searching for the best shower filter for hard water in India, the honest starting point is your specific symptom, not a brand’s stage count. Brands currently selling filtered shower heads in India, based on live listings, include WaterScience (CLEO range), Purifit, KRYSSTAL, Alton, and Panca, though you should confirm specifications, cartridge life, and borewell-specific options directly on each listing before buying, since marketing pages often overstate results. Installation, Maintenance & Replacement Cost in India Most shower filters install without a plumber, and cartridge life depends more on your water quality than the brand you choose. Installation Cartridge
Kitchen Faucet Trends in India 2026
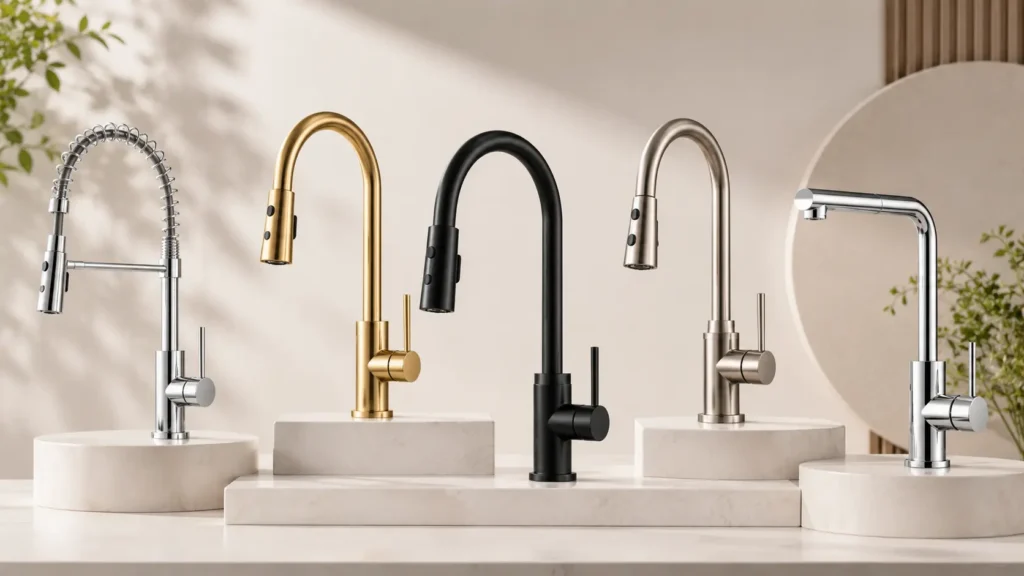
Indian kitchens look very different today than they did a decade ago. More homeowners now choose modular kitchen layouts, which demand fixtures that match clean lines and smart storage. Hard water remains a real challenge in many cities, so families want faucets that resist scale and are easy to clean. At the same time, water efficiency has become a genuine priority, not just a buying trend. Consequently, homeowners are asking more pointed questions about flow rates, quality of finish and long-term durability. This has prompted brands to rethink design, materials and function in tandem, rather than just focusing on looks. As a result, premium kitchen faucets now sit on many shopping lists, even in mid-range renovations. This blog walks through the kitchen faucets trends in India that are actually shaping these choices in 2026. Pull-Down Spray Faucets are Becoming the Preferred Choice Indian cooking demands more from a kitchen tap than most Western designs allow for. Large kadais, heavy pressure cookers, and big vegetable batches need a faucet that reaches every corner of the sink. A pull-down spray gives that extra flexibility, letting the spout move directly over pots instead of forcing them under a fixed tap. Conventional faucets, on the other hand, tend to have a gap between the spout and deep vessels, making rinsing rice, washing greens, or scrubbing tawas slower and messier. The pull-down design solves this gap problem, which is one reason kitchen faucet trends in India point clearly towards this style. Who Should Consider Them Pull-down faucets suit modular kitchen owners who already have a single-bowl or double-bowl sink. They work especially well for families who cook daily and need quick switching between aerated flow and a stronger spray. Beyond that, households with children benefit too, since one-hand operation makes the tap easier and safer to use. Price Range and What to Check Before Buying In practice, pull-down faucets in India fall across three clear price bands. Therefore, buyers must check spout reach against sink width, and confirm enough sink depth to avoid splashing. Matte Black and Premium Finishes are Defining Modern Kitchens Light-coloured cabinetry now dominates Indian modular kitchens, and homeowners want fixtures that stand out against this backdrop. A matte black faucet creates strong visual contrast, giving the sink area a sharp, finished look. Brushed gold and gunmetal are softer options that work better with warmer tones or stone countertops in the kitchen. Beyond looks, these finishes rely on PVD coating, which bonds metal at a molecular level. This makes the surface far more resistant to scratches, fading, and hard water spots than standard chrome plating. As a result, premium finishes now last longer in daily use, even in homes with harder tap water. Popular Finish Options and Maintenance Four finishes appear most often in Indian showrooms today. For maintenance, wipe PVD finishes with a soft cloth and mild soap, avoiding abrasive scrubbers. Standard chrome faucets cost ₹2,500 to ₹6,000, while PVD-coated options typically range from ₹9,000 to ₹25,000. High-Arc and Gooseneck Designs Work Well with Indian Cooking Habits Regular taps don’t usually fit tall pots and pressure cookers. A gooseneck spout solves this by curving high over the sink, giving space for tall pots underneath. The height also turns out to be useful in filling tall steel containers or rinsing large colanders during cooking. Beyond function, the curved shape adds a clean, sculptural look to modular kitchens. Many homeowners pair a single lever gooseneck faucet with a minimalist sink to create a focal point. This combination has become one of the most popular modern kitchen faucet designs for modular kitchens. Installation Considerations and Price Before buying, check the cabinet clearance above the sink, since tall spouts need extra vertical space. Confirm the sink depth too, as splashing increases when the arc sits very high above a shallow basin. In India, high-arc and gooseneck faucets typically cost between ₹6,000 and ₹22,000, depending on brand, finish, and cartridge quality. Water-Efficient Faucets are Becoming a Priority In many Indian cities, real water supply pressure is a concern, so every drop saved counts. The aerator mixes air with water, maintaining pressure while reducing overall water consumption. It has a flow restrictor in there that limits the maximum flow, but does not interfere with normal activities like rinsing or washing. The Difference is Clear in Numbers This can reduce water use in the kitchen by nearly half, a great help in homes with a tanker supply or limited hours of municipal supply. Who Should Consider Them Urban households facing intermittent water supply gain the most from this feature. Families in flats with shared overhead tanks also benefit, since lower usage reduces pressure on the building’s overall supply. For Indian households searching for the best kitchen faucet for Indian homes, water efficiency now ranks as a genuine priority, not an afterthought. These faucets typically cost ₹4,000 to ₹15,000, depending on brand and cartridge quality. Brass and Stainless Steel are the Best Materials for Indian Conditions Most Indian cities deal with hard water, and that water leaves mineral deposits inside faucet valves over the years. Municipal supplies often carry chlorine too, which wears down weaker metals from the inside out. Humid kitchens don’t help either. Trapped moisture speeds up rust and corrosion in cheaper fittings far faster than most buyers expect. A faucet made from the wrong material can fail in just a few years, even with careful use. So choosing the best kitchen faucet material for hard water isn’t about the shiny finish on top. It comes down to what’s built underneath that surface. Brass vs Stainless Steel vs Zinc Alloy Material Hard Water Performance Lifespan Price Range (INR) Brass Excellent, resists corrosion well 15 to 20 years ₹4,000 to ₹25,000 Stainless Steel Very good, low reactivity 12 to 18 years ₹5,000 to ₹20,000 Zinc Alloy Poor, prone to pitting 3 to 6 years ₹1,500 to ₹4,000 For most Indian homes, brass paired with a ceramic disc cartridge gives the best value over time. The cartridge keeps
Which Shower Head is Best for High Pressure in India
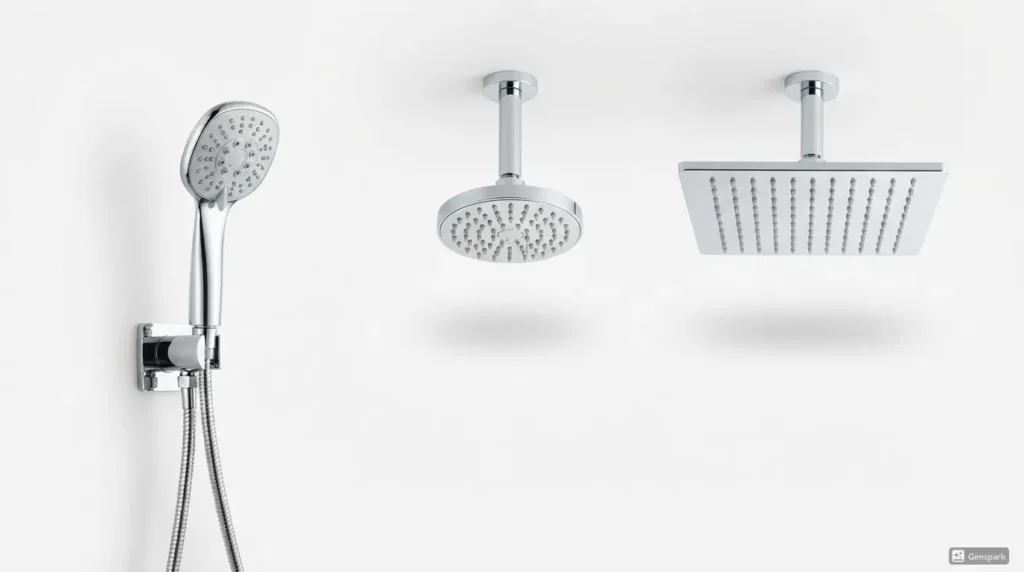
For the best shower head for high pressure, most Indian households prefer a compact hand shower or a fixed wall-mounted head with anti-clog silicone nozzles, focused spray pattern, and standard G1/2 fitting. Oversized rain shower heads look premium, but they usually need stronger inlet pressure to feel powerful. A smaller nozzle often beats a bigger showerhead when your water pressure is limited. But the right pick still depends on your water source, your existing pressure level, and your pipe’s fitting size. That’s what we’ll break down next. Which Shower Head is Best for High Pressure? For many Indian bathrooms, a compact hand shower or fixed wall shower beats a large rain shower on felt pressure. That’s because a smaller spray face pushes the same water through fewer holes. So each jet feels stronger, even at a lower flow rate. Rain and overhead shower heads spread water across a wide disc. That means they need a stronger inlet supply to feel powerful. Without a booster pump, they often feel weak or misty instead. Your setup matters too. A home with an overhead tank, a booster pump, or a direct municipal line will each behave differently with the same shower head. So always match your choice to your actual water source, not just the shower head’s looks. Shower Head Type Best For Pressure Suitability Price Range (India) Hand Shower Low to medium pressure homes High (focused spray) ₹500–₹5,000 Fixed Wall Shower Standard bathrooms High (focused spray) ₹300–₹3,000 Rain/Overhead Shower Homes with booster pumps Needs strong inlet pressure ₹600–₹5,000 (premium sets ₹20,000+) Combo Shower Homes wanting flexibility Depends on parts used Varies by parts used What Actually Makes a Shower Head Feel High-Pressure? Most people confuse pressure with flow rate. But they’re not the same thing. Pressure is the force with which the water is being pushed through the pipe. It is measured in bar or psi ( pounds per square inch ), or sometimes kPa ( kilopascals ). Flow rate is how much water comes out. It’s measured in LPM (liters per minute). A shower head can have low flow but still feel strong, because pressure and flow do two different jobs. In India, plumbing references under IS 17429 Part 1:2020 commonly cite around 70 kPa (0.7 bar) as the minimum dynamic pressure recommended at a shower outlet, with 50 kPa (0.5 bar) used as a benchmark in simplified-system contexts. So if your line runs below these levels, even a good will feel weak. Nozzle count changes the feel too. Picture two heads with the same 9.5 LPM flow: one has 8 holes, the other has 64. The 8-hole head pushes water out faster per hole, so it hits harder, even though total flow is identical. Marketing labels don’t guarantee any of this. So check the actual LPM rating and nozzle count instead of trusting the box. Best Shower Head Types for Indian Bathrooms Not every shower head suits every home. So here’s how the main types stack up for typical Indian water setups. 1. Hand Shower: This is the best choice for homes with medium and inconsistent pressure. You can hold it close to your body, which increases the force you feel. This is why many people look for the best hand shower for high pressure when their building’s supply is inconsistent. 2. Fixed Wall Shower Head: This is a very simple wall-mounted shower head and is often a favorite with buyers in India. It gives a stronger, more focused spray than a wide rain head. So it’s a safe pick for basic bathrooms without a booster pump. 3. Rain Shower Head: A rain shower head only makes sense if your pressure is already strong. Otherwise, it turns into a rain shower for low-pressure disappointment — soft, misty, and slow. Check your pump setup first. 4. Combo Shower: A combo shower gives you both options in one fitting. So you get flexibility without picking just one style. Matching Your Indian Setup How to Choose the Right High-Pressure Shower Head Picking the right shower head takes more than checking the price tag. Here’s what to look at, step by step. Check Your Water Source First Check the Operating Pressure Don’t buy on looks alone. Manufacturers publish pressure specs, usually in bar or psi, right on the product page. So always check the listed spec before you add it to your cart. Check Fitting Size Most Indian shower heads use a standard G1/2 (1/2-inch) connection, though this isn’t universal across every brand or import. So always confirm the thread size on the listing against your existing fitting before you buy. Features That Matter More Than Marketing Claims Material and Warranty Why Your Shower Still Feels Weak After Changing the Head You installed a new shower head, but the water still trickles out. That usually means the real problem sits somewhere else in the pipe. A shower head is just one piece of the puzzle. The plumbing behind the wall matters just as much. Final Thoughts Picking which shower head is best for high pressure comes down to your home, not the fanciest option on the shelf. A big rain head or a small hand shower can both disappoint if they don’t match your water source. So before you buy, check your tank height, pump setup, and fitting size first. Ready to choose? Check out Begin Faucets’ shower head collection to find the right fit for your bathroom. Frequently Asked Questions Does a Shower Head Really Increase Water Pressure? A showerhead can’t create pressure that isn’t already in your pipes. It only changes how that existing pressure feels by concentrating water through smaller nozzles. Is a Rain Shower Head Good for Low Water Pressure? Not usually, unless you have a booster pump. The wide spray face spreads water thin, so weak supply lines often turn it into a soft drizzle. Which is Better for High Pressure: Hand Shower or Overhead Shower? A hand shower usually wins for most homes. You can hold it
Shower Head vs Shower Arm: Key Differences & Buying Guide
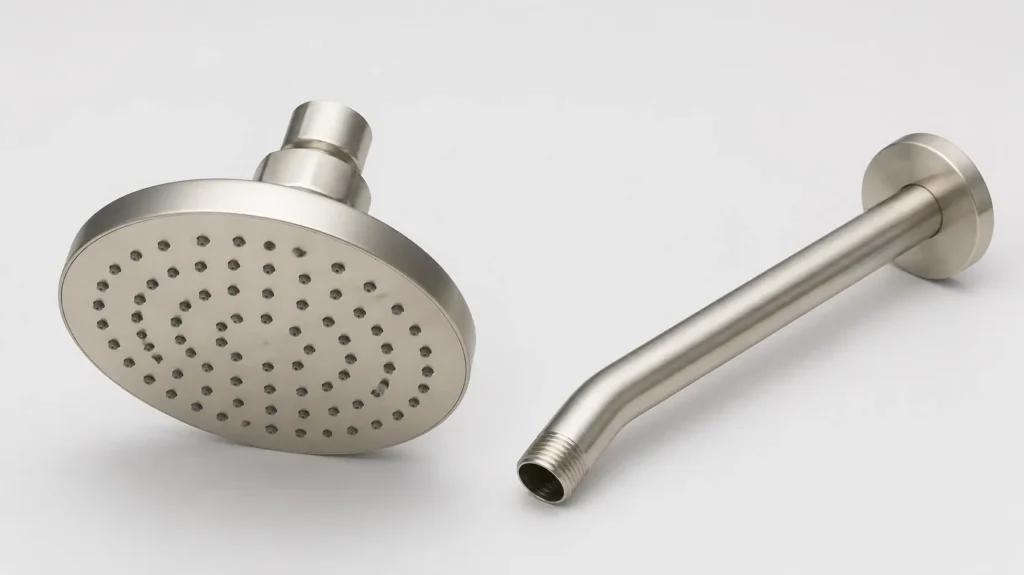
A new shower arrives, but it won’t fit the old wall fitting, and the return shipping ends up costing more than the part itself. This is one of the most common problems during bathroom renovations across Indian homes. The buyer picked a good product, but not the right part. The confusion usually comes down to one thing: people think the shower head and the pipe behind it are the same item. They are not, and mixing them up creates real problems. Get this wrong, and you’ll deal with poor water flow, mismatched threads, or a fitting that looks out of place. This guide covers the shower head vs shower arm difference. You’ll also learn how the two parts connect, when each one needs replacing, and what to check before you buy for your bathroom. Shower Head vs Shower Arm: Key Differences The shower head is the component that sprays water onto your body. The shower arm is the pipe that connects to the wall outlet and supports the shower head. One creates the spray. The other places it at the right height and angle. Feature Shower Head Shower Arm Purpose Sprays and distributes water Connects and positions the shower head Position Attached at the end of the arm Fixed to the wall outlet Water Delivery Controls spray pattern and pressure Carries water from pipe to shower head Installation Point Screws onto the shower arm Screws into the wall’s shower outlet Visible Appearance Main focal point in the bathroom Often overlooked, but affects overall look Standard Sizing (India) Varies by spray face size and thread fit Typically 6 to 15 inches long Replacement Frequency Every 3-5 years, depending on use Every 8-10 years, unless damaged Average Price (India) ₹300 – ₹5,000+ (varies by type) ₹150 – ₹1,500 (varies by material) Maintenance Needs regular cleaning for clogged nozzles Needs occasional checks for leaks or corrosion Compatibility Must match arm’s thread size Must match wall outlet’s BSP thread standard Thread Size Usually ½” BSP Female Usually ½” BSP Male Note: Prices, lifespans, and sizing figures above are general estimates based on typical market ranges — they vary by brand, city, material, and usage. Check current listings and manufacturer specs before you decide on a model. How the Shower Head and Shower Arm Work Together The water takes a simple path to reach you. Here’s the route it follows from the wall to your skin: Both parts need to work together for a good shower. A loose joint, wrong angle, or blocked arm can ruin the entire flow. Even a top-quality shower head performs poorly if the arm behind it is damaged or misaligned. Water flow through the pipe is only half the story. The other half comes down to pressure and spray performance. When Should You Replace the Shower Head, the Shower Arm, or Both? Not every shower problem means replacing the whole unit. Sometimes it’s just one part that’s fine and one that needs fixing. Replace Only the Shower Head Replace Only the Shower Arm Replace Both Shower Head and Shower Arm Knowing which part is failing saves money and avoids unnecessary work. A quick check before buying tells you exactly what to replace. Choosing the Right Shower Head and Shower Arm for Indian Bathrooms Getting this choice right isn’t just about picking a nice design. Your water pressure, water quality, and bathroom layout all decide what will actually work in your home. Water Pressure Most Indian homes run on overhead tanks. That gravity-fed setup typically delivers somewhere in the range of 0.5 to 1 bar of pressure, sometimes less, depending on tank height and pipe layout. In apartments, shared plumbing lines make this worse during morning and evening rush hours. A basic shower head handles this fine. Rainfall panels are trickier, since they generally need closer to 1 to 1.5 bar to spray evenly across the wider surface. Before buying one, find out what pressure your building actually delivers — a plumber or your building’s maintenance team can usually confirm this. Hard Water If your tap water leaves white marks on tiles, you already know about hard water. Those minerals collect inside pipes and shower nozzles over months, slowly choking the flow. Silicone nozzles handle this better than plastic or metal ones, mainly because the scale doesn’t bond to the surface as easily — you can usually just rub it off. The arm matters here too, so corrosion-resistant metal is worth the extra cost in mineral-heavy areas. Plumbing Compatibility Indian bathroom outlets are mostly built around ½-inch BSP (British Standard Pipe) threads, which is the common plumbing standard used across the country. That said, not every brand sticks to this, particularly some imported ones. Before you place an order, check the thread size listed by the manufacturer against what’s already fitted on your wall. Bathroom Size Small bathrooms feel cramped with a long arm sticking out. Go shorter and keep the fitting close to the wall. If you have more space to work with, a longer arm gives the shower head room to sit higher, which suits rainfall designs. A quick measurement of your shower area saves a return shipment later. Material Steel lasts long and shrugs off rust, but you’ll pay more for it. Brass feels solid and holds up well too, though it’s heavy and needs the occasional polish to keep its shine. Plastic fittings are the cheapest option and easy to install, but heat and constant water exposure wear them down faster than metal. Finish Chrome is still what most people buy, and it goes with almost anything. Matte black and brushed nickel have picked up demand lately for a slightly different look. Whatever you pick, try to match it with your taps and other fittings already in the bathroom. Common Installation Mistakes That Reduce Shower Performance A shower fitting can look perfect and still perform badly. Most of the time, the problem traces back to how it was installed, not the product itself. Most of these
Wall Mixer With Hand Shower: Types, Uses & Buying Tips
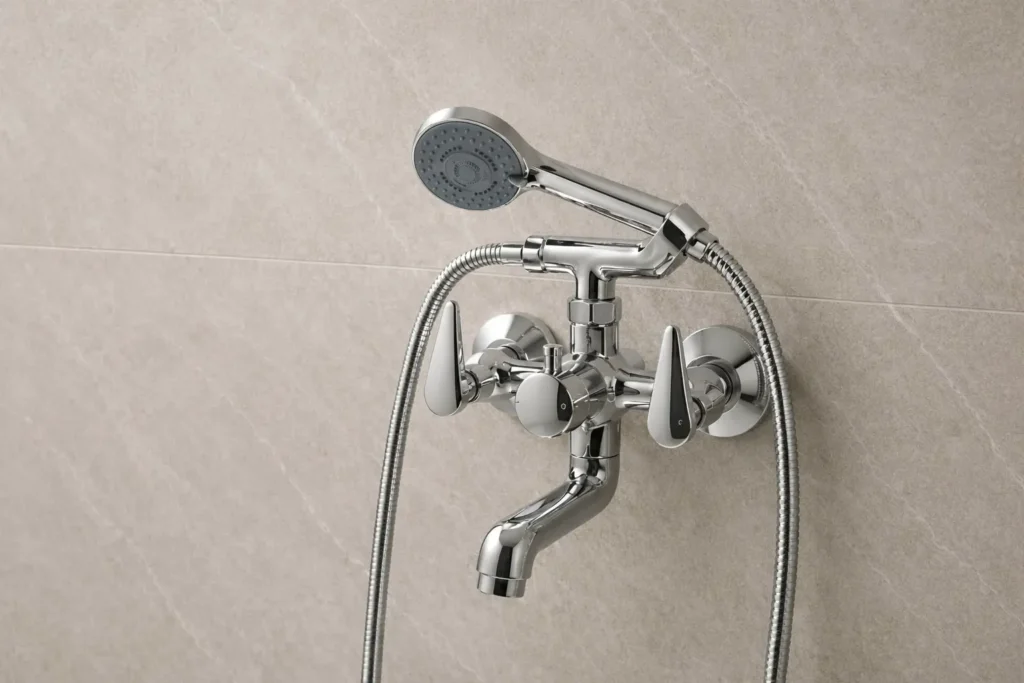
A wall mixer with hand shower is a bathroom fitting that mixes hot and cold water and sends it out through a handheld shower head. Indian homeowners now prefer this setup because it offers flexible bathing, unlike a fixed showerhead alone. Here’s what many buyers miss: two units can look almost the same on a store shelf, yet perform very differently. The cartridge quality, body material, and finish decide how long the fitting lasts and how well it handles daily use. Before buying, weigh the type of mixer, its body material, water pressure compatibility, plumbing requirements, and spare parts availability. These five factors affect performance far more than looks do. This guide explains each of them, so you can choose a fitting that suits your bathroom and lasts for years. What is a Wall Mixer With Hand Shower and How Does It Work? A wall mixer tap with hand shower, also called a hot and cold mixer tap with hand shower, blends hot and cold water into a single flow. It then sends that water out through a fixed spout or a handheld shower, whichever you need. Most Units are Built From These Parts: The working part is simple once you break it down. Hot water comes in from one pipe, cold water from another, and both meet inside the mixing chamber. Turning the handle changes how much of each goes in, so you get the temperature you want. Once that’s set, the diverter lever decides whether the water exits through the spout below or travels up through the hose to the hand shower. This makes the fitting useful for more than just bathing. People rely on it to fill buckets, rinse the floor, wash their hair, or bathe kids, all from one point on the wall. Types of Wall Mixers with Hand Shower Available in India Not every wall mixer with hand shower set works the same way. The differences come down to how the hand shower connects, how many outlets the unit offers, and how the pipework is installed. Brands such as Jaquar, CERA, Hindware, and Parryware all sell both non-telephonic and telephonic ranges in India, usually across zinc alloy and brass body options. Non-Telephonic Wall Mixer This type holds the hand shower in a fixed bracket close to the mixer body. It has a simple design, so there’s less to go wrong and less to maintain over time. Telephonic Wall Mixer Here, the hand shower pulls out on a flexible hose, much like a telephone receiver. This gives you longer reach and makes bathing easier for elderly users and children who may struggle with a fixed unit. 2-in-1 Wall Mixer This unit combines a spout and a hand shower in one compact fitting. It’s the most common setup found in Indian homes today, since it covers bucket-filling and hand shower use without needing extra plumbing points. 3-in-1 Wall Mixer A 3-in-1 wall mixer adds a third outlet: provision for an overhead shower, along with the spout and hand shower. This type needs an extra water line planned in advance. Because of this, it suits new construction or a full renovation, where the plumber can lay out all three connections before the walls are finished. Exposed vs Concealed Installation Whichever type you pick, you’ll also choose between two installation styles, and this choice matters as much as the mixer type itself. Installation Advantage Trade-off Exposed Easier to service and repair Visible pipework Concealed Cleaner, minimal look Needs planning before tiling An exposed wall mixer sits on top of the wall, so a plumber can reach the pipes quickly if there’s a leak or a part needs changing. A concealed wall mixer hides the pipework inside the wall, which gives the bathroom a neater finish, but this route only works if the plumbing is planned before tiling starts. Keep in mind that all price ranges above are indicative for 2026 and will shift based on the brand you pick, your city, and whether you buy in-store or online. Note: Wall mixers are available in finishes such as chrome, matte black, brushed nickel, gunmetal, and rose gold. Chrome remains the most popular choice because it matches most bathroom fittings and is usually the easiest to maintain. What Actually Matters When Buying a Wall Mixer with Hand Shower Looks and price tell you very little about how a fitting will hold up. These are the details that decide whether your purchase lasts five years or fifteen. Brass Body vs Zinc Alloy Body A good-quality brass wall mixer with hand shower resists corrosion and hard water better than zinc alloy. It is often made from high-grade brass, the same kind used in other sanitary fittings. It also lasts longer and handles repairs more easily because the metal is stronger around threads and joints. The trade-off is cost: brass units usually cost more than zinc alloy, but the extra spend often pays back in fewer replacements. Finish Quality A good chrome finish does more than improve appearance. Multi-layer nickel and chrome plating helps protect the mixer from rust, stains, and daily wear. A thicker, well-applied finish also keeps the fitting looking newer for longer. Cartridge Quality The cartridge controls how smoothly the handle turns and how well the mixer resists leaks. Ceramic disc cartridges outperform older rubber-washer or plastic mechanisms on both counts, and they tend to last many years longer under daily use. Water Pressure Compatibility Most hand showers work with low water pressure, but the spray becomes stronger and more even as pressure increases. Many manufacturers recommend an operating pressure of around 0.5 to 3 bar, so it’s worth checking the product specifications before buying. Diverter Quality The diverter is one of the parts that wears out most quickly because it is used every time you switch between the spout and the hand shower. A good-quality internal mechanism helps reduce leaks and keeps switching smooth over time. A durable internal mechanism matters far more here than the outer chrome finish.
How to Change a Shower Arm: Step-by-Step Guide
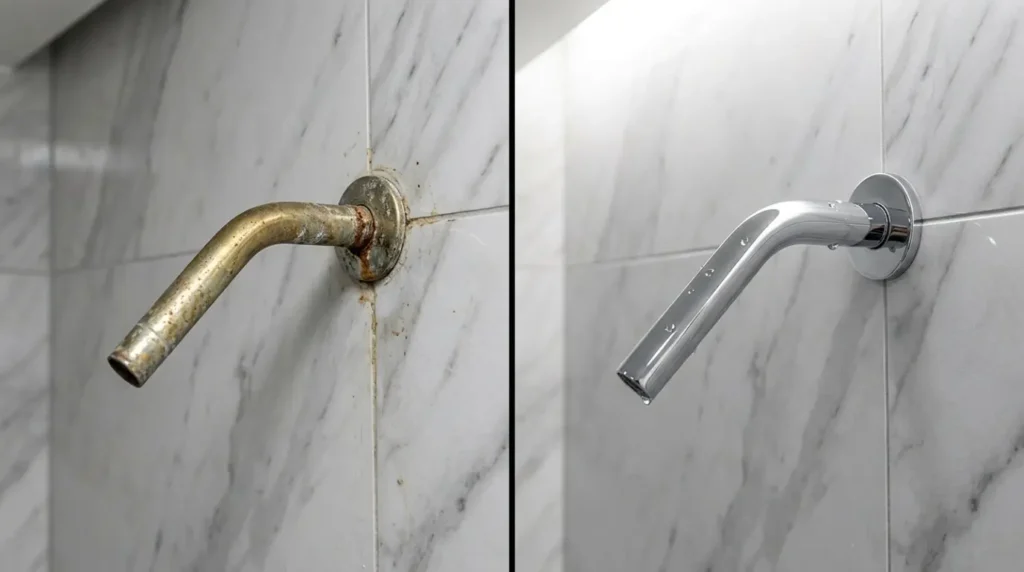
Replacing a shower arm is usually a 30-60 minute DIY job as long as the threads are clean and undamaged. A shower arm is the short pipe that connects your showerhead to the wall plumbing behind the tiles. People tackle shower arm replacement for different reasons. You might have a leaking shower arm dripping near the wall, a visibly corroded pipe, or simply want to upgrade to a rain shower head. Sometimes it’s just a cosmetic update, a chrome finish that’s gone dull. Before you buy anything, check your fittings. Most Indian homes use a 1/2-inch BSP fitting, but some imported fixtures use NPT or metric threads. These look nearly identical but won’t seal correctly if mixed. Here’s one warning worth remembering: wrong thread sealing causes most post-installation leaks on any wall-mounted shower arm. PTFE tape is strongly recommended for threaded shower-arm joints. Finally, shut your isolating valve before starting. If you don’t have one, keep a bucket and old towels close by. Tools and Materials You Need Before Starting Gathering everything before you start means you won’t be hunting for a wrench with water dripping on your floor. What You’ll Need Optional But Useful Caution: Metal wrench jaws and chrome finishes do not get along. Always wrap a cloth around the arm first; bare jaws leave scratches that rust quickly in hard water conditions. Important Checks Before You Remove the Old Shower Arm Rushing straight to removal is how small jobs turn into big ones. Take five minutes here and save yourself a lot of trouble later. Check the Thread Size and Compatibility Most Indian homes use a 1/2-inch BSP (British Standard Pipe) fitting where the shower arm meets the wall. To confirm yours, check the product spec sheet that came with your existing shower arm. No spec sheet? Take your old arm to a local hardware store and compare it physically against a known 1/2-inch BSP fitting. One thing to watch: BSP and NPT threads look almost identical side by side. But they have different thread angles — BSP uses 55 degrees, NPT uses 60 degrees, and this difference alone is enough to prevent a reliable seal, even though both share the same 14 threads per inch. Identify the Type of Shower Arm You Have Shower arms come in a few common styles — straight, curved, wall-mounted, and ceiling-mounted. Most Indian bathrooms use a standard straight shower arm or a gently curved shower arm that angles the head downward. Switching to a rain shower arm that drops from the ceiling is a different matter entirely. That usually means rerouting pipework inside the wall — a job for a plumber, not a weekend DIY session. Measure the Length and Projection Measure from the wall surface to the centre of your showerhead connection point. Use that number to pick the right replacement. Common Length Metric Equivalent Best For 6 inches 150 mm Small shower spaces 9 inches 225 mm Standard bathrooms 12 inches 300 mm Larger enclosures 15 inches 375 mm Rain shower heads Getting the shower arm length wrong means your showerhead either sits too close to the wall or sticks out awkwardly into the spray zone. Look for Corrosion or Old Sealant Before removing anything, shine a torch around the flange, the decorative plate sitting flush against your wall. Look for rust patches, flaking chrome, or layers of hardened old tape sitting on the exposed threads. A corroded shower arm usually comes off fine. But if you spot damaged threads inside the wall elbow itself, stop. A rusted shower fitting deep in the wall may need the tiles opened up to fix properly. At that point, consider a licensed plumber rather than pushing forward alone. How to Change a Shower Arm: Step-by-Step Work through each step in order. Skipping ahead is how small mistakes turn into bigger ones. Step 1: Remove the Shower Head Turn the shower head anticlockwise to loosen it. Keep a soft cloth wrapped around it so the finish stays scratch-free. If it won’t budge, spray a little penetrating oil around the joint and wait 10–15 minutes before trying again. Once it’s off, check the rubber washer inside; if it looks flat or cracked, swap it out now rather than later. Step 2: Slide Back the Escutcheon Plate Next, slide the escutcheon plate, the cover plate sitting against your wall tiles, back along the pipe to expose the entry point. If someone has sealed it with silicone, run a utility knife carefully around the edge first. Before moving on, take a close look at what’s behind it. Moisture, mould patches, or rust at this stage usually point to a slow, hidden leak that needs attention. Step 3: Unscrew the Old Shower Arm Wrap a cloth around the arm near the wall, grip it with your adjustable wrench, and turn anticlockwise. If the fitting feels seized, apply penetrating oil and give it ten minutes to work before you force anything. One thing to be careful about is never pushing hard against the wall tiles directly. Sudden pressure can crack grout lines or the tile itself. Step 4: Clean the Internal Threads Once the old arm is out, clear away every bit of old PTFE tape, limescale, and debris using a stiff brush or an old toothbrush. Always brush debris outward, away from the pipe opening. You don’t want grit falling into your wall plumbing. Look inside the wall elbow and check the inner threads for any damage or corrosion before going further. Step 5: Apply PTFE Tape the Right Way Hold the pipe end facing you and wrap the PTFE tape clockwise around the threads. Wrapping in this direction stops the tape from bunching up and unravelling as you screw the arm in. Two to four wraps are enough for a standard joint, or follow the tape manufacturer’s guidance if specified. Keep the tape off the very end of the pipe opening. If your fitting uses tapered BSPT threads, consider adding a small amount of
How to Clean a Hand Shower Head: Complete Cleaning Guide
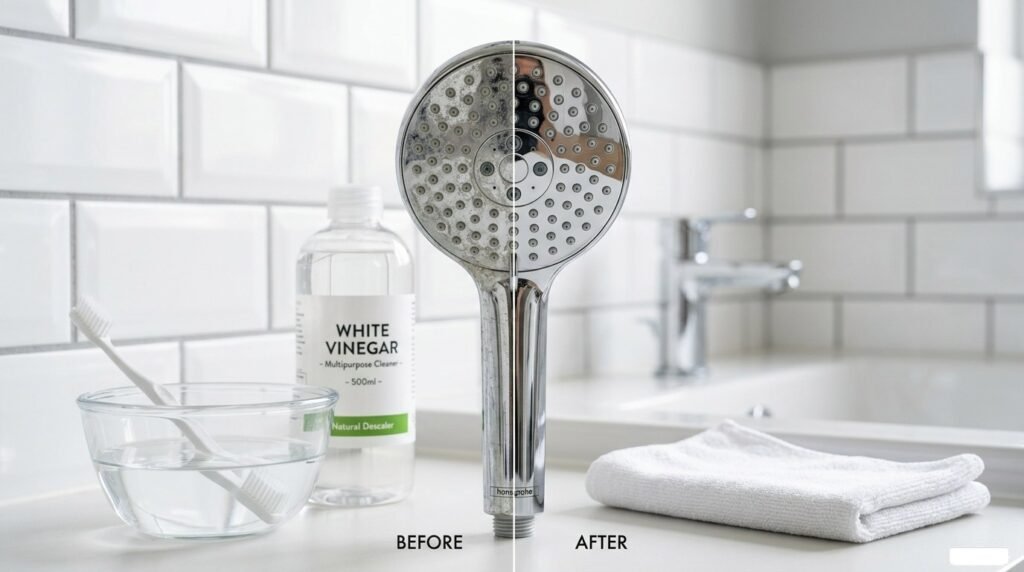
Your hand shower head is used almost every day. Over time, hard water deposits calcium and magnesium minerals on and inside it, building up into a crusty layer called limescale. Soap scum and the warm, damp bathroom air make things worse. Together, they block nozzles, stain the surface, and reduce how well your shower works. Many people don’t notice the problem until it becomes obvious. Here are five signs your hand shower head needs cleaning: These signs won’t fix themselves. The longer you wait, the harder the mineral deposits become to remove. Fortunately, cleaning a hand shower head is simple and usually requires only white vinegar, a few basic tools, and less than an hour of active effort. Quick answer: To clean the hand shower head, detach it from the hose. Soak it in undiluted plain white vinegar for 30-60 minutes. Vinegar dissolves limescale, calcium deposits and mineral build-up. Then take an old toothbrush and scrub the nozzles and unblock any holes. Rinse thoroughly in warm running water. Connect the hose again and check the water pressure. Tools and Materials Needed to Clean a Hand Shower Have all the tools and supplies you will need within arm’s reach before you get started. Item Quantity / Amount White vinegar 500–750 ml (bowl method) / 250–500 ml (bag method) Bowl or dish Large enough to cover the shower head completely Plastic bag + rubber band Standard-size sandwich bag Toothbrush with soft bristles 1 Toothpicks or a fine needle 2–3 Microfiber cloths 1 -2 Mild dish soap (optional) A few drops White vinegar is the go-to cleaner for a reason. It’s just enough natural acidity to eat through limescale and mineral deposits, but it won’t strip finishes or corrode the shower head body as some harsh chemical cleaners will. Step-by-Step Guide to Cleaning a Hand Shower Head Step 1: Remove the Hand Shower Head First things first, try removing the shower head from the hose by hand. Grip it firmly and turn anticlockwise. Most hand shower heads come off without any tools at all. If yours feels stuck, look up the manufacturer’s guide before you pull harder. Some models have locking mechanisms you need to release first. Warning: Keep metal pliers away from chrome and coated finishes. If you need extra grip, wrap a thick cloth around the connector and use that as a buffer. Bare metal on a polished surface leaves scratches that don’t buff out. Can’t get it off at all? No problem. Move straight to Step 2 — the bag method handles that situation without any removal needed. Step 2: Soak in White Vinegar Next, pour white vinegar into a bowl deep enough to swallow the whole shower head. Face the nozzles downward so the spray holes sit fully covered by the liquid. How long you leave it soaking depends on how bad the buildup actually is: Condition Soaking Time Regular monthly cleaning 15–30 minutes Light mineral deposits 30–60 minutes Moderate limescale buildup 1–2 hours Heavy limescale or stubborn blockage 4–8 hours or overnight Bag method for shower heads that won’t come off: Pour vinegar into a sandwich bag, slide it up over the shower head so every nozzle sits underwater, then cinch a rubber band around the neck of the hose to hold the bag steady. Same soaking times apply. Pro Tip: Slightly warm vinegar gets through calcium buildup noticeably quicker. Heat it for 20–30 seconds in the microwave — stop well before it boils, or the smell gets unbearable. Warning: Gold, bronze, and other decorative finishes don’t play well with long acid exposure. Cap your soak at 30 minutes for anything other than standard chrome or plastic. Step 3: Scrub the Nozzles Once the soak wraps up, grab your old toothbrush and get scrubbing. Work across the whole face of the shower head in short back-and-forth strokes. The vinegar will have already loosened most of the limescale, so it shouldn’t take much effort. Warning: Stabbing a needle straight in damages rubber nozzles faster than any amount of hard water ever would. Slow and steady gets the job done without creating new problems. After that, hold the shower head under warm running water and rinse away everything the toothbrush knocked loose — vinegar residue included. Step 4: Clean the Mesh Filter Here’s the step most people never bother with, and it’s often the real reason water pressure stays disappointing even after a thorough clean. Tucked just inside the inlet where the hose screws in, there’s a small mesh filter screen. It catches sand, grit, and pipe sediment so those particles don’t reach the nozzles. You’ll often see the water pressure improve the moment you reinstall a freshly rinsed filter. It’s a small thing that makes a big difference. Step 5: Reassemble and Test Finally, screw the shower head back onto the hose by hand. Go clockwise and keep turning until it feels snug against the connector. Warning: The moment it feels tight, stop turning. One twist too many strips the thread or flattens the washer out of shape, and either way, you end up with a dripping joint. Cleaning Tips for Different Hand Shower Head Types Not every shower head takes the same kind of cleaning. The material and finish of yours changes what products and tools are safe to use. Chrome Hand Shower Heads Chrome scratches easily if you’re not careful. Stick to soft cloths and avoid any abrasive cleaning pads or powders. Once you’re done cleaning, dry the surface straight away — this stops water spots from dulling the shine. Stainless Steel Hand Shower Heads A microfiber cloth works best on stainless steel because it lifts water marks without leaving new ones behind. Keep rough scrubbing pads away from the surface. Even light scratching on stainless steel shows up clearly under bathroom lighting. Plastic Hand Shower Heads Plastic doesn’t handle strong chemicals well — they can cloud the surface or cause it to crack over time. Clean gently with diluted white vinegar and a soft cloth.
How to Add a Hand Held Shower Head in 7 Easy Steps

A basic shower gets the job done, but a handheld shower head makes it so much better. A handheld shower head is a flexible, hose-connected shower head you can hold and move freely. And homeowners love to add one for simple reasons: The best part? You don’t need a plumber. Most people finish this upgrade in under an hour. In this blog, you will learn exactly how to add a hand held shower head in 7 easy steps. We cover every tool, every part, and every move from start to finish. Tools and Materials Required Collect these items before you begin; having everything on hand saves time and prevents trips to the hardware store in the middle of the job. Check Your Existing Shower System Before you begin, check out your current shower to avoid any surprises when you’re working. 1. Most home showers use a ½-inch NPT (National Pipe Thread) connection. This is the standard screw fitting on your shower arm — the pipe sticking out of your wall. Nearly all handheld shower kits fit this size. 2. Your current fixed shower head simply screws off by hand or with a wrench. No special tools needed. 3. But some setups need a diverter valve, a little switch that directs water between two shower heads. You may need one if you want to keep your old shower head running alongside the new handheld unit. More on that in a later step. 4. Most standard bathrooms need zero extra parts beyond the kit itself. So, check your setup first and shop with confidence. How to Install a Hand Held Shower Head in 7 Easy Steps Difficulty Level Time Required Easy 20–60 minutes Step 1: Remove the Old Shower Head Wrap a soft cloth around the base of your old shower head. This stops the wrench from leaving marks on the metal. Grip the cloth-covered base with your adjustable wrench and turn it counterclockwise. Once it starts to move, spin it off the rest of the way with your hand. Caution: Forcing a stuck shower head too fast can bend the shower arm inside the wall. Work slowly and let the wrench do the job. Step 2: Clean Off the Old Tape and Inspect the Threads Use your fingernail or a dry rag to peel off every bit of old plumber’s tape from the shower arm. Old tape leaves behind a gummy layer that stops new tape from sealing well. After clearing it off, hold the arm near a light source and look at the threads carefully. Smooth, clean threads mean you are ready for the next step. Pro Tip: Run your fingertip along the threads after wiping them down. Anything that feels rough, raised, or uneven needs a closer look before you go further. Step 3: Apply New Plumber’s Tape On The Threads Get the first edge of the plumber’s tape really tight against the bottom of the shower arm threads. Wind the tape around the threads moving in a clockwise direction. Go around two to three full times, keeping the tape pulled tight the whole way. Press the torn end flat against the threads with your thumb so nothing hangs loose. Caution: Wrapping the tape in the wrong direction, counterclockwise, makes it unravel the second you screw anything onto it. Always go clockwise. Step 4: Screw On the Mounting Bracket Pull the mounting bracket out of your handheld shower head kit. Line it up with the shower arm and begin threading it on by hand. Turn it clockwise and keep going until your hand cannot move it any further. Wrap your cloth around the bracket and tighten it one quarter turn more with the wrench. Pro Tip: The bracket should face straight out from the wall once tightened. The hose and shower head will hang all weird if it is at an odd angle. Step 5: Connect the Shower Hose to the Bracket Take the shower hose from your kit and find the end that fits into the opening of the bracket. Thread the end onto the bottom of the bracket by hand first. Once hand-tight, hold the bracket steady with one hand and give the hose fitting a short quarter turn with the wrench. Let the hose fall naturally and make sure no section of it is twisted or kinked. Pro Tip: A twisted hose puts stress on both connection points and shortens the life of the hose significantly. Step 6: Connect the Hand Held Showerhead to the Hose. Hold the open end of the shower hose with one hand to keep it steady. Take the handheld shower head and thread it onto the hose end clockwise. Hand-tighten it until you feel firm resistance. Then use the wrench with the cloth to snug it up one final quarter turn, nothing more. Pro Tip: Most leaks in a handheld shower head installation happen at this joint. Take your time here and make sure the connection feels solid before testing. Step 7: Turn the Water On and Look for Leaks Reach into the shower and turn the water on to full flow. Stand back and watch every connection point for a full minute — the shower arm, the bracket base, and both ends of the hose. Press a dry fingertip against each joint and check for any moisture at all. Then switch between every spray setting on the handheld shower head to make sure water pressure stays strong and consistent. Caution: A small drip caught now takes seconds to fix. Left alone, that same drip can damage your wall for weeks and months. How to Keep Your Existing Shower Head and Add a Handheld One Difficulty Level Time Required Moderate 30–90 minutes The good news is you do not have to choose between your old shower head and a new handheld one. A simple extra part lets you run both. Using a Diverter Valve A diverter valve is a small fitting that splits incoming water between two separate outlets —
How to Clean a Moen Shower Head: Step-by-Step Guide
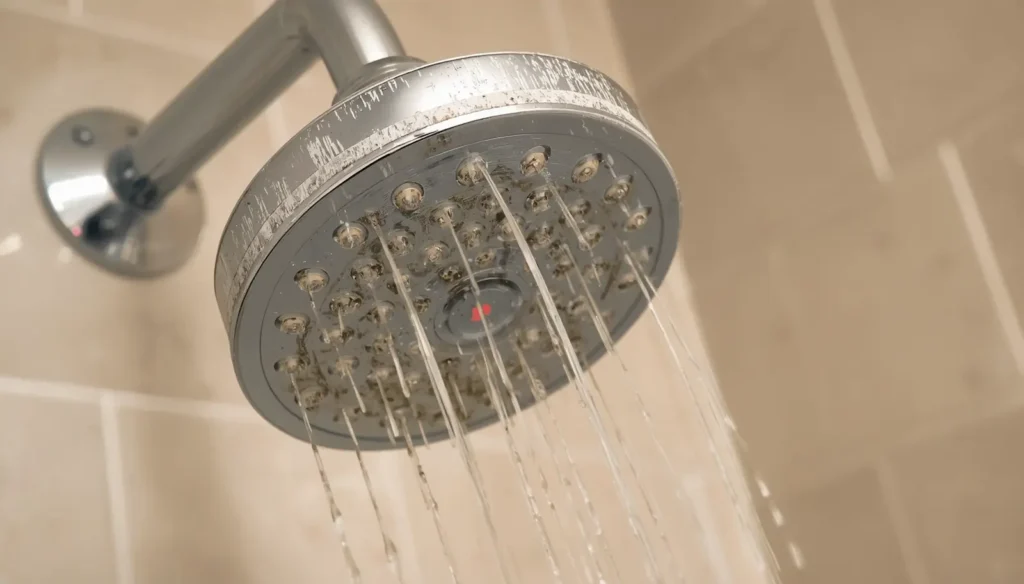
Learning how to clean a Moen shower head can save you a lot of frustration. Moen is an American brand with a strong reputation. More Indian homes are now choosing it for its build quality and modern look. But here is the problem: Indian water is tough on shower heads. Cities like Delhi, Jaipur, and Nagpur have very high TDS levels of water. This means the water is rich with minerals like calcium and magnesium. Over time, these minerals build up inside your shower head. You start getting a weak, uneven spray. White crusty patches show up around the nozzles, too. Many people think the shower head is broken. It is not. It just needs a clean. This guide shows you exactly how to fix it in under 60 minutes. Quick Answer: Pour one to two cups of white vinegar into a plastic bag. Hang the bag over your Moen shower head so all the nozzles sit inside the vinegar. Hold the bag in place with a rubber band. Leave it for one to two hours. Then pull the bag off and turn on the shower. Run hot water for 30 seconds to flush everything out. What You’ll Need to Clean a Moen Shower Head Basic Supplies (No Removal Method): Use these items for the simple bag method. You likely have most of them at home already. For Deep Clean (Removal Method): Use these extra items when the shower head needs to come off for a thorough clean. Which Cleaner is Safe for Your Moen Shower Head? Not every cleaner works on every finish. Using the wrong one can damage the coating. Check this table before you start. Cleaner Safe for Moen Best For Avoid On White Vinegar Yes Chrome, Nickel Matte Black, Gold CLR Cleaner Caution Severe buildup only All delicate finishes Baking Soda Paste Yes Surface scrubbing Inside cartridge Bleach No Never use on Moen All finishes Mild Dish Soap Yes Matte Black, Gold N/A Will Vinegar Damage Your Moen Shower Head Finish? Every Moen finish behaves differently when it meets vinegar. Using the wrong cleaner is the top reason finishes get permanently damaged, and it can void your Moen warranty, too. Check your finish below before you pick up that bottle. Moen Finish Vinegar Safe Soak Time Limit Best Cleaning Method Chrome Yes Up to 2 hours Undiluted white vinegar Brushed Nickel Caution 30 minutes max Diluted vinegar (1:1 water) Matte Black No Never soak Mild soap + warm water Spot Resist Brushed Gold No Never soak Damp microfibre only Brushed Stainless Caution 30 minutes max Diluted vinegar Oil Rubbed Bronze No Never soak Mild soap + warm water Tip: When in doubt, mild dish soap and warm water work safely on every Moen finish. How to Clean a Moen Shower Head Step By Step Method 1: Cleaning the shower without removing the shower head Best For: Light to Medium Buildup | Chrome and Nickel Finishes 1. Take a plastic ziplock bag and add 1-2 cups of the white vinegar. 2. Slide the shower head into the bag so every single nozzle touches the vinegar. 3. Hold the bag firmly against the neck and lock it in place with a rubber band. 4. Walk away and let it sit for 1 to 2 hours. 5. Thirty minutes in, take an old toothbrush, dip it in the vinegar and work it across the faceplate. 6. When the time is up, carefully pull the bag down and off. 7. Turn the shower on full and run hot water for 60 seconds to wash the mineral bits away. 8. Take a microfibre cloth and dry the shower head face completely. Hard Water Tip: If your city TDS is above 500 ppm, soak the shower head overnight with undiluted vinegar for best results. Method 2: Deep Clean by Removing the Shower Head Best For: Severe Buildup | Blocked Nozzles | Annual Maintenance 1. Fold a thick cloth around the shower head collar before touching anything else. 2. Set the adjustable wrench on top of the cloth — bare metal against the finish will scratch it badly. 3. Rotate anti-clockwise until the shower head comes free from the pipe. 4. Drop it straight into a bowl of undiluted white vinegar. 5. Two hours work for normal buildup. For anything heavier, leave it overnight. 6. Pick up a toothbrush and scrub every nozzle one by one, then hold it under running water to rinse. 7. Before putting it back, wind fresh plumber’s tape clockwise around the pipe threads. 8. Screw it on by hand first, then use the wrench for just a quarter turn, stop right there. How to Clean the Moen Filter Screen Inside every Moen shower head sits a small mesh filter screen. In hard water areas, this screen clogs faster than the nozzles, and most people never clean it. 1. Remove the shower head using the steps above.2. Look inside the inlet connection; the filter screen sits right there.3. Use needle-nose pliers to pull it out gently.4. Rinse it under water and scrub softly with a toothbrush dipped in vinegar. 5. Let it air dry fully before putting it back. 6. Look closely at the screen; if it looks torn or corroded, then replace it. New filter screens are very cheap and can be bought on Amazon India or from any hardware shop. Cleaning Guide for Specific Moen Shower Head Types Fixed Wall-Mount Shower Heads Use the bag method every time. Handheld Shower Heads Always detach from the hose before soaking. Rain Shower Heads These have large faceplates, so they need more time. Moen Magnetix Shower Heads Remove the magnetic dock before you start cleaning. Moen Dual Shower Systems Clean both heads on the same day for even results. 5 Mistakes That Damage Your Moen Shower Head While Cleaning 1. Bleach or Harsh Acids: Your finish will peel off, and Moen will not honour the warranty after that. 2. Vinegar Soaks on Matte Black or Gold: These finishes are
How to Clean Limescale From a Shower Head (India Guide)
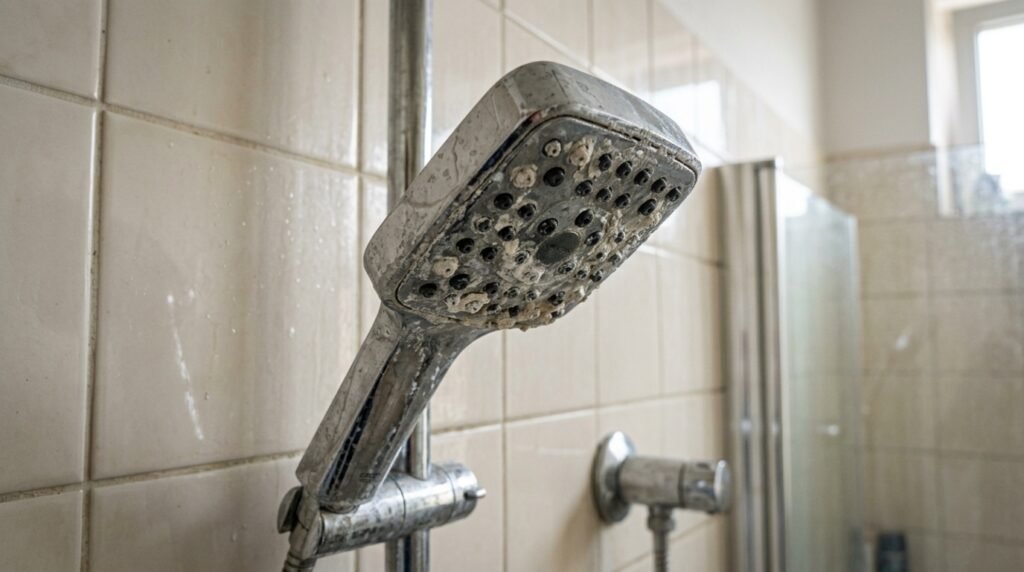
That white, crusty layer on your shower head is limescale. It forms when hard water (water with a lot of dissolved calcium and magnesium) dries on the metal. Every shower leaves a tiny bit behind. Over weeks and months, it builds up and blocks the spray holes. Quick Answer: Remove the shower head if you can, and soak it in white vinegar or citric acid for 30 to 90 minutes. Scrub the nozzles with a soft toothbrush, clear any blocked holes with a pin, then rinse well. If the shower head is fixed, tie a vinegar-filled plastic bag around it instead. Chrome and many plastic shower heads are generally fine with a mild vinegar soak, while brass, gold, matte black, and coated finishes need extra care. What Causes Limescale on a Shower Head? Hard water is common across large parts of India, especially in homes that rely on borewell or groundwater, or that store water in overhead tanks before it reaches the shower. As water dries on the nozzle plate, the calcium and magnesium stay behind as a solid, chalky layer. Your exact water hardness depends on your locality and water source, so it’s worth getting your water tested rather than assuming a fixed number for your city. As a general reference point, IS 10500:2012, the Bureau of Indian Standards specification for drinking water, sets the acceptable limit for total hardness at 200 mg/l, with a permissible limit of 600 mg/l where no better source is available. Water at or above these levels tends to leave visible deposits on taps, shower heads, and glass more quickly. Signs Your Shower Head Needs Cleaning You don’t need to inspect it closely to know something is wrong. Watch for: If you notice two or more of these, it’s time to clean. What Tools and Materials You’ll Need to Clean a Shower Head Keep this simple. Most of it is already in your kitchen. How to Clean a Removable Shower Head Taking the shower head off gives you the deepest clean. Here’s how to do it properly. Step 1: Unscrew the shower head. Twist it counter-clockwise by hand. If it won’t budge, wrap a cloth around it and use a wrench so you don’t scratch the metal. Step 2: Rinse off loose dirt under running water before soaking. Step 3: Soak it in vinegar or citric acid. Cover the whole spray plate. Check your finish first (see the next section) before choosing full-strength or diluted vinegar. Step 4: Scrub the nozzles with the toothbrush in small circles, focusing on the edges of each hole. Step 5: Clear blocked holes gently with a toothpick or pin. If your shower head has rubber nozzles, squeeze each one with your fingers first. This alone loosens a lot of surface buildup before you reach for the toothbrush. Can You Use Vinegar on Every Finish? Not always, and this trips up a lot of people. Check your finish before you soak anything. When in doubt, a mild descaling product made for your specific finish is safer than guessing with vinegar. Cleaning a Fixed Shower Head Without Removing It Many wall-mounted, ceiling-mounted, and rain shower heads in Indian bathrooms don’t come off easily. This method works around that. 1: Fill a sturdy zip-lock bag with white vinegar. 2: Slide it over the shower head so the nozzle plate sits fully inside the liquid. 3: Tie it in place with a rubber band or string around the shower arm. 4: Soak for about an hour for light buildup, or three to four hours for heavy buildup. 5: Remove the bag, scrub the plate with a soft brush, and rinse well. 6: Run the shower at full pressure for half a minute to flush out loosened deposits. For brushed brass or matte black fixed heads, including many wide rain shower plates, dilute the vinegar with equal parts water — full-strength vinegar left too long can dull these finishes. How Long Should You Soak a Shower Head Soak time depends more on how much buildup there is than on the exact minute count. Use this as a general starting point, and always follow your manufacturer’s instructions where available: Buildup level General starting point Light (thin white film) 20–30 minutes Moderate (visible crust) 45–60 minutes Heavy (thick, uneven spray) 60–90 minutes, or repeat once Don’t leave delicate or coated finishes soaking “just to be safe.” Longer isn’t always better, and it can damage the surface. Other Ways to Remove Stubborn Limescale If vinegar alone isn’t cutting through heavy deposits, try one of these. Method Best for Note Citric acid solution Heavy mineral deposits Dissolve 1–2 tbsp in 500ml warm water; check compatibility with brass, gold, and coated finishes before use Baking soda paste Surface grime and gentle scrubbing Mix with water into a paste; mildly abrasive, so scrub lightly Manufacturer-approved descaler Heavy buildup Always follow the label’s contact time General bathroom cleaner Everyday grime, not limescale Not made for shower head finishes — don’t rely on it for descaling A quick tip: don’t mix baking soda into your vinegar soak. Vinegar is acidic and baking soda is alkaline, so combining them cancels out the very acidity that dissolves limescale. Use them separately, not together. What Not to Use on a Shower Head A few habits do more harm than good: Shower Head Problems and Quick Fixes Problem Likely cause What to do Uneven spray Partly blocked nozzles Soak and scrub, flex rubber nozzles Weak water flow Mineral buildup inside Descale, then flush thoroughly Water sprays sideways A few blocked holes Clear individual holes with a pin Still weak after cleaning Inlet filter or supply issue Check the mesh filter at the connection point Buildup returns fast Hard water at the source Clean more often, or look at water treatment How Often Should You Clean a Shower Head in India? This depends on your water source more than your city. Borewell water and some groundwater tend to carry more minerals than treated municipal supply,