
How to Cover a Drain Properly: Types, Covers & Installation Tips
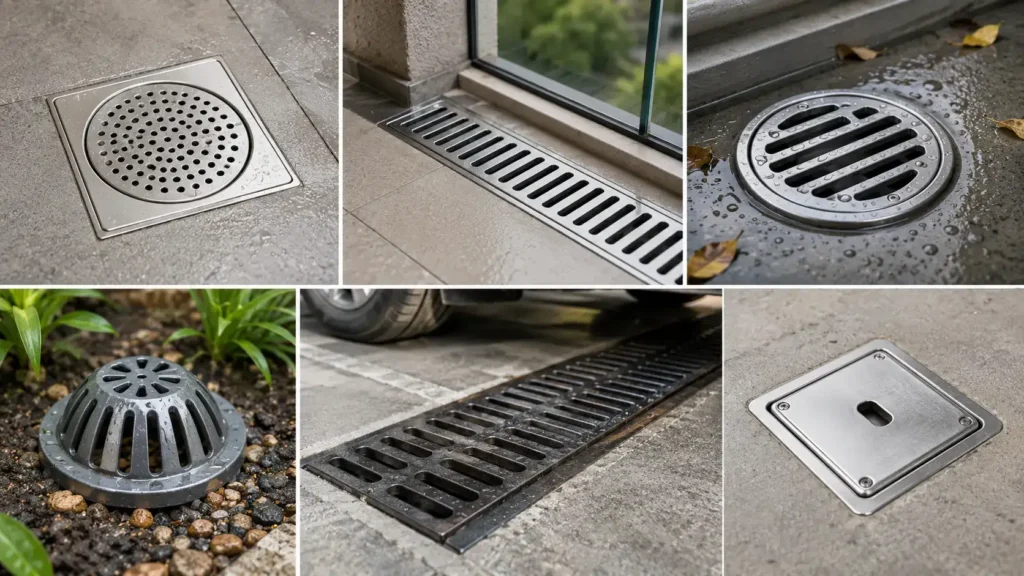
Open drains are an invitation to trouble. They are prone to clogging with leaves, hair, and dirt, and heavy rains cause water to back up. In the stagnant water, cockroaches and mosquitoes breed, and the foul smell drifts through the house. Worse, an open drain near a balcony or staircase can cause a bad fall, especially for kids and elderly family members. That is why learning how to cover a drain properly matters. A good cover does two jobs at once: it keeps dirt, pests, and accidents away, while still letting water flow through without blocking it. Too tight a cover, and water pools. Too loose, and debris gets in anyway. Not every drain needs the same solution. A bathroom drain, a balcony outlet, and an outdoor trench each face different water loads and dirt types. This guide walks you through the right drain cover for each spot, how to pick materials, and how to install one the correct way. Identify the Type of Drain Before Choosing a Cover Not all drains are built the same, so don’t buy a cover before you know what you’re dealing with. Take a look at what you’ll typically find around an Indian home: Skip this step, and you’ll likely pick the wrong option. As a result, the wrong drain cover can cause as many problems as no cover at all — it may trap water, let debris through, or simply crack under the weight it wasn’t made for. Best Ways to Cover a Drain Based on Location The right drain cover changes depending on where the drain sits in your home. A cover that works in a bathroom won’t survive a driveway, and one made for a terrace won’t fit a narrow balcony channel. Here’s how to choose for each spot. Bathroom Drains A flat mesh or perforated cover works best for bathroom drains. Stainless steel doesn’t rust when it’s in constant contact with water, and it remains hygienic for years. Skip the weekly wipe-down, though, and hair and soap scum build up underneath the mesh fast enough to slow drainage within a month. In most Indian apartments, this drain sits near the shower area and sees daily use. Best For: Daily wastewater with hair and soap Avoid If: You want a cover with wide gaps, since small debris will pass through Balcony Drains A slotted channel cover suits balcony drains, since it clears rainwater fast without blocking the narrow opening. PVC or coated metal handles sun exposure better than plain iron, which rusts quickly outdoors. Undersized slot widths are the usual culprit here — monsoon leaf litter clogs them almost as fast as you clear them. Apartment balconies in cities like Mumbai and Pune rely on this setup heavily during the rainy season. Best For: Narrow spaces with regular rain exposure Avoid If: The area collects heavy leaf litter without frequent cleaning Terrace Drains Terrace drains need a wide-slot, heavy grate that can handle large water volumes during monsoon. Cast iron or thick stainless steel holds up under constant weather changes better than lightweight plastic. Many homeowners install a grate with too small an inlet area for the roof’s runoff, so water backs up and overflows during sudden downpours. Rooftop terraces often double as drying or sitting areas. A secure, properly sized cover keeps the space safe too. Best For: High water flow and outdoor weather exposure Avoid If: The terrace has poor slope, since water will pool regardless of the cover Outdoor Garden Drains A dome-shaped or raised grate cover suits garden drains, as it keeps mud and leaves from sinking straight in. Galvanized iron works well here because it resists corrosion from soil moisture. Flat covers are the wrong pick here — soil settles over them within weeks and buries the opening entirely. Independent houses with lawns or utility yards commonly use this type near outdoor taps. Best For: Areas with loose soil and plant debris Avoid If: The drain sits under heavy foot traffic, since domes can crack Driveway Drains Driveway drains call for a heavy-duty trench grate built to bear vehicle weight without bending. Cast iron is the standard choice here, since it holds up under repeated pressure far better than plastic. Residential-grade covers don’t belong here; rated for foot traffic only, they crack under a car’s weight within months. Parking areas in gated communities depend on this type to manage runoff safely. Best For: Areas with regular vehicle movement Avoid If: Load rating isn’t checked against your vehicle weight Which Drain Cover Material is Best If you’re wondering how to cover a drain with the best all-round material, stainless steel is the safest bet for most homes — it resists rust and looks clean for years. However, for heavy-traffic areas like driveways, cast iron works better since it carries much more weight without bending or cracking. Material Rust Resistance Load Capacity Cost Best Use Maintenance Stainless Steel High Medium Medium-High Bathrooms, balconies Low Cast Iron Medium (can rust if uncoated) Very High Medium Driveways, trench drains Medium PVC High Low Low Garden drains, light-use areas Low Polymer Concrete High High Medium-High Terraces, outdoor channels Low For everyday indoor use, stainless steel gives the best balance of durability and price. If your drain sits in a parking area or driveway, don’t settle for anything lighter than cast iron, since plastic and thin metal both fail under vehicle weight over time. Polymer concrete is worth the extra cost for terraces and outdoor channels, as it handles both heavy rain and temperature swings without warping. Cost should never be the only factor. A cheap PVC cover on a driveway will crack within months, costing more in replacements than a proper cast iron one would have upfront. How to Install a Drain Cover Without Affecting Water Flow Most homeowners get the material right and still end up with flooding. The real problem is usually a cover with too few openings, not the material. This one mistake causes most slow-drainage complaints
How to Remove a Channel Drain Cover Step by Step
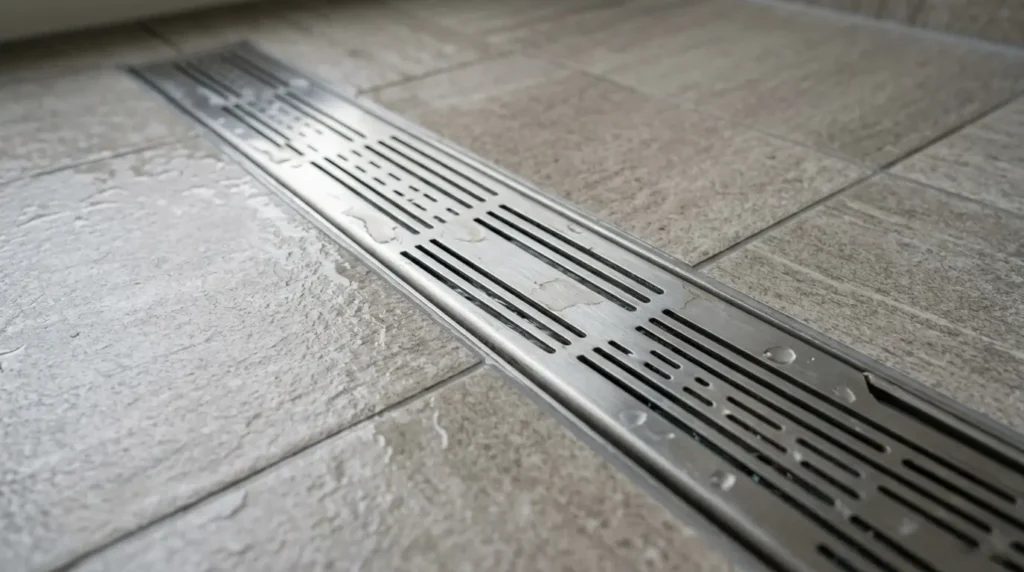
A channel drain cover, also called a linear drain cover or drain grate, is the removable top panel that sits over a long, narrow drainage channel in your bathroom or balcony floor. Beneath it, you’ll often find a debris basket or hair trap that collects waste before it enters your pipes. Homeowners remove the cover for three main reasons: The removal method depends entirely on your drain design. Forcing the cover can crack tiles, scratch stainless steel finishes, or break locking mechanisms. Identify Your Channel Drain Cover Type Before Removal Using the wrong removal method causes real damage. It can scratch your stainless steel finish, crack floor tiles, or snap the locking mechanism clean off. So before you touch the cover, take sixty seconds to identify what type you have. Here are the four main channel drain cover types found in Indian homes: Cover Type Key Feature How It’s Removed Snap-In Cover No visible screws Hook or lifting slot Screw-Fixed Cover Screws on the top surface Flathead or Phillips screwdriver Tile Insert Drain Blends with floor tiles Drain lifting key Heavy-Duty Outdoor Grate Large, heavy frame Two-handed lift Snap-in drain covers are the most budget-friendly option. Screw-fixed covers give you a secure fit. Tile insert drains look seamless and clean. Heavy-duty grates handle outdoor loads and water volume. Note: In most Indian bathrooms, snap-in and screw-fixed channel drain grates dominate. This is because standard floor traps in Indian construction follow compact sizing, typically 110mm to 200mm wide, which suits lighter cover designs. Once you know your drain type, you pick the right tool and avoid costly mistakes. Tools You Will Require to Remove the Channel Drain Cover Using the wrong tool on a drain cover leaves scratches, chips the finish, or cracks the surrounding tile. Keep these six tools handy before you start. Tool Purpose Drain lifting key Hooks into tile insert drain covers for clean removal Screwdriver (flathead or Phillips) Turns out, screws on fixed-type covers Needle-nose pliers Gets a firm grip on tight or corroded edges Plastic pry tool Slides under the cover without marking the surface Rubber gloves Keeps your hands clean and stops the cover from slipping Soft cloth Lays under the stainless steel grate to prevent scratching Now let’s get into the actual removal steps. How to Remove a Channel Drain Cover Step by Step Follow these five steps carefully. Each one builds on the last, so don’t skip ahead. Step 1: Dry the Area and Inspect the Cover Wet floors hide the cover edges and cause slipping. Before you touch anything, take an old towel and wipe the area dry. Once dry, look at the drain grate carefully. Check for screws, lifting slots, side clips, or small key holes. Run your finger along the edges, and you’ll often feel a gap that eyes miss. If you spot a brand name like Jaquar or Hindware stamped on the grate, look up that model. Some brands use their own removal method. Now you know exactly what you’re dealing with before you start. Step 2: Remove Screws or Locking Clips Screws corrode fast in Indian bathrooms because water sits on the floor daily. Match your screwdriver size to the screw head first. A loose-fitting screwdriver strips the head and turns a five-minute job into a repair job. Turn slowly. If the screw resists, put a drop of WD-40 around the head, wait 5 to 10 minutes, then try again. Most Indian bathroom channel drain covers use Phillips head screws — a No.1 or 2 Phillips fits the majority. Once out, drop the screws into a small bowl immediately. Losing one into an open channel means an unnecessary hardware run. Screws removed, the cover now sits loose. Step 3: Lift the Cover Using the Correct Technique Tilting the cover sideways chips the tile edge. Always lift straight up. Cover Type Removal Method Snap-in Hook into the slot and pull vertically Screw-fixed Remove screws first, then lift both ends evenly Tile insert Use the lifting key that came with the drain Outdoor grate Grip both ends and lift straight with both hands For covers longer than 600mm, use both hands and apply equal pressure. Thin stainless steel grates bend easily if you lift from one end only. Set the cover on a soft cloth after removal to avoid scratching the finish. Step 4: Take Out the Debris Basket or Hair Trap The debris basket is located under the grate and catches hair and pieces of soap. Not all channel drains include one; it depends on your brand and model. If yours has one, lift it out by the handle using rubber-gloved hands. No handle? Slide gloved fingers under the rim carefully. Hair and soap residue are the most common finds in Indian bathroom drains. During monsoon season, fine sand and mud add to the build-up. Don’t rinse the basket over the open drain — debris falls straight into the pipe. Take it to a dustbin first, tap out the waste, then rinse separately. Step 5: Inspect the Channel for Blockages Shine a phone torch down the channel and look for hair clumps, soap coating, white mineral crust, or sand. Hard water cities like Delhi and Jaipur see heavy mineral build-up. Also, check for rust or cracks on the channel body. A cracked channel leaks water into the floor slab — expensive to fix later. This inspection ensures no hidden blockage remains before the cover goes back on. What to Do If the Channel Drain Cover is Stuck A stuck cover usually means the drain hasn’t been cleaned in months. Before you apply any force, identify the cause. Forcing a stuck channel drain cover cracks tiles, damages the frame, and can snap locking clips permanently. Here are the most common causes and how to fix each one: Cause Solution Mineral deposits or limescale Pour warm water around the edges. Apply white vinegar and leave it for 10–15 minutes. Soap scum build-up Spray a mild bathroom cleaner around the rim.
How to Remove a Shower Drain Cover Without Damage
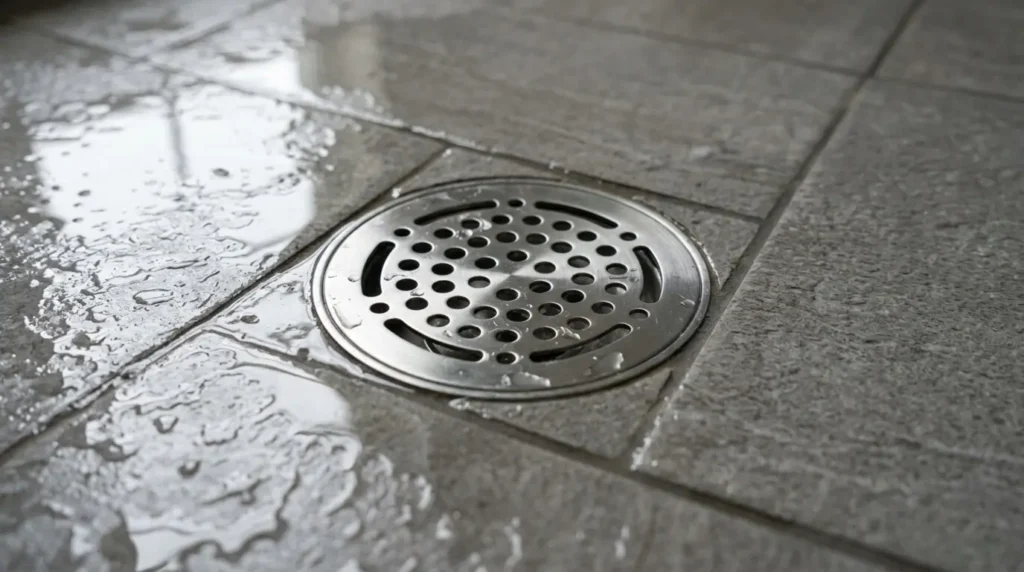
Water pooling at your feet. A smell you can’t ignore. Hair and soap scum are turning your drain into a slow-moving mess. These are signs your shower drain cover needs to come off and soon. The good news is you can handle this yourself in under 15 minutes. To remove a shower drain cover, first identify if it is a screw-in, snap-in, or pop-up style. Screw-in covers need a screwdriver to loosen the center screw. Snap-in covers lift straight out with a flathead screwdriver or your fingers. Pop-up drains twist counterclockwise to release. The removal steps depend entirely on which type of drain cover you have. Using the wrong approach can scratch your drain grate or crack the finish around it. Types of Shower Drain Covers Before you grab a screwdriver, you need to know what kind of drain cover you have, because the removal method is completely different for each type. 1. Screw-In Drain Covers: These are the most common type. You’ll spot one or two visible screws sitting on top of the drain grate or along its edge. A standard flat-head or Phillips screwdriver is all you need to get this type off. 2. Snap-In Drain Covers: Snap-in covers have no screws at all. They press into the drain opening and hold themselves in place with small plastic or metal tabs. A flat-head screwdriver slipped under the edge will pop them right out. 3. Pop-Up Drain Covers: Pop-up style stoppers come in three common subtypes, each of which is removed differently. If you don’t know what subtype you have, try twisting counterclockwise first; most variants do share that direction. 4. Linear Shower Drains: These are rectangular drains that run parallel to one edge of the shower floor. They’re often found in walk-in and modern tile showers. The grate usually lifts straight up or has small screws on either end. 5. Tile Insert Drains: These drains sit completely flush with your tile floor, so they can be tricky to notice. The cover holds a piece of tile on top to blend in. You’ll need a flathead screwdriver to find the seam and carefully pry it up. Tools You’ll Need to Remove a Shower Drain Cover How to Remove Each Type of Shower Drain Cover Now that you know your drain type, here’s exactly how to remove it, without damaging it. Screw-In Drain Covers Tip: Place a small towel around the drain opening before you start. It stops screws from slipping into the drain. Snap-In Drain Covers Tip: Try two or three different spots around the edge if the cover does not pop up right away. Snap-in covers sometimes grip more tightly on one side. Pop-Up Drain Covers Tip: If the cover feels stuck, grip the edges with needle-nose pliers and twist gently. Avoid yanking it hard. Linear Drain Covers Tip: Linear grates can be long and awkward to handle. Ask someone to help you hold one end while you lift the other. Tile Insert Drain Covers Tip: Wrap the tip of your screwdriver with a small piece of tape. It prevents scratches on the tile surface around the drain. If your cover still will not budge after following these steps, the next section will help you deal with a shower drain cover stuck from buildup or corrosion. What to Do When the Shower Drain Cover is Stuck If the cover will not budge, forcing it is the worst thing you can do. You risk cracking the tile, bending the grate, or snapping a corroded screw right off. Most stuck covers have a simple cause, and once you identify it, the fix is straightforward. Cause Solution Mineral deposits / hard water buildup Soak with white vinegar for 15 to 20 minutes Rusted screws Apply penetrating lubricant, wait 10 minutes Soap scum is sealing the edge Pour warm water around the edge, then pry gently Silicone residue Score the seam carefully with a plastic tool Corrosion Grip with needle-nose pliers wrapped in a cloth One important caution before you apply force: When using pliers or a screwdriver to grip the cover, make sure only the cover is rotating, not the drain body below it. If you feel the entire drain assembly turning, stop immediately. That means the drain body’s seal to the shower pan has loosened, and continuing to use it can cause water to leak into the subfloor, a repair that costs far more than a plumber visit. If this happens, call a plumber before using the shower again. If corrosion is severe and nothing works, contact a plumber before the situation gets worse. But in most cases, a little patience and the right product will get that cover off cleanly. How to Clean a Shower Drain After Removing the Cover With the cover off, do not put it back just yet. A few minutes of cleaning now can fix a slow-draining shower and stop bad smells from coming back. Common Mistakes to Avoid Some small mistakes can make an easy job into an expensive repair. Watch out for these: Take your time with each step. Rushing is usually what causes damage. When to Call a Plumber Most homeowners can remove a shower drain cover without any professional help. However, some situations do need an expert. Call a plumber if a screw has snapped off inside the drain body and cannot be extracted, if you notice visible cracks in the drain body itself, or if water continues to back up after you have cleaned the drain thoroughly. You should also get a professional opinion if you suspect the waterproofing membrane beneath your shower floor may have been disturbed. These are not DIY fixes, and catching them early saves money in the long run. Summing It Up Removing a shower drain cover is a straightforward job when you follow the right order. Identify your drain type, pick the correct tools, work gently, clean what you find, and reinstall the cover securely. To keep things flowing smoothly, pull the cover off
Bathroom Floor Drain Trap Types, Tips, and Maintenance
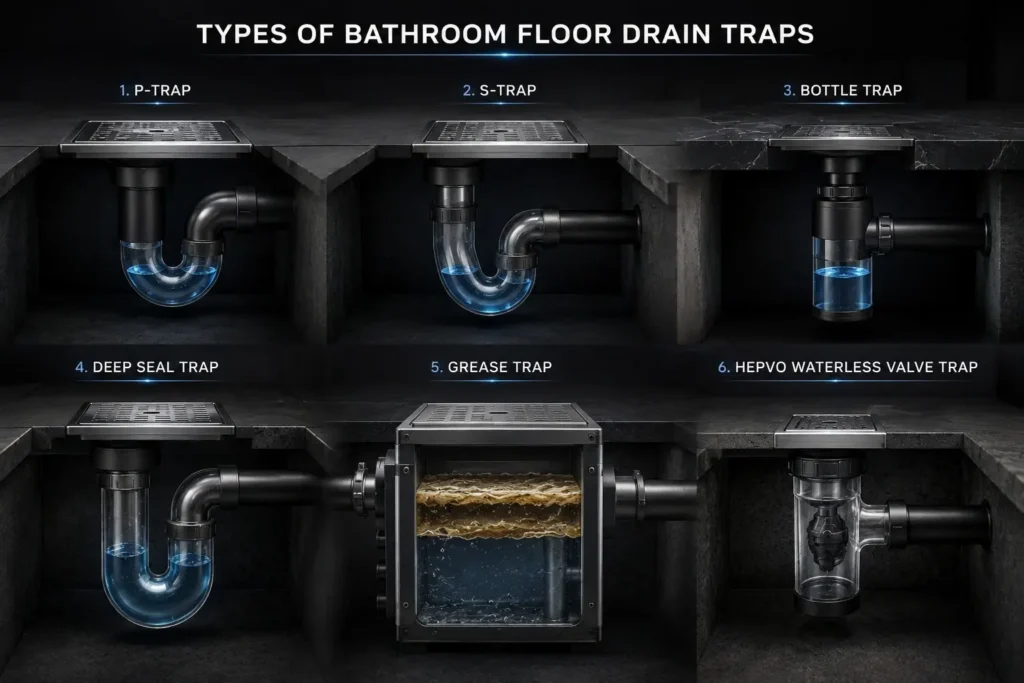
That smell creeping out of your bathroom floor isn’t random — your bathroom floor drain trap is likely the culprit. Most homeowners ignore this small but mighty component until something goes wrong. And by then, you’re dealing with foul odors, slow drains, or worse — sewer gas sneaking into your home. Here’s the good news. Once you understand how it works, you can easily stay ahead of the problem. This blog covers the different types of floor drain traps, how they keep your bathroom fresh, and simple maintenance tips to avoid blockages and bad smells. Stick around — this is easier to manage than you think. What is a Bathroom Floor Drain Trap A bathroom floor drain trap is a small curved pipe fitted beneath your floor drain. It sits quietly under the surface, completely out of sight. Think of it as a silent gatekeeper. Its one job is to stop unwanted things — sewer gases, insects, and debris — from traveling up through the drain and into your bathroom. Without it, your bathroom would be directly connected to the sewer system. Hence, foul smells and potential health hazards could enter your home freely. It’s a simple component, but it plays a surprisingly important role in keeping your bathroom clean, safe, and odor-free every single day. Difference Between Floor Drain and Floor Trap These two terms sound similar, but they do very different jobs. Here’s a quick way to tell them apart. Feature Floor Drain Floor Trap Purpose Collects and removes water Blocks gases, pests, and debris Location Visible on the floor surface Hidden beneath the floor drain Water Seal No Yes Visibility Easy to see Out of sight Works Alone No No Neither one works on its own. The floor drain handles the water, while the floor trap handles everything you don’t want coming back up. Strip one away, and the system breaks down. Together, though, they quietly do their job every single day without you ever having to think about it. Types of Bathroom Floor Drain Traps Not all bathroom floor drain traps look or work the same way. Here’s a breakdown of the most common types so you can spot which one belongs in your bathroom. 1. P-Trap Picture the letter “P” flipped on its side — that’s exactly what this one looks like. It’s the go-to choice for most homes today, used under sinks and floor drains alike. The design is straightforward, which makes both installation and cleaning far less of a hassle. 2. S-Trap This one curves twice, forming a shape that looks like the letter “S.” Older homes have them everywhere, but most building codes today won’t allow new installations. The biggest issue is self-siphoning — the trap tends to drain its own water seal dry, which defeats the whole purpose. 3. Bottle Trap This is a nice little trap with a small cylindrical body that fits nicely under the drain. Ideal for tight spaces, this is why you will often see this under pedestal sinks. It has a clean, minimal look and is a popular choice for modern bathroom designs. 4. Deep Seal Trap This one has a deeper water column – around 75mm compared to the standard 50mm. That extra depth ensures the seal takes much longer to evaporate. And making it a solid pick for bathrooms or utility rooms that rarely see regular use. 5. Grease Trap Its job is to catch fats and oils before they sneak into your drainage system. You’ll mostly find it in kitchens, but some bathrooms share drainage lines where one becomes necessary. Skip it where it’s needed, and you’re looking at stubborn, greasy blockages down the line. 6. HepvO Waterless Valve Trap Instead of relying on standing water, this trap uses a soft internal valve that flexes open when water passes through, then snaps shut on its own. No water means no evaporation problem — making it a genuinely clever solution for drains that go weeks without any use. Common Signs Your Bathroom Floor Drain Trap Has a Problem The trap in your floor drain usually gives you some hints before it stops working properly. Look for these signs, and you can fix problems early. 1. Spotless bathroom smells like sewer gas: You can’t smell that unmistakable sewer smell, but everything looks clean, don’t brush it off. The water in the trap dried up, or there is a crack, and the nasty gas comes right in. 2. Gurgling noises: If you hear gurgling and bubbles from your drain immediately after running water through it, it’s because air is trapped in the pipes. It may be because there is some form of clogging in the vent. 3. Slow drainage of water: If you find that the floor drain is slow, then it is most likely because the trap is blocked with things such as hair or soap from the bathroom. 4. Insects around the drain: There are unusual insect sightings around the drain. That water barrier is supposed to keep critters from crawling up the sewer and invading your bathroom. 5. Cracks around the drain: Even the smallest crack will allow water to get under the floor and destroy the seal. Often, you will not see them immediately. 6. Puddles on the floor: If you see water chillin’ on the bathroom floor instead of draining, you have a serious clog in your trap or drain. And now it’s backing up. Bathroom Floor Drain Trap Maintenance Tips Maintaining the floor drain trap is not difficult. Just pick up a few good habits, and you can avoid any surprises. When Should You Replace Your Bathroom Floor Drain Trap? Sometimes, fixing won’t do. Here are the times when replacement is the better option: 1. If you spot a crack or any kind of damage, getting a good seal is basically impossible. 2. Still smelling something funky after cleaning and refilling the trap? That probably means the trap is worn out. 3. When stubborn clogs just won’t budge, even
How to Install a Grab Rail: A Complete Step-by-Step Guide
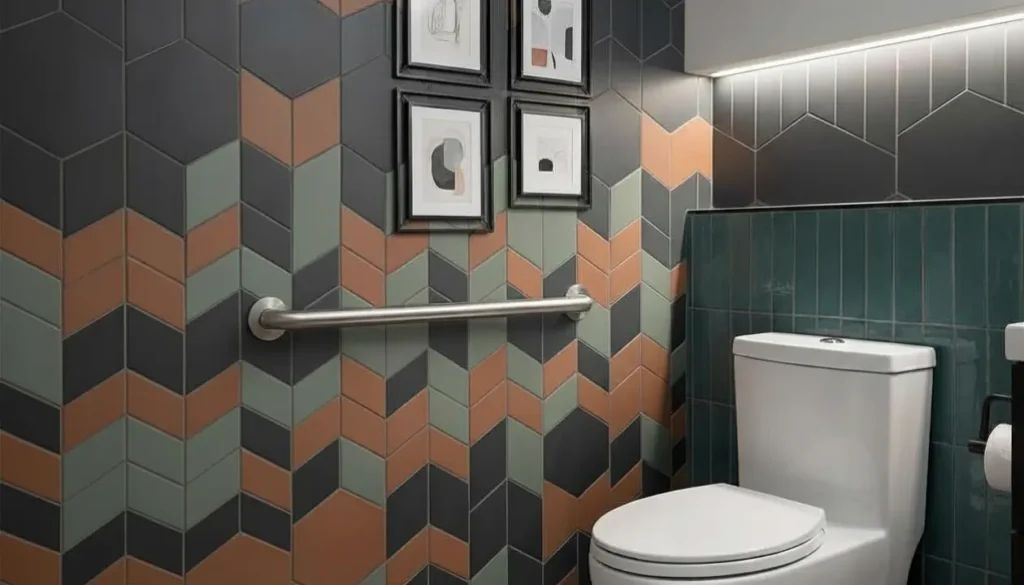
A wet floor. A missed step. One fall can change how a person moves through their own home for good. For families with elderly or disabled members, that risk lives in the bathroom every single day. A correctly installed grab rail fixes this. Fit one at 33 to 36 inches from the floor, secure it into a wall stud or a load-rated anchor, and make sure it can hold at least 100 kg — check the manufacturer’s exact rating, since many rails go higher. This guide walks through exactly how to install one, step by step, along with placement rules, tools, and Indian pricing. What Tools You’ll Need Before You Start Gather everything first. A mid-installation trip to the hardware store is avoidable. How to Install a Grab Rail: Step-by-Step Step 1: Assess the User’s Needs First Don’t buy a rail and figure out placement afterward. Walk through the bathroom with the person who’ll use it and note where they struggle most — standing from the toilet, stepping over the bath edge, balancing in the shower. This decides where every rail goes. Height, grip strength, and whether they use a walking aid all affect which rail diameter and surface texture work best. Step 2: Mark Your Fixing Points Hold the rail in position and mark each screw hole with a pencil. Check the position with the user standing in place before moving on — it’s easier to erase a pencil mark than fill a drilled hole. Step 3: Scan for Pipes and Wires Run a pipe and cable detector over every mark. This takes under a minute and prevents a burst pipe or an electric shock. Step 4: Find a Stud, or Choose the Right Anchor A stud finder tells you what’s behind the wall. Screwing into solid timber gives the strongest hold. If there’s no stud in range, use cavity anchors rated for load-bearing use. Note: Standard wall plugs will not hold under real body weight. Step 5: Match the Drill Bit to Your Wall Tile needs a tile bit, started slowly to avoid cracking the glaze. Brick or plaster needs a masonry bit. Timber takes a standard wood bit. Step 6: Drill the Holes Go slow, especially on tile. Wrap tape around the bit at the correct depth so you don’t drill past what the plug needs. Step 7: Insert wall plugs, if needed Tap them flush with the surface. Skip this step only if you’re screwing straight into a timber stud — plugs reduce grip there instead of adding it. Step 8: Fix the rail to the wall Start each screw by hand, then tighten gradually, moving between screws rather than finishing one at a time. This keeps the mounting plate flat and even. Step 9: Check the level Rest a spirit level along the rail. Even a small tilt affects grip comfort and confidence — adjust before moving on. Step 10: Load test it Push down and outward on the rail with real force, the kind someone would apply mid-slip. There should be no movement, flex, or creaking. If anything feels loose, remove the rail and check the fixings again. A single rail usually takes 30 to 45 minutes once your tools and fixings are ready. Add extra time if you need to locate studs or work around tile. Where to Place a Grab Rail: Exact Measurements Placement follows the movements that put a person most at risk: sitting, standing, and stepping over wet surfaces. Choosing the Right Type of Grab Rail Type Best For Notes Fixed/permanent rail Daily, long-term use Bolts into the wall; strongest and most stable option Folding rail Shared or small bathrooms Folds flat against the wall when not needed Suction cup rail Travel, short-term use Easy to move, but not rated for full body weight Vertical rail Pushing up to stand Common near the toilet and bath entry Horizontal rail Side-to-side balance Common in the shower area Angled rail (45°) Getting in and out of a bathtub Combines both push and balance support Stainless steel (SS 304 grade) is the standard material for Indian bathrooms because it resists rust in humid conditions. Chrome-plated and PVC-coated grab bars also exist, but steel lasts longer in wet, high-use spaces. Grab Rail Prices in India Prices vary by material, finish, and load rating. As a general guide: Rail Type Approximate Price Range (₹) Suction cup rail 400 – 1,200 Folding rail 1,200 – 3,500 Fixed stainless steel rail 800 – 2,500 Angled bathtub rail 1,500 – 4,000 Heavy-duty adhesive/tenant-friendly rail 1,000 – 3,000 These are approximate street and online retail ranges — always confirm current pricing with the supplier, and don’t choose on price alone. Compare the load rating and finish (satin vs. polished) first. Common Mistakes That Cause Rail Failure Popular Grab Rail Brands in India Cera: Mid-range stainless steel rails, widely stocked Signxpress India: SS 304 grade rails in straight, L-shaped, and swing designs Begin Faucets: Bathroom fittings and accessories, including grab bars, for home and commercial use Ruhe: stainless steel and brass rails sold directly by an Indian manufacturer Ess Ess, Ruwido, and Ken: Grab rails available through hardware and sanitaryware dealers Final Thoughts Installing a grab rail correctly is a small job with a big outcome — it gives someone back their independence in the room where falls happen most. Take the extra ten minutes for stud checks, load tests, and the right anchors. It’s the difference between a grab bar that looks secure and one that actually is. If any part of this feels outside your comfort zone, call a professional installer. There’s no downside to getting it checked. Frequently Asked Questions How Much Weight Should a Bathroom Grab Rail Hold? Most quality rails are rated for 100–150 kg. For an elderly or heavier user, check the manufacturer’s exact weight rating before buying — don’t assume a lower-end rail will be strong enough. Can I Install a Grab Rail on Plasterboard or Drywall? Yes, but only with cavity